Deploying Jupyter Notebooks on AWS EC2

Attribution: Creative Commons, Amazon Web Sevices
Jupyter Notebooks are very popular in the scientific programming community due to their ability to integrate code, equations, visualizations, and narrative text all into one interactive document. When running a Jupyter Notebook on a local machine, we are limited by the memory and computing power available on the laptop or desktop computer. Amazon Web Services (AWS) Elastic Compute Cloud (EC2) provides on-demand, reliable, scalable, and inexpensive cloud computing services. This step-by-step tutorial will guide you to deploy Jupyter notebooks on an EC2 instance, providing you with the ability to combine the interactive functionality of Jupyter notebooks with the easily scalable computing capabilities offered by EC2. This is especially useful for high-perfomance computing and deep learning problems which can leverage parallel processing and GPU computing architectures provided by EC2 to run these codes much faster than on your local machine, while still being able to interactively change your code and visualize the results using Jupyter notebooks.
This tutorial will help you learn how to set up an AWS EC2 instance and run Jupyter notebooks on the cloud. You will need an AWS account, and a Linux/MacOS computer with root priveleges. This process is somewhat involved, and AWS Sagemaker offers a quick way of setting up a Jupyter Notebook on AWS if you do not want to get into the details. However, setting up the EC2 server and Jupyter notebook yourself will provide you much more control and flexibility over the whole process.
-
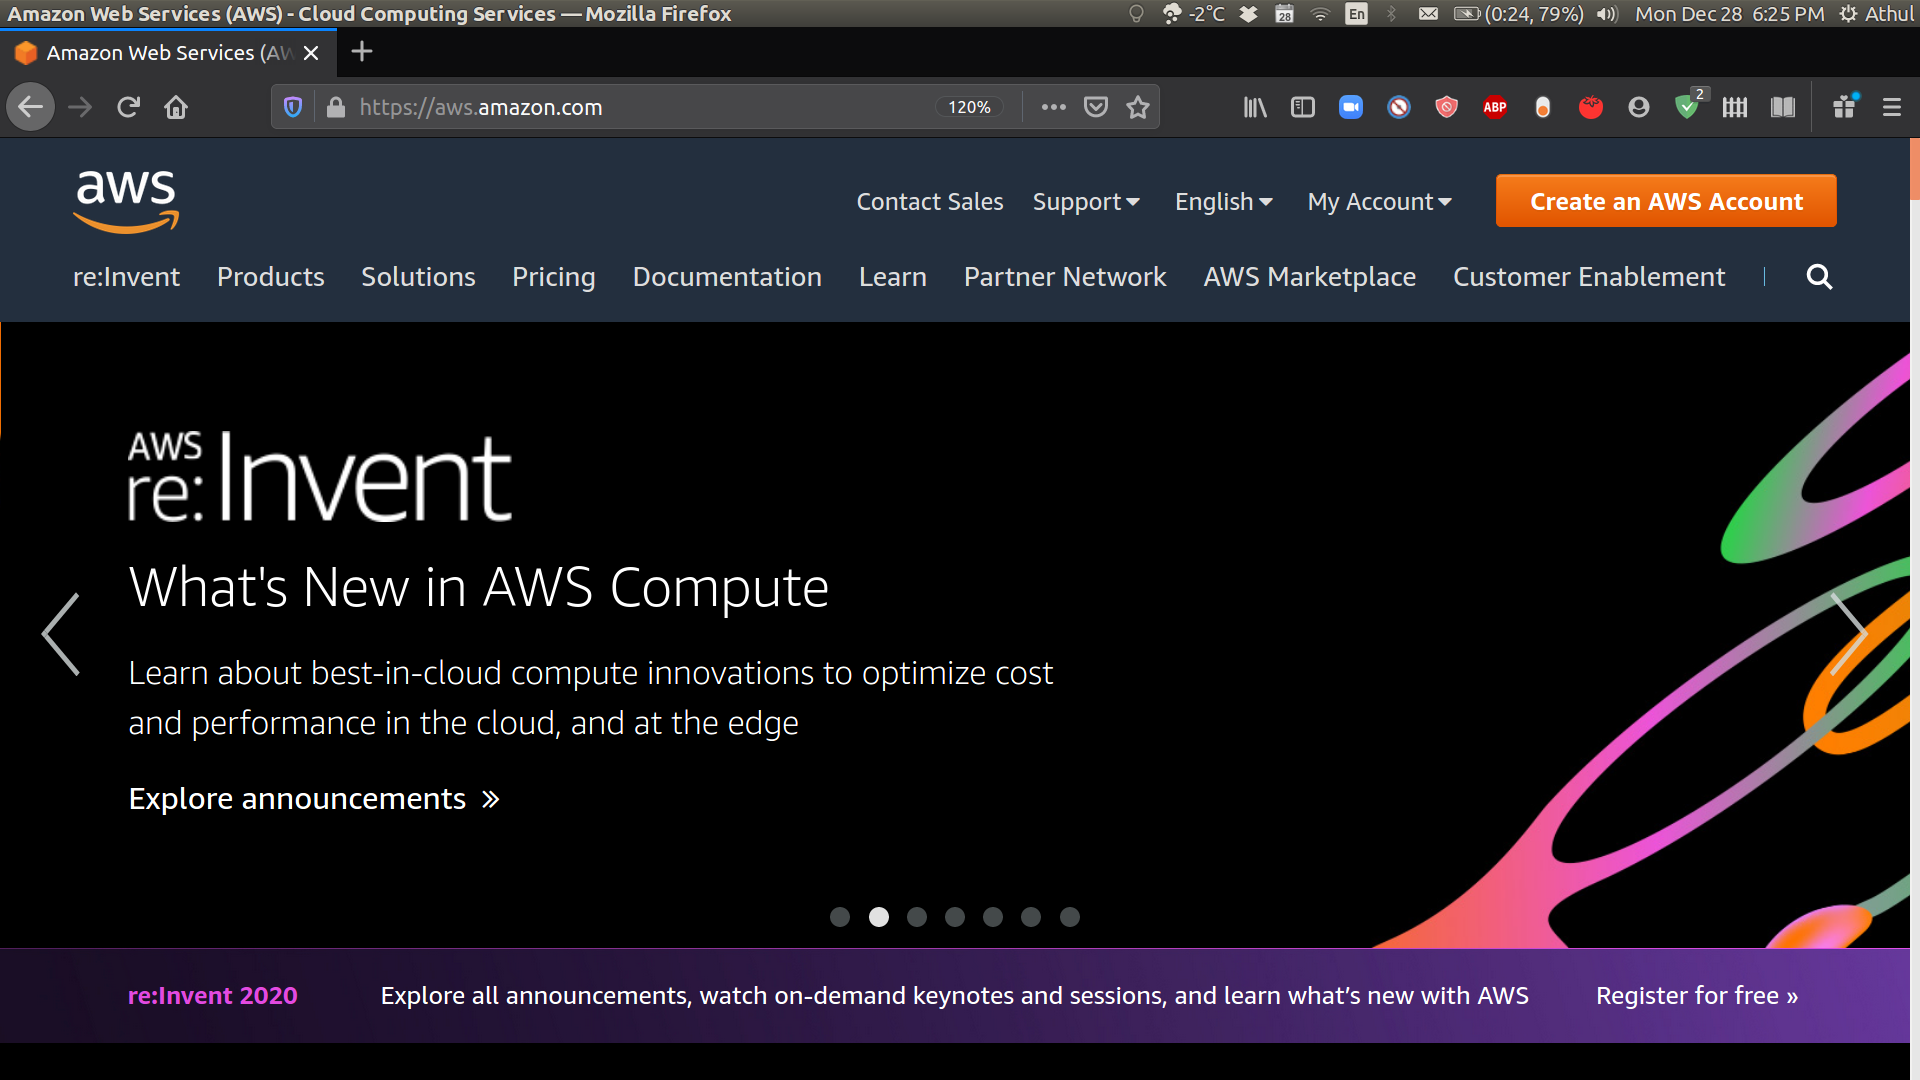
Go to aws.amazon.com and sign up for an account if you do not already have one.
-
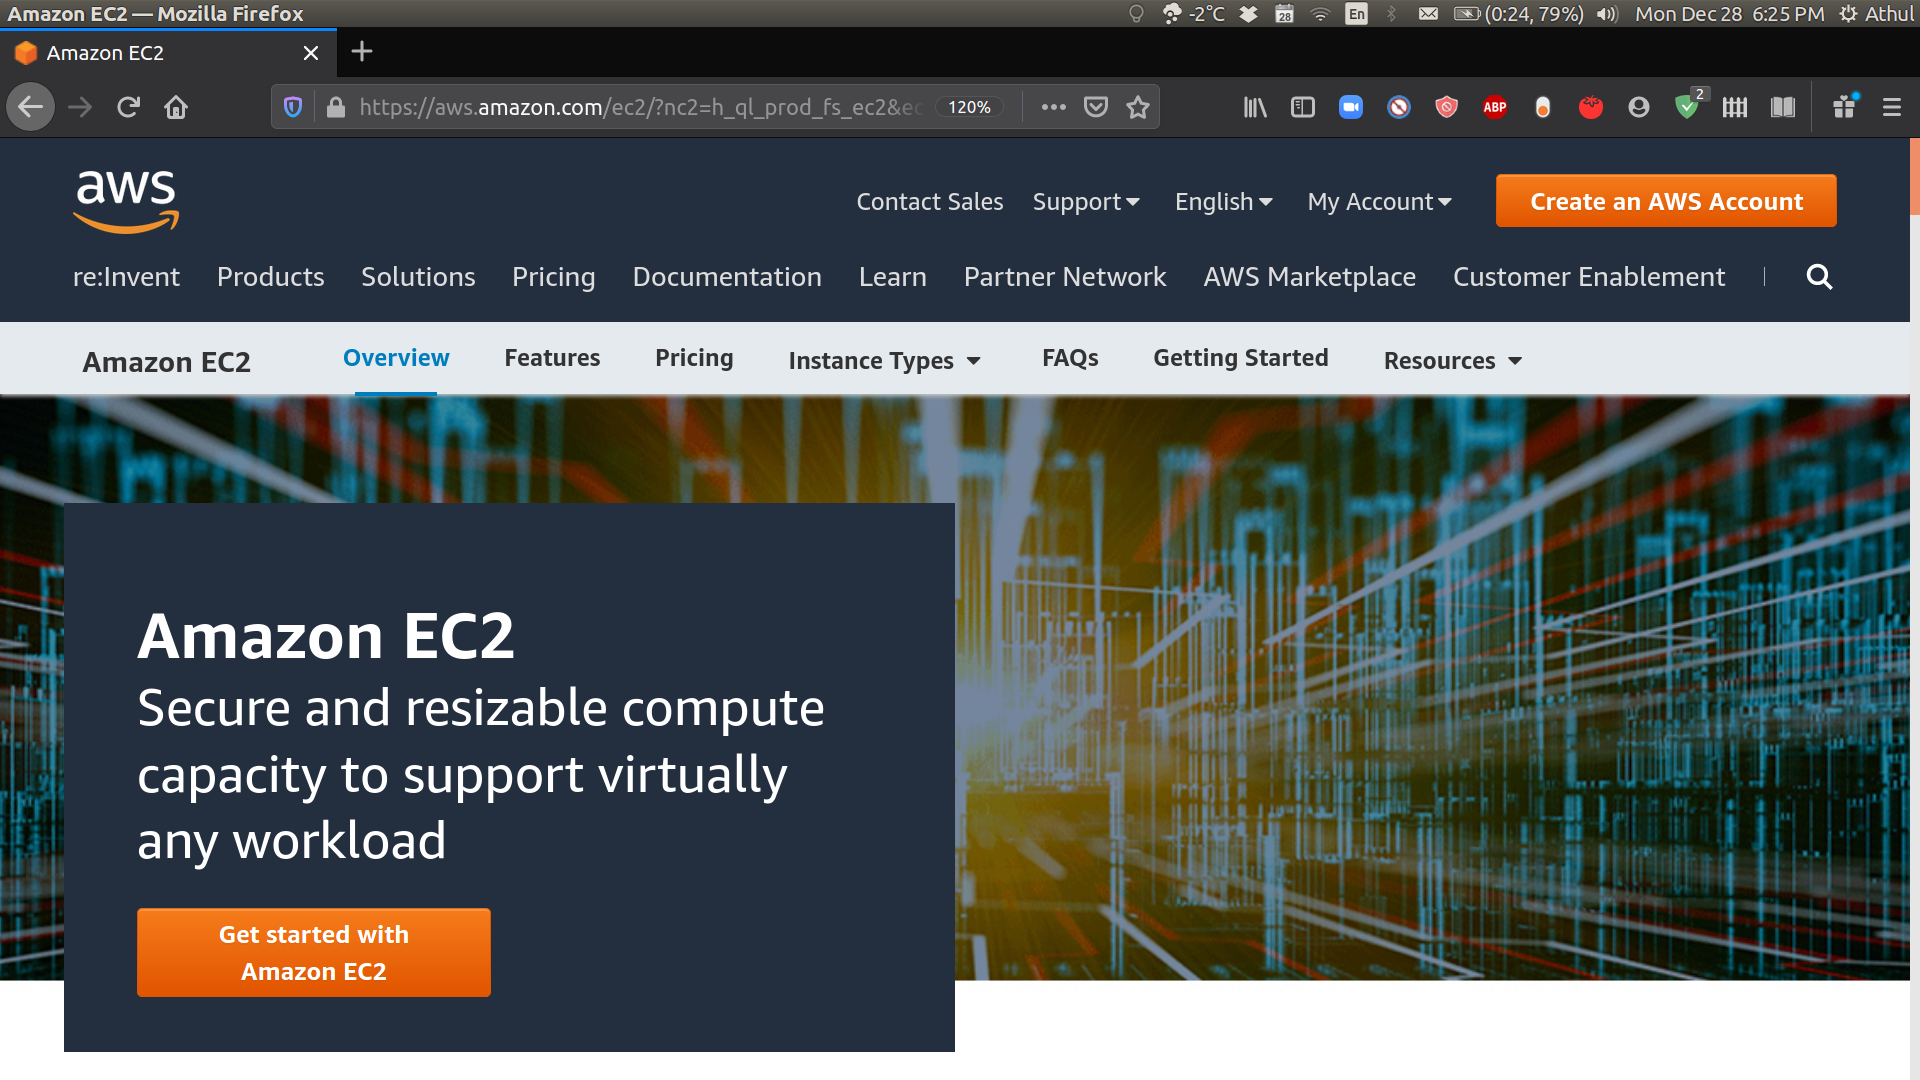
Launch an EC2 instance. This can be done from the Products tab. Click on the “Get Started with Amazon EC2”.
-
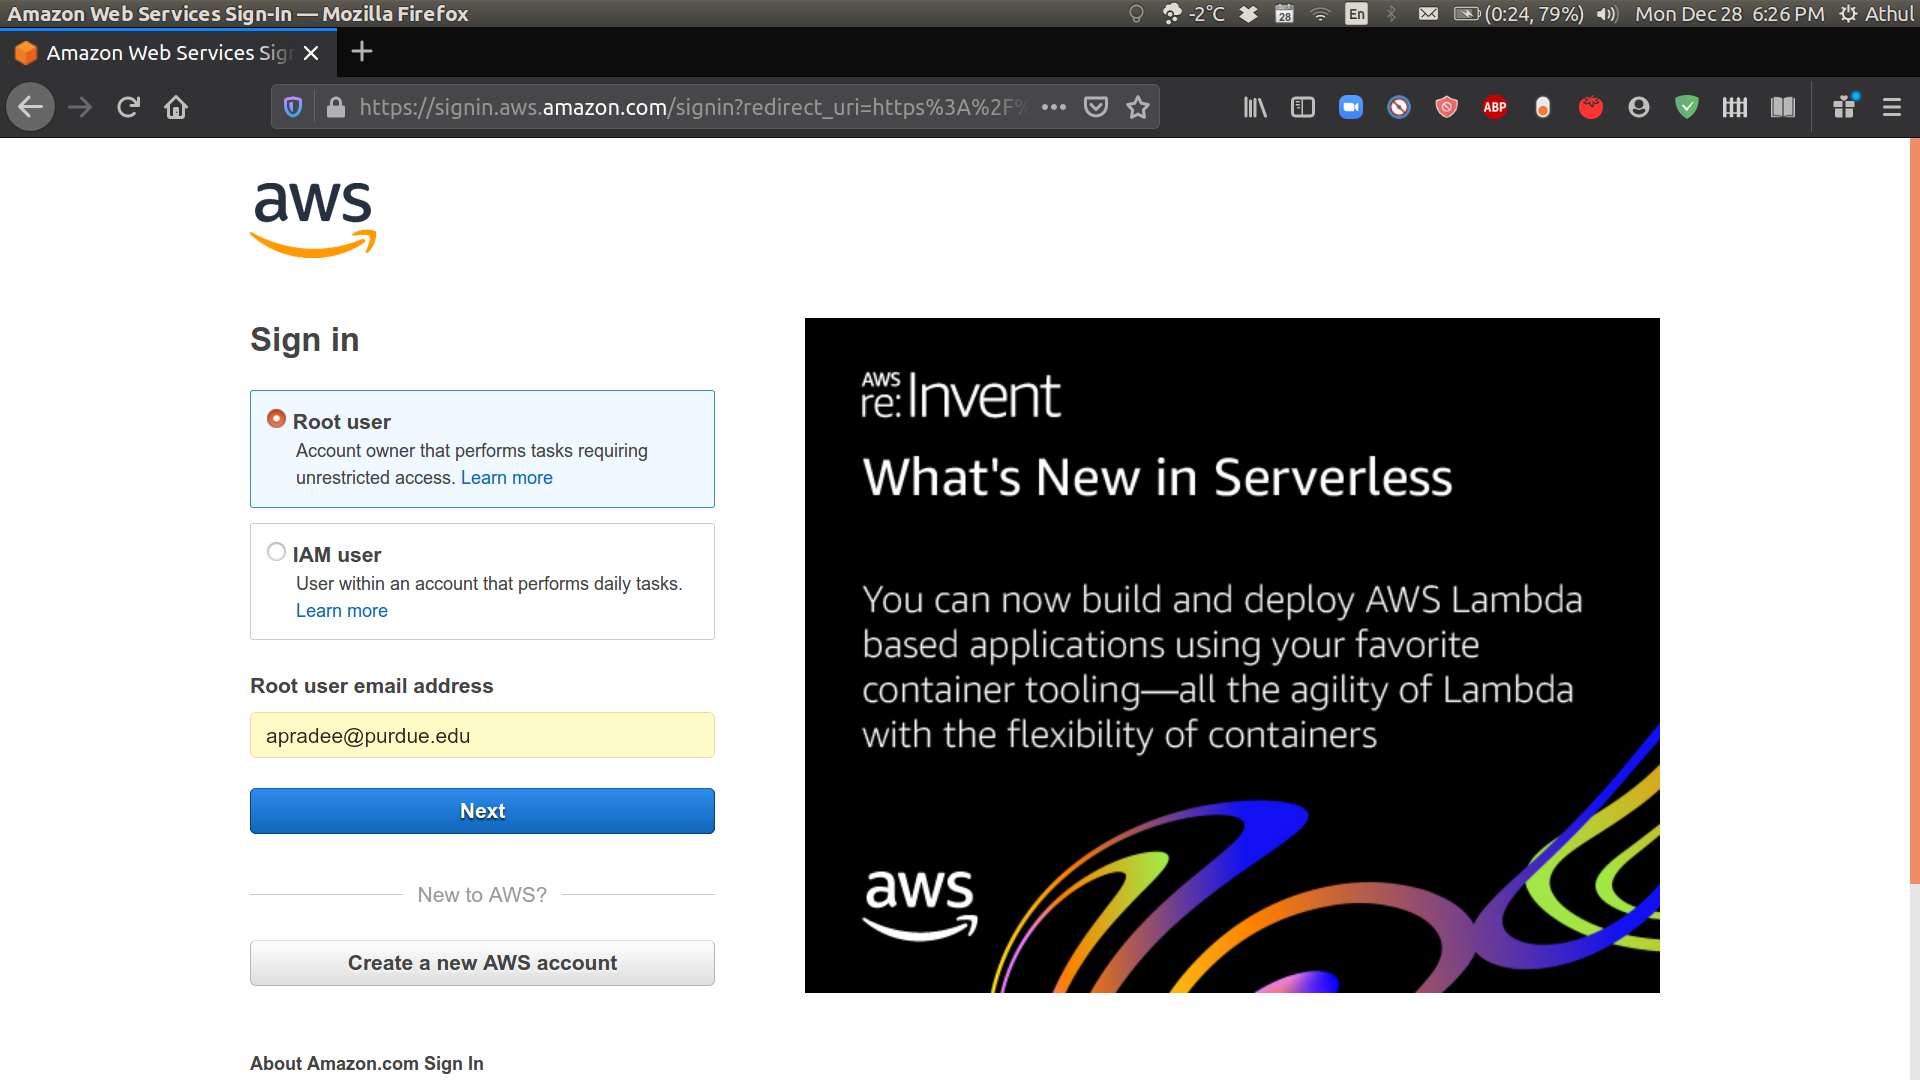
Sign into your AWS account.
-
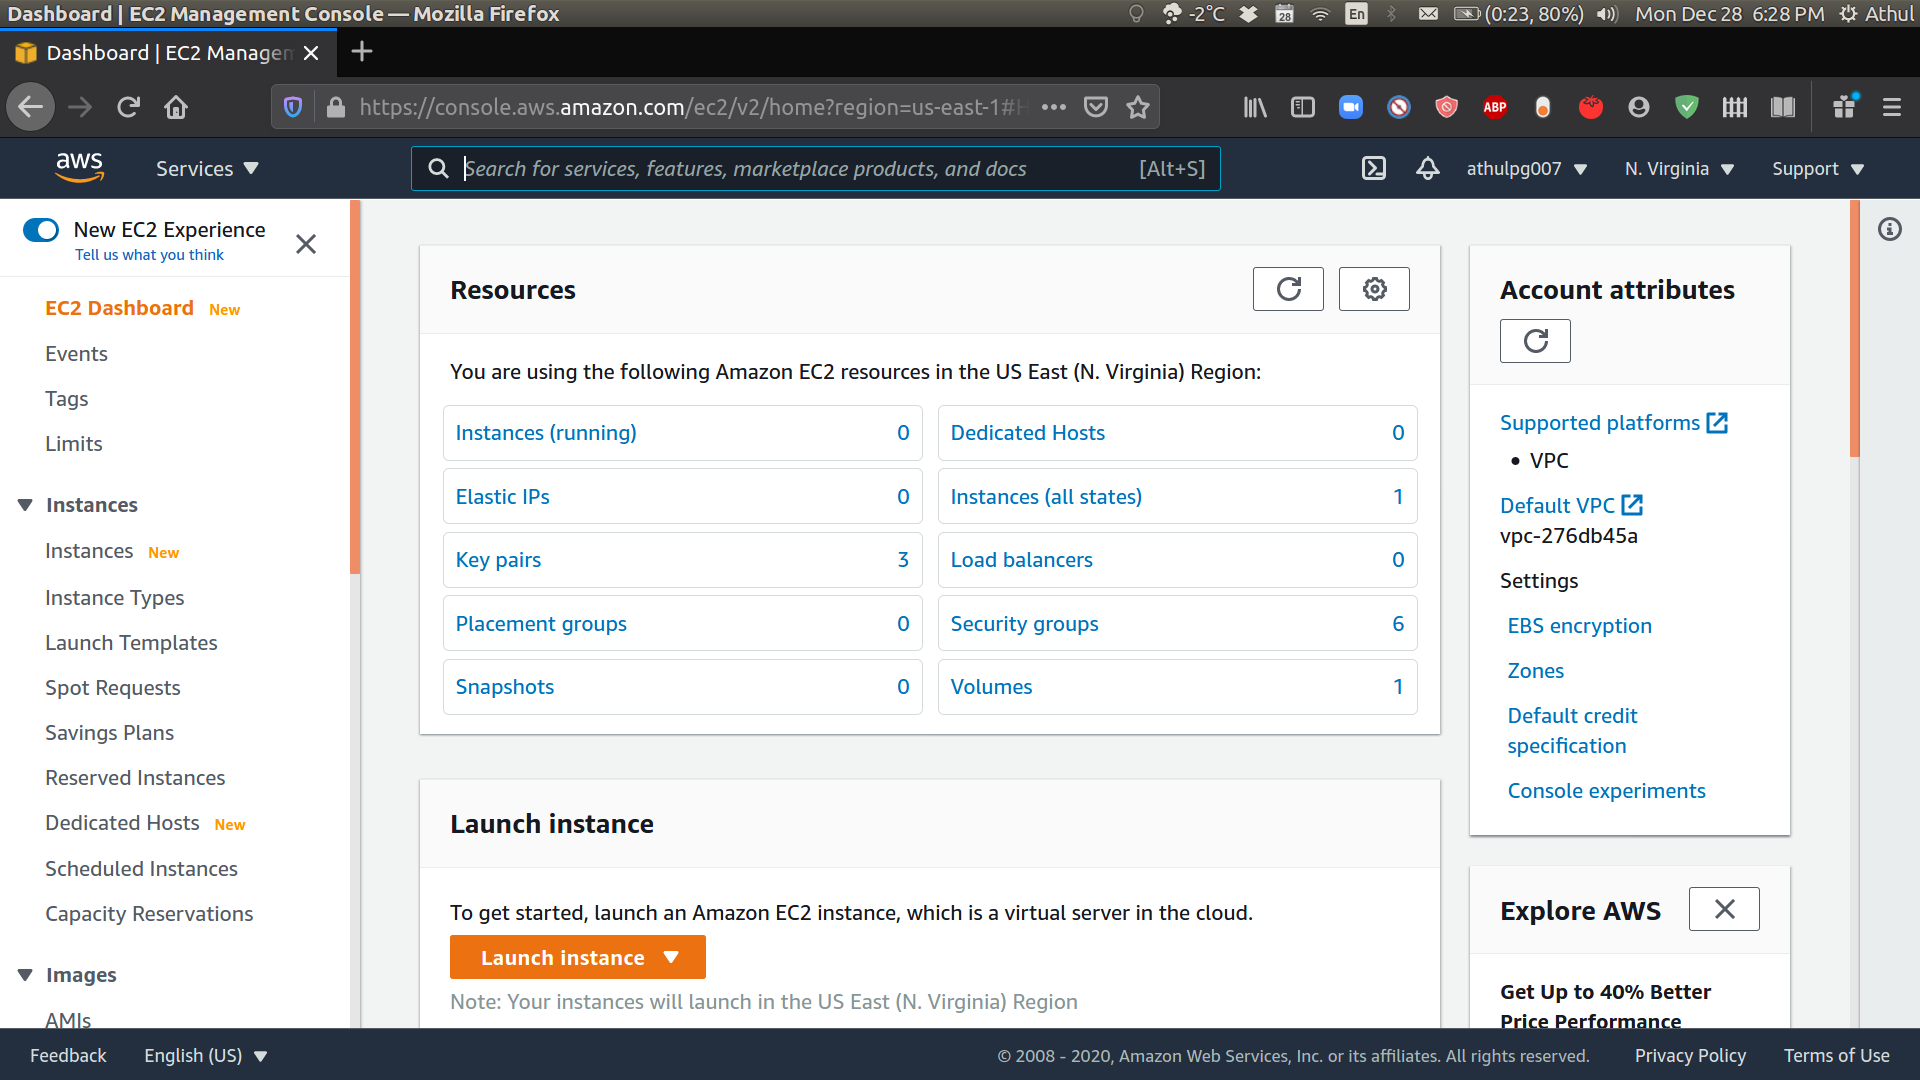
Click on launch instance to get stated with the EC2 instance wizard.
-
Choose an Amazon Machine Image (AMI). Select the Ubuntu 20.04/18.04 AMI for this tutorial.
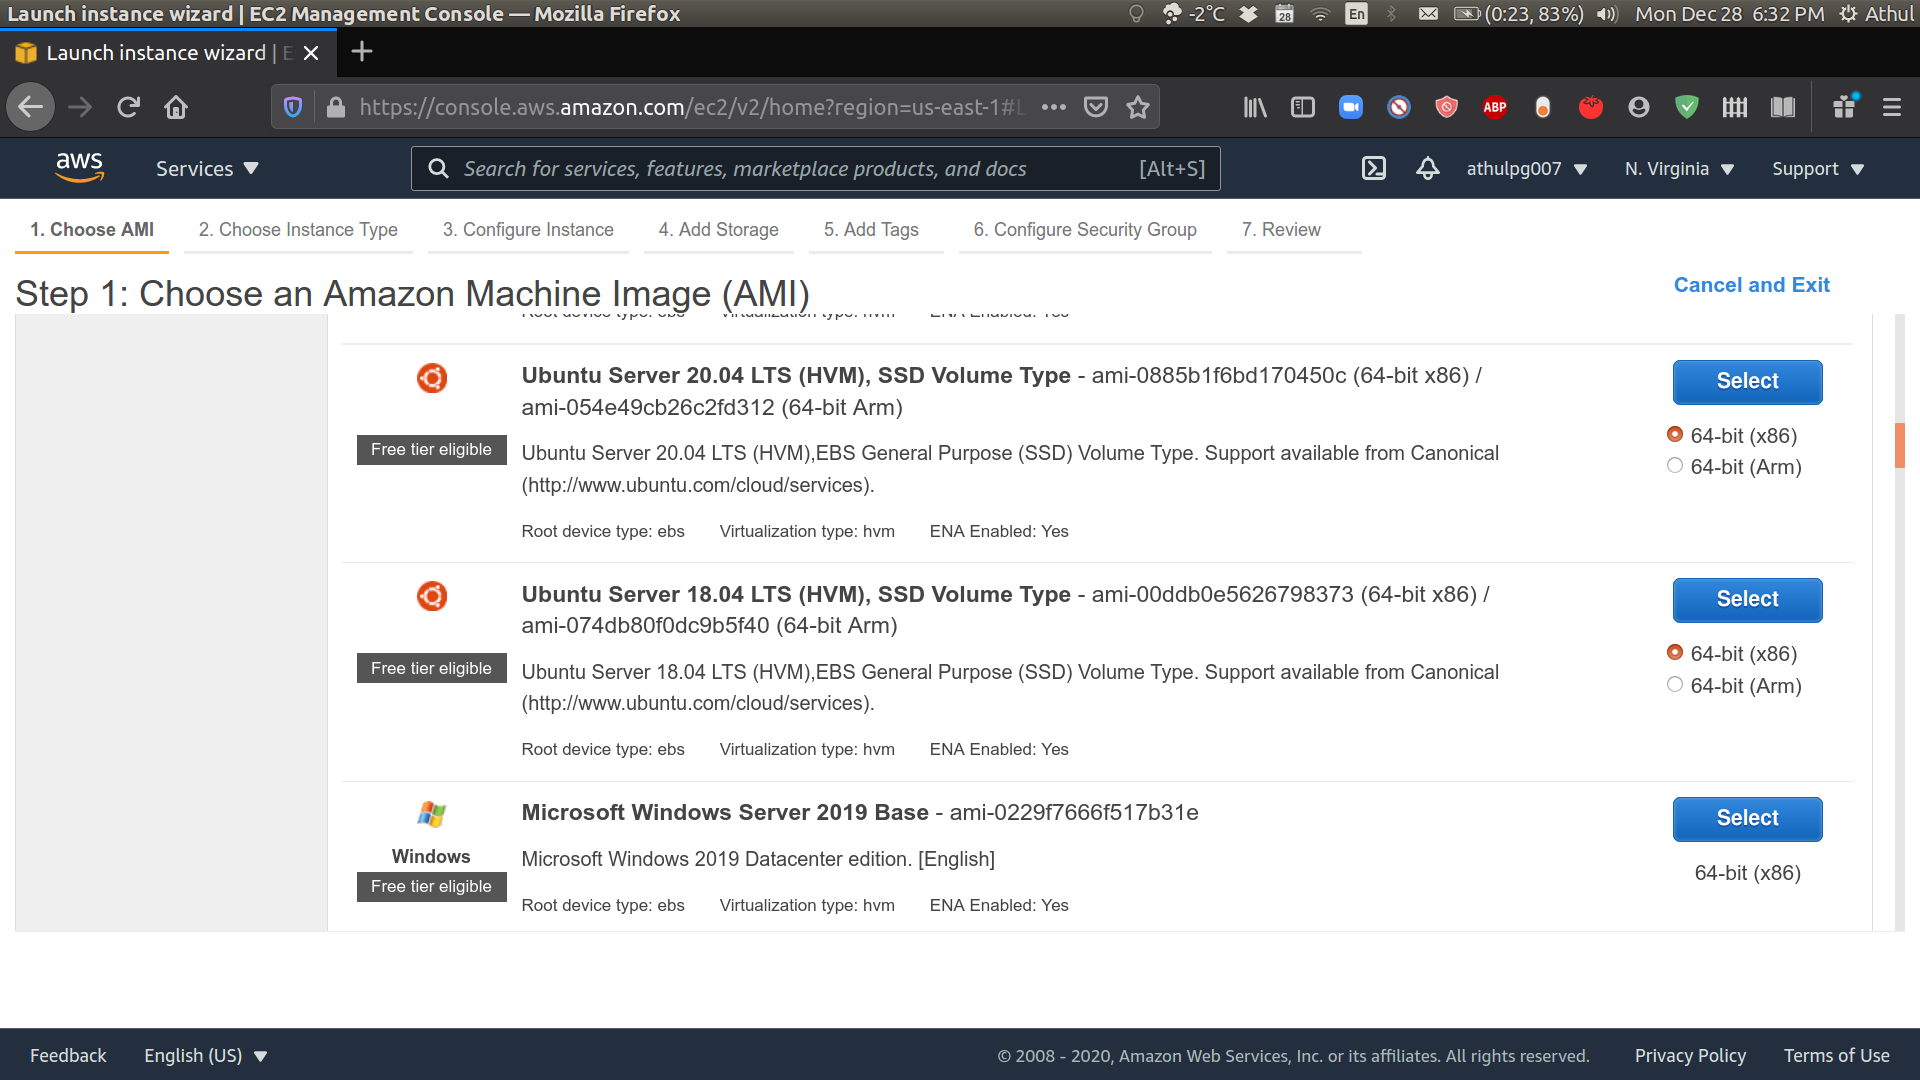
-
Choose an instance type. For this tutorial select the t2.micro which is free-tier eligible up to 750 hours, which is plenty enough for learning purposes. Just make sure to stop the instance when we are done with the tutorial to avoid exceeding the free-tier limit. Next, click on Configure Instance Details.
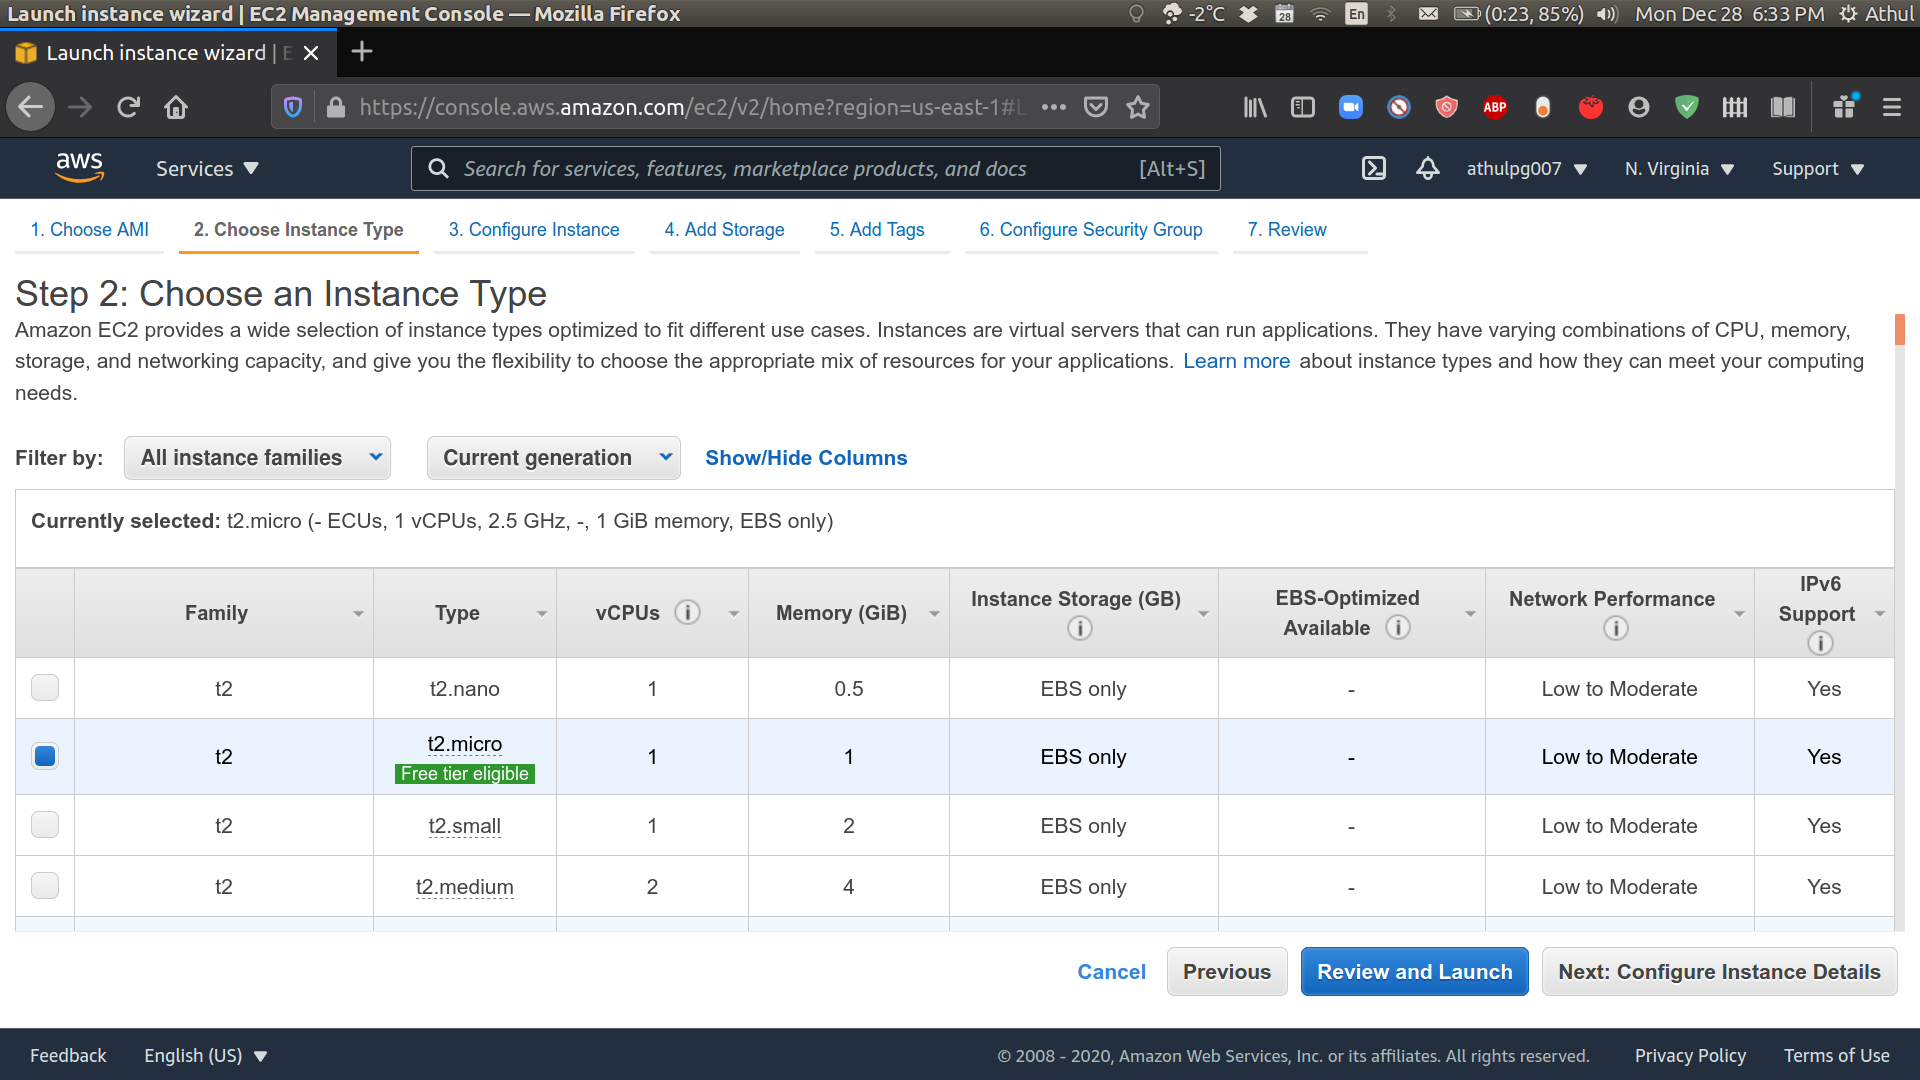
-
Configure instance details. You can leave everything as in the default settings. Make sure the Auto Assign Public IP field is set to “Use subnet setting (Enable)”. Next, add storage.
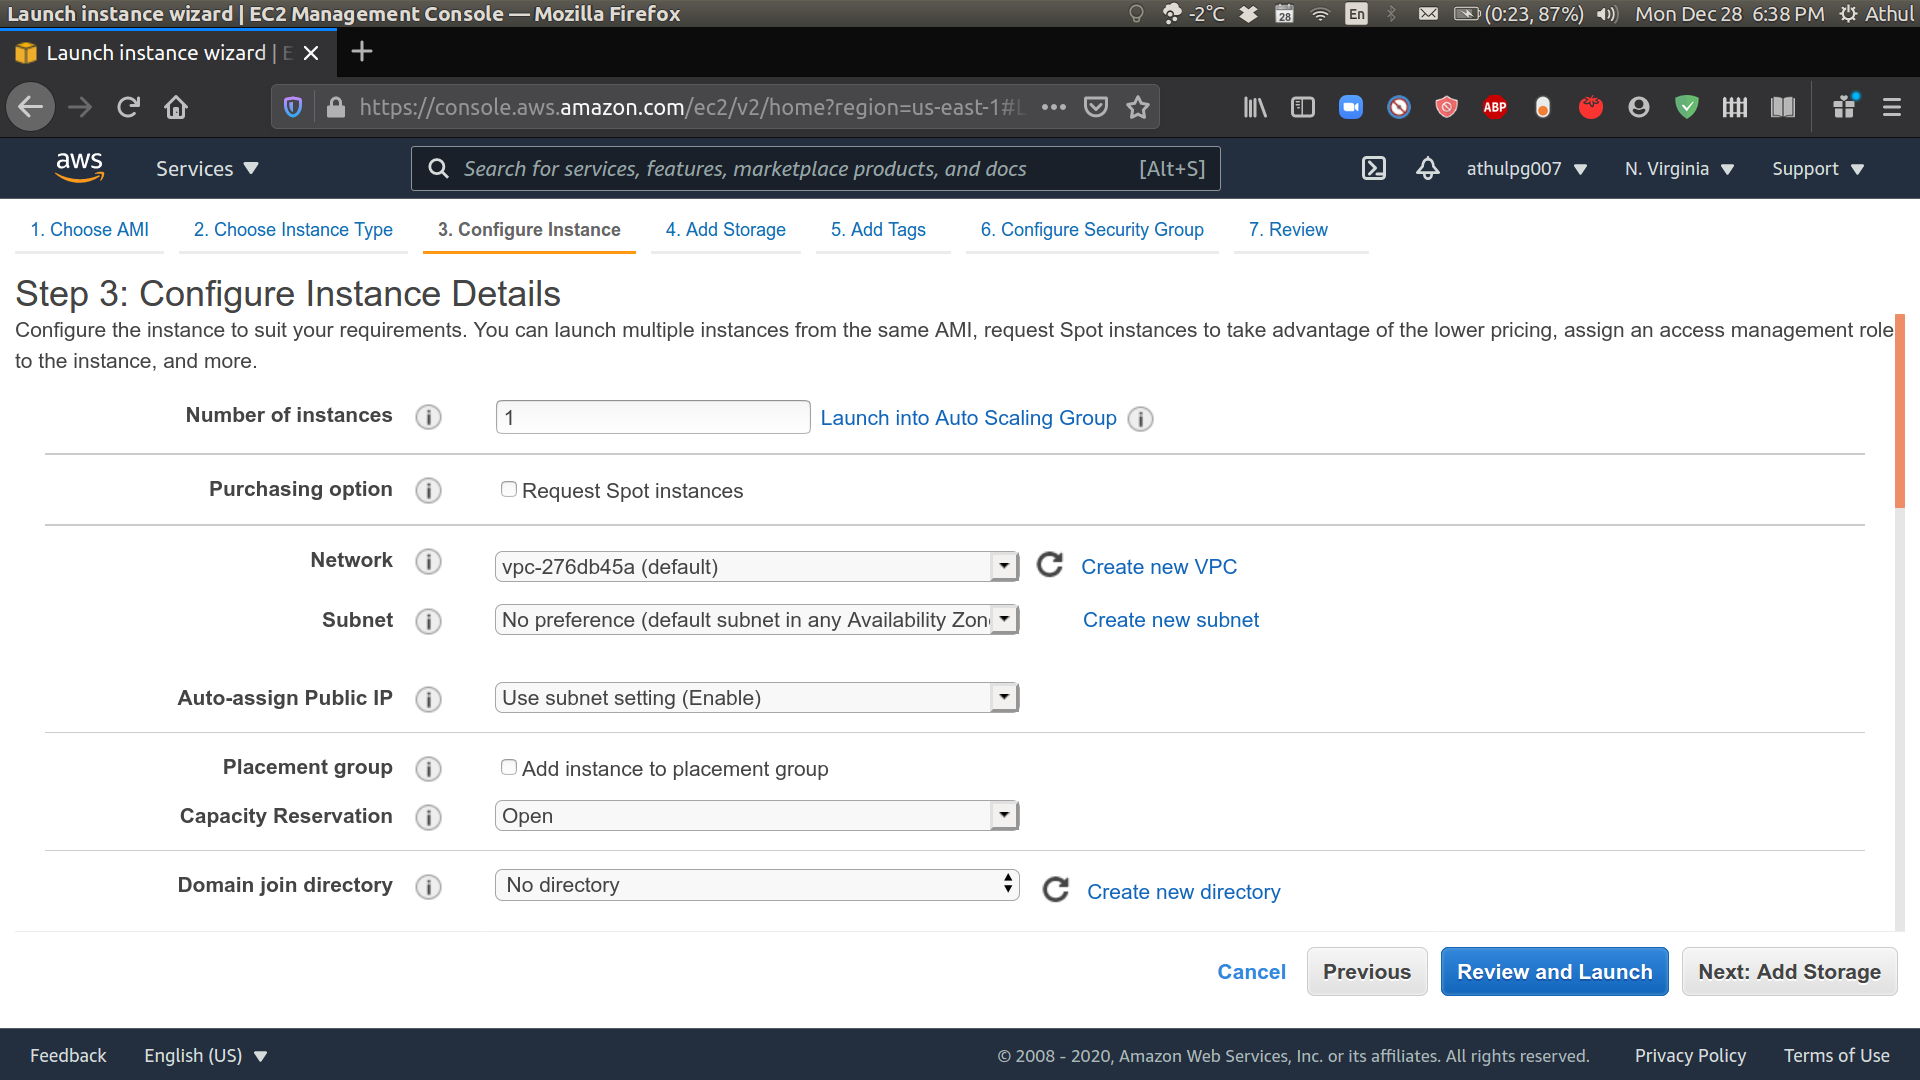
-
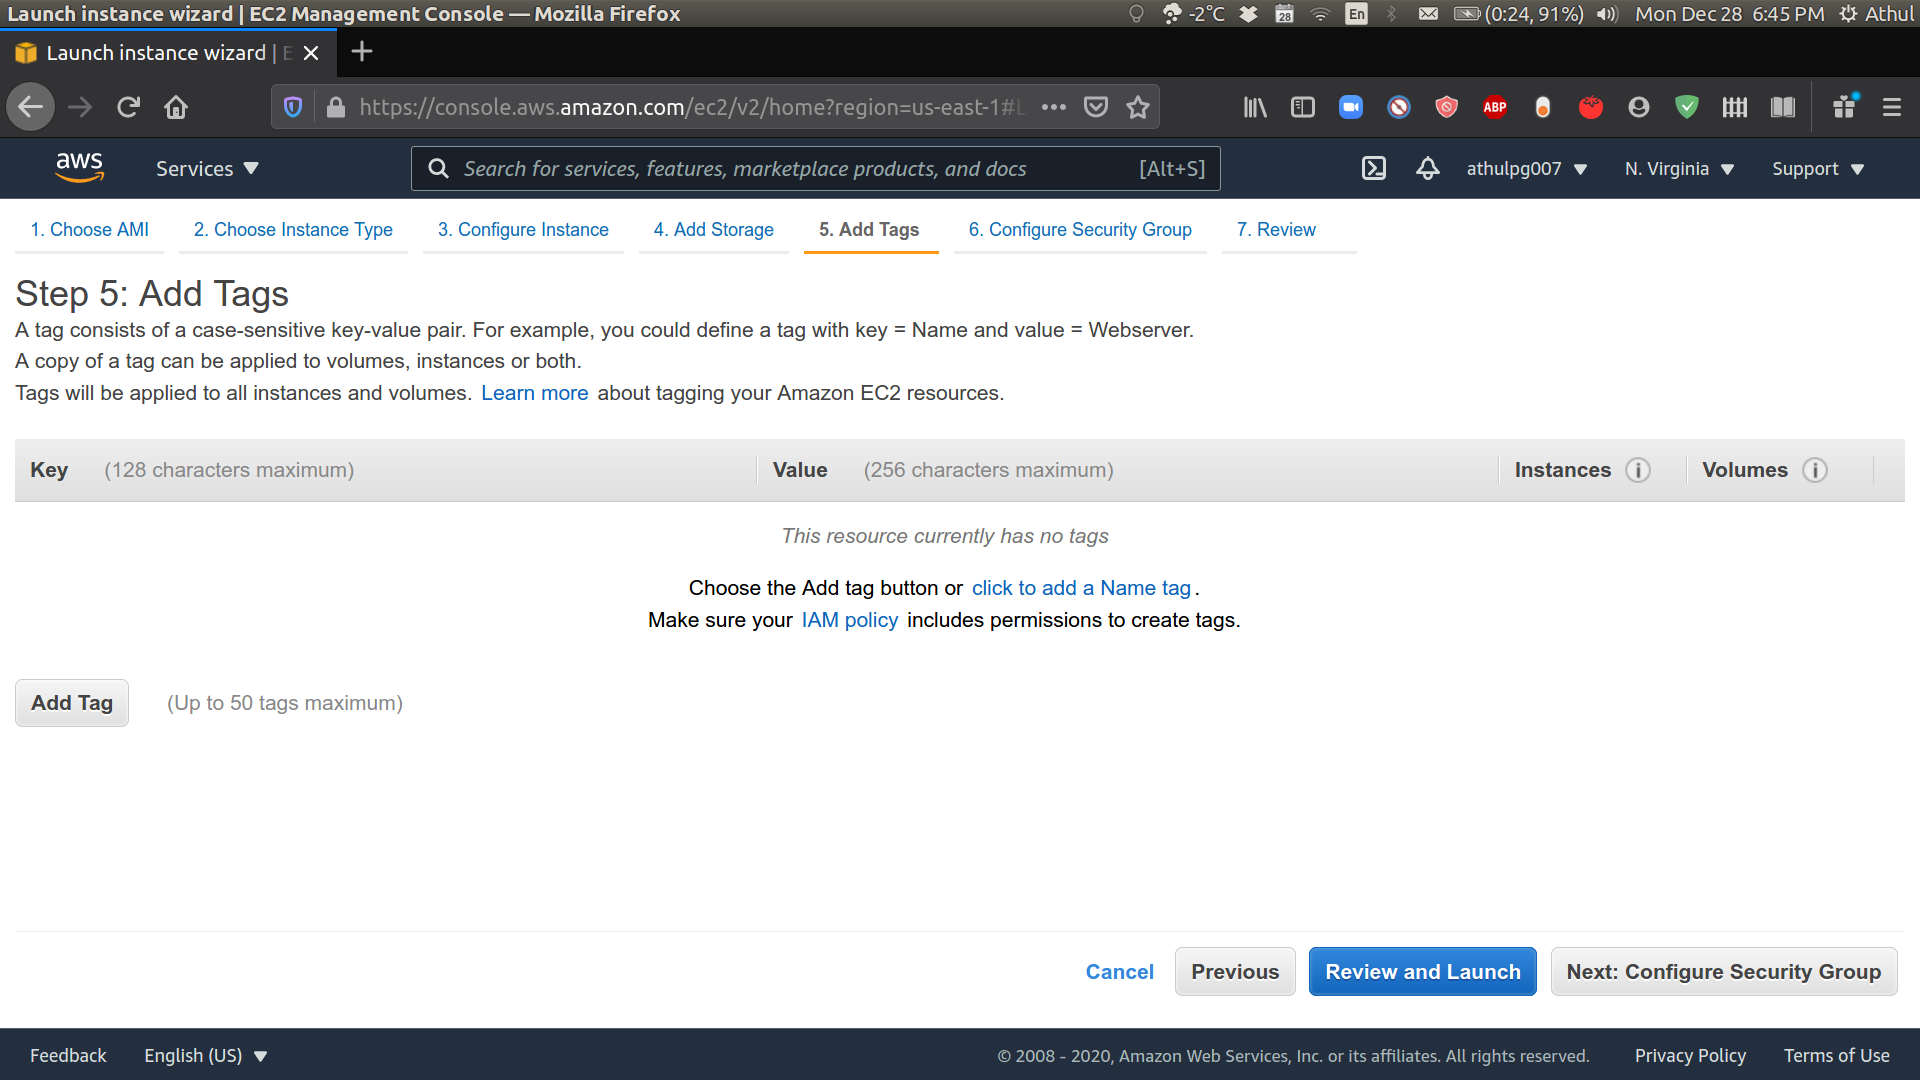
Add storage. You can add up to 30 GB of storage under free-tier. For this tutorial, we will choose 16 GB which will be more than enough. Next, click Add Tags.
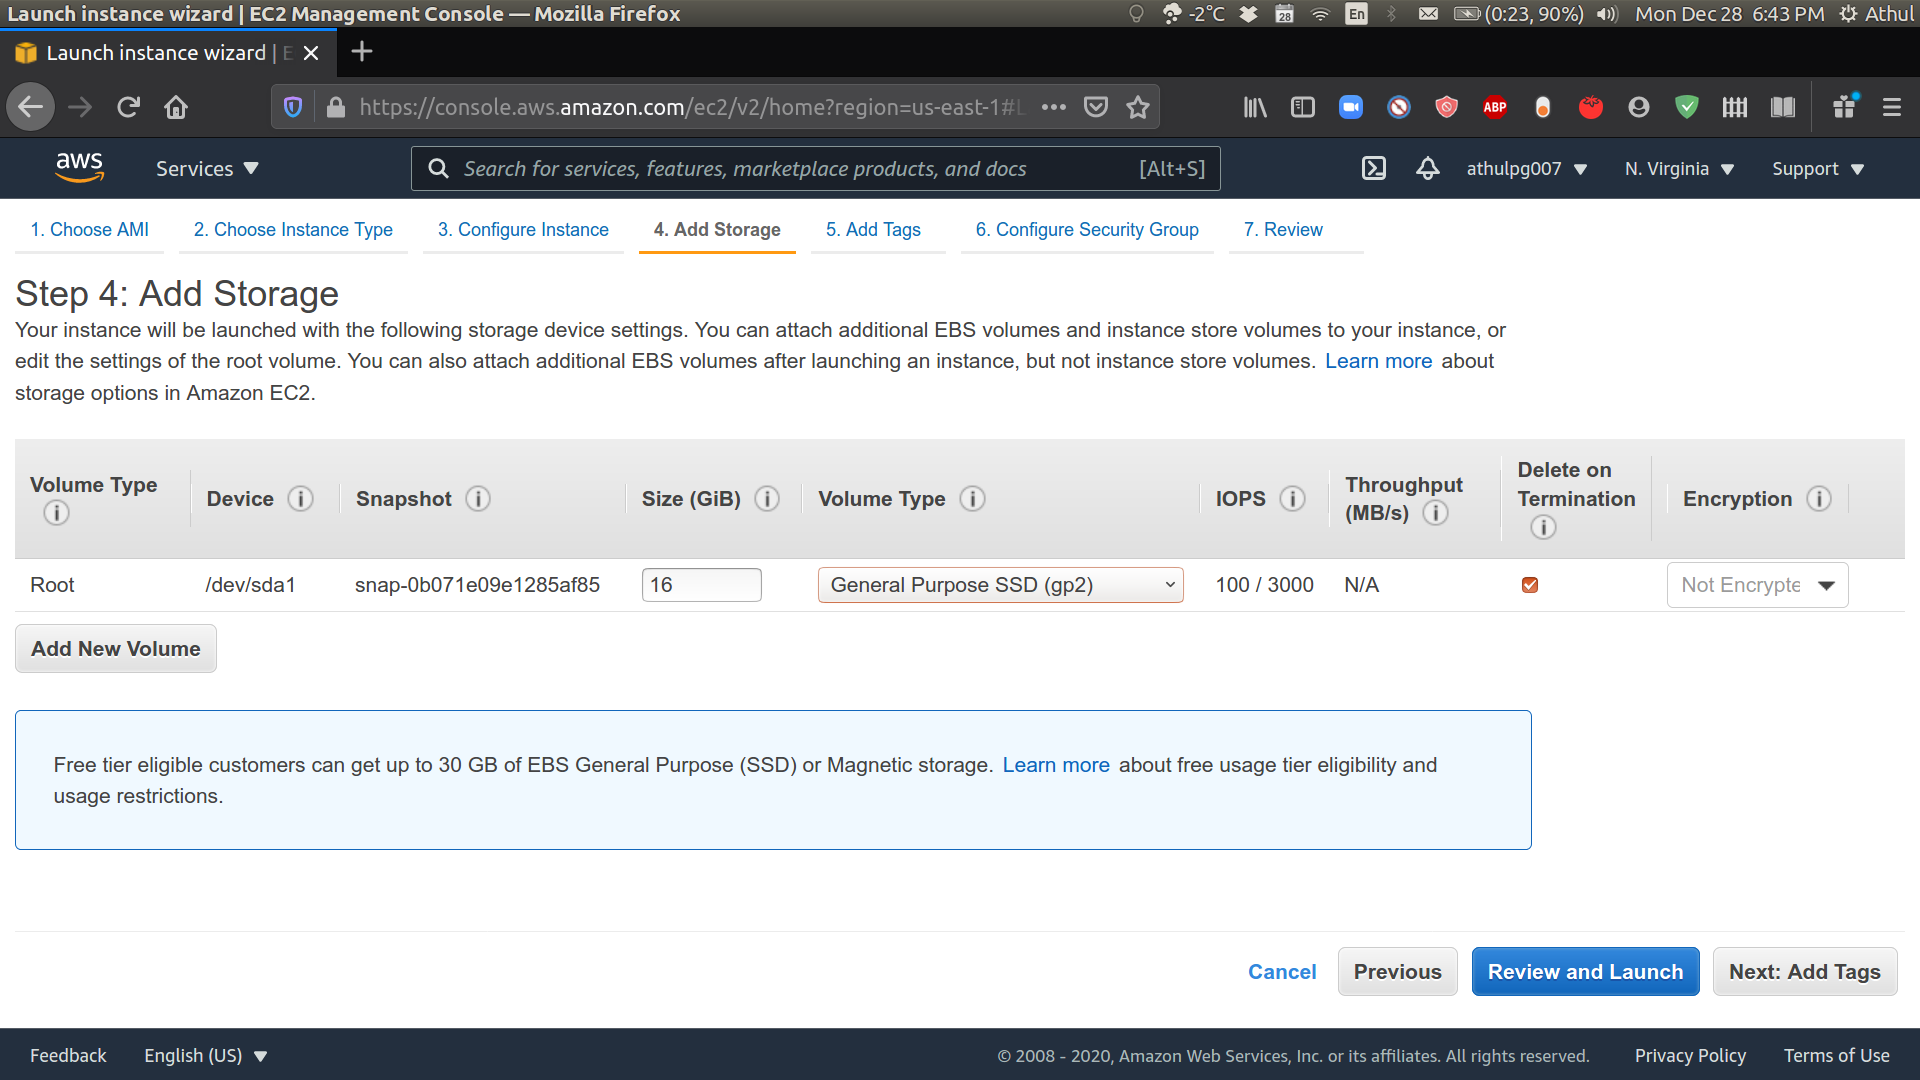
- No action is needed on this page. Proceed to configure the security group.
-
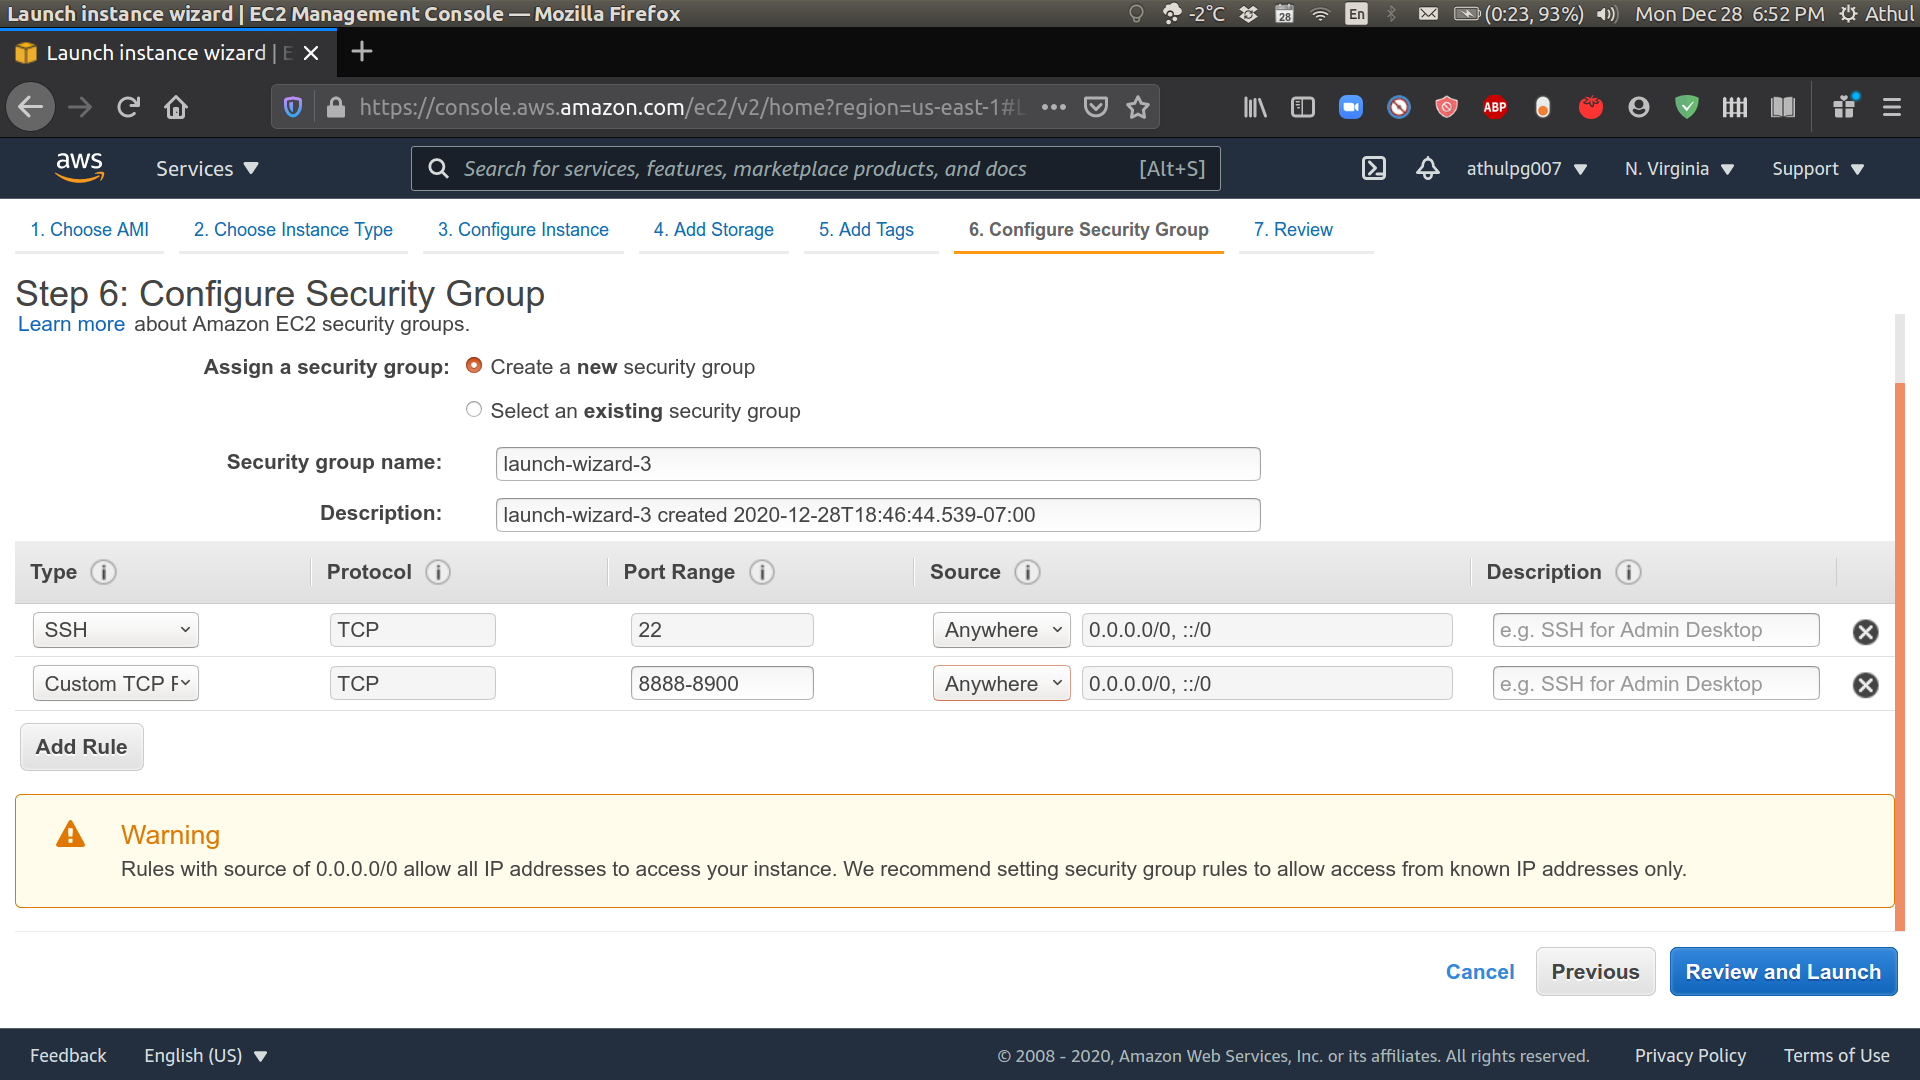
You will see an existing rule allowing SSH connections. Edit the source field to allow connections from anywhere. Also, add a custom TCP rule with port range 8888-8900 and source from anywhere. As the warning says, this is not a very secure way of doing things so make sure not to leave sensitive data on your notebook. But this will work for learning purposes. Proceed to Review and Launch.
-
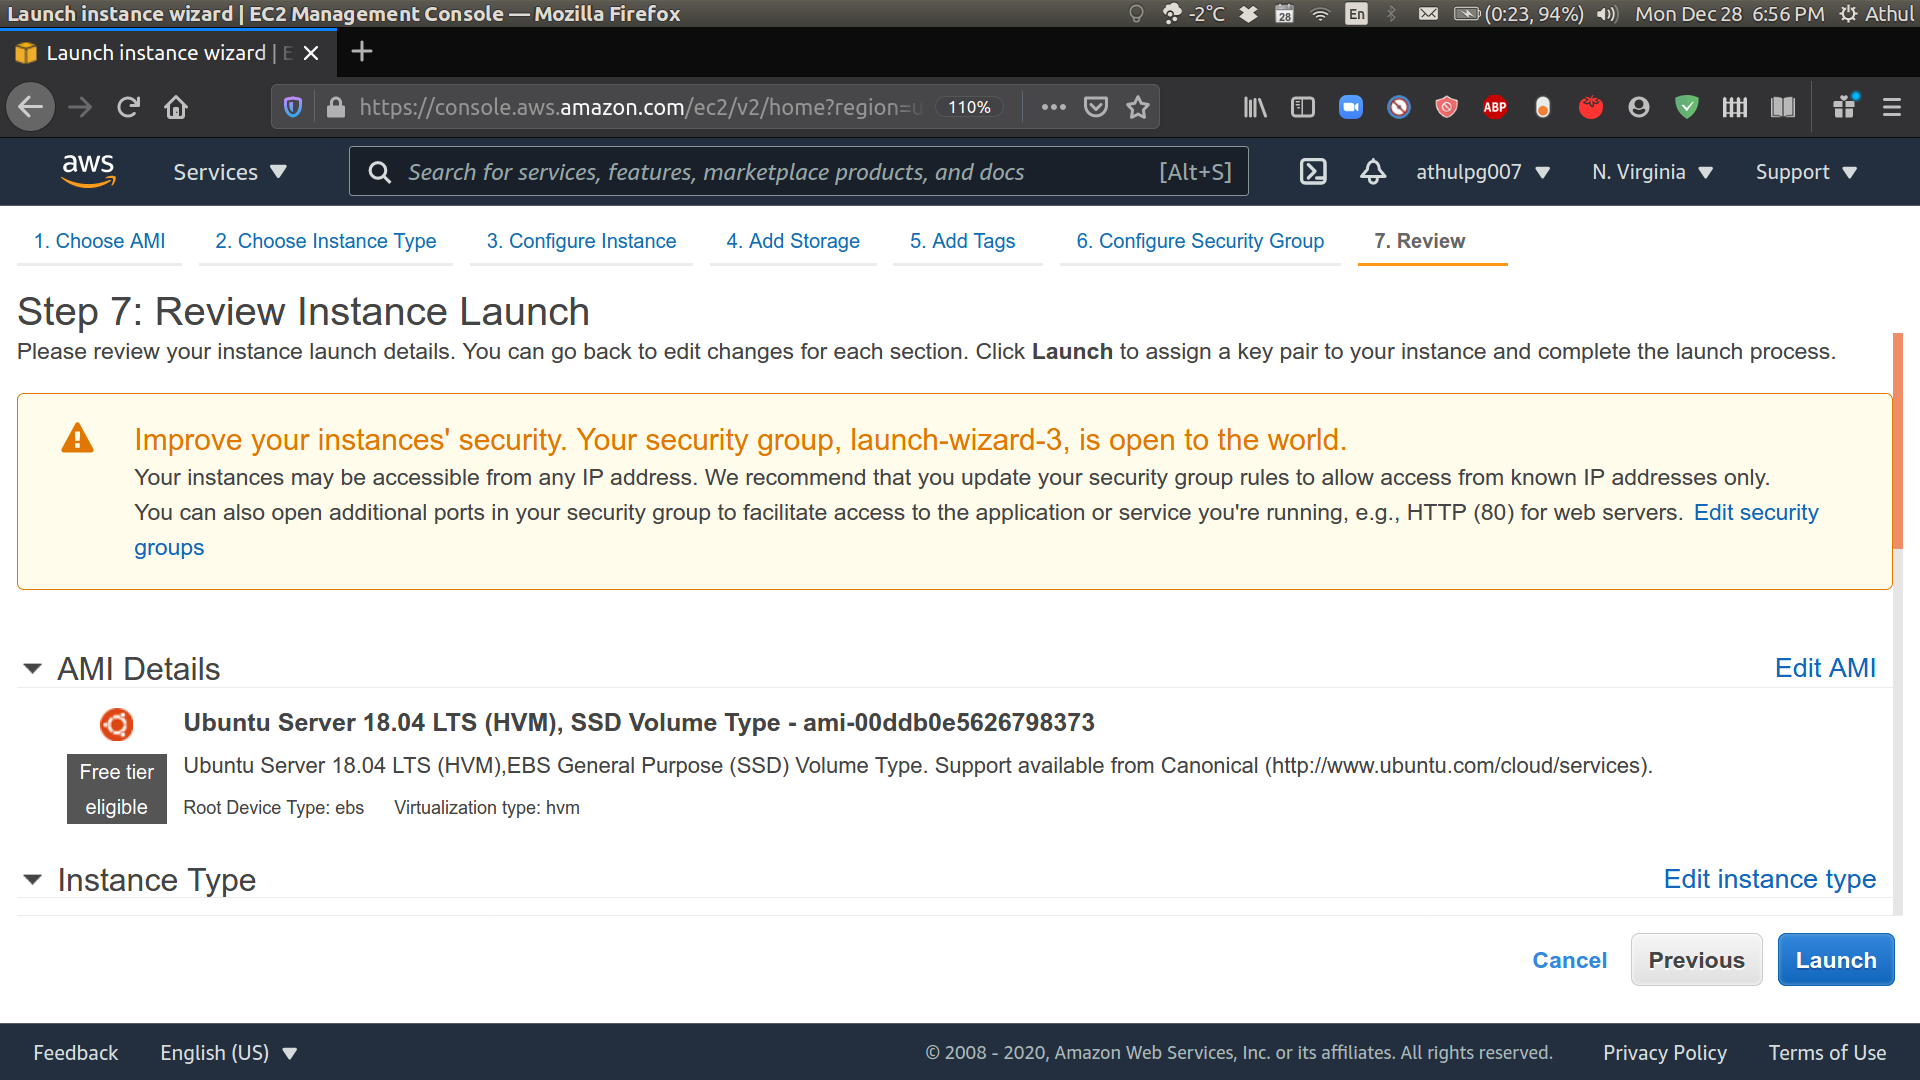
Review the instance setup and click Launch.
-
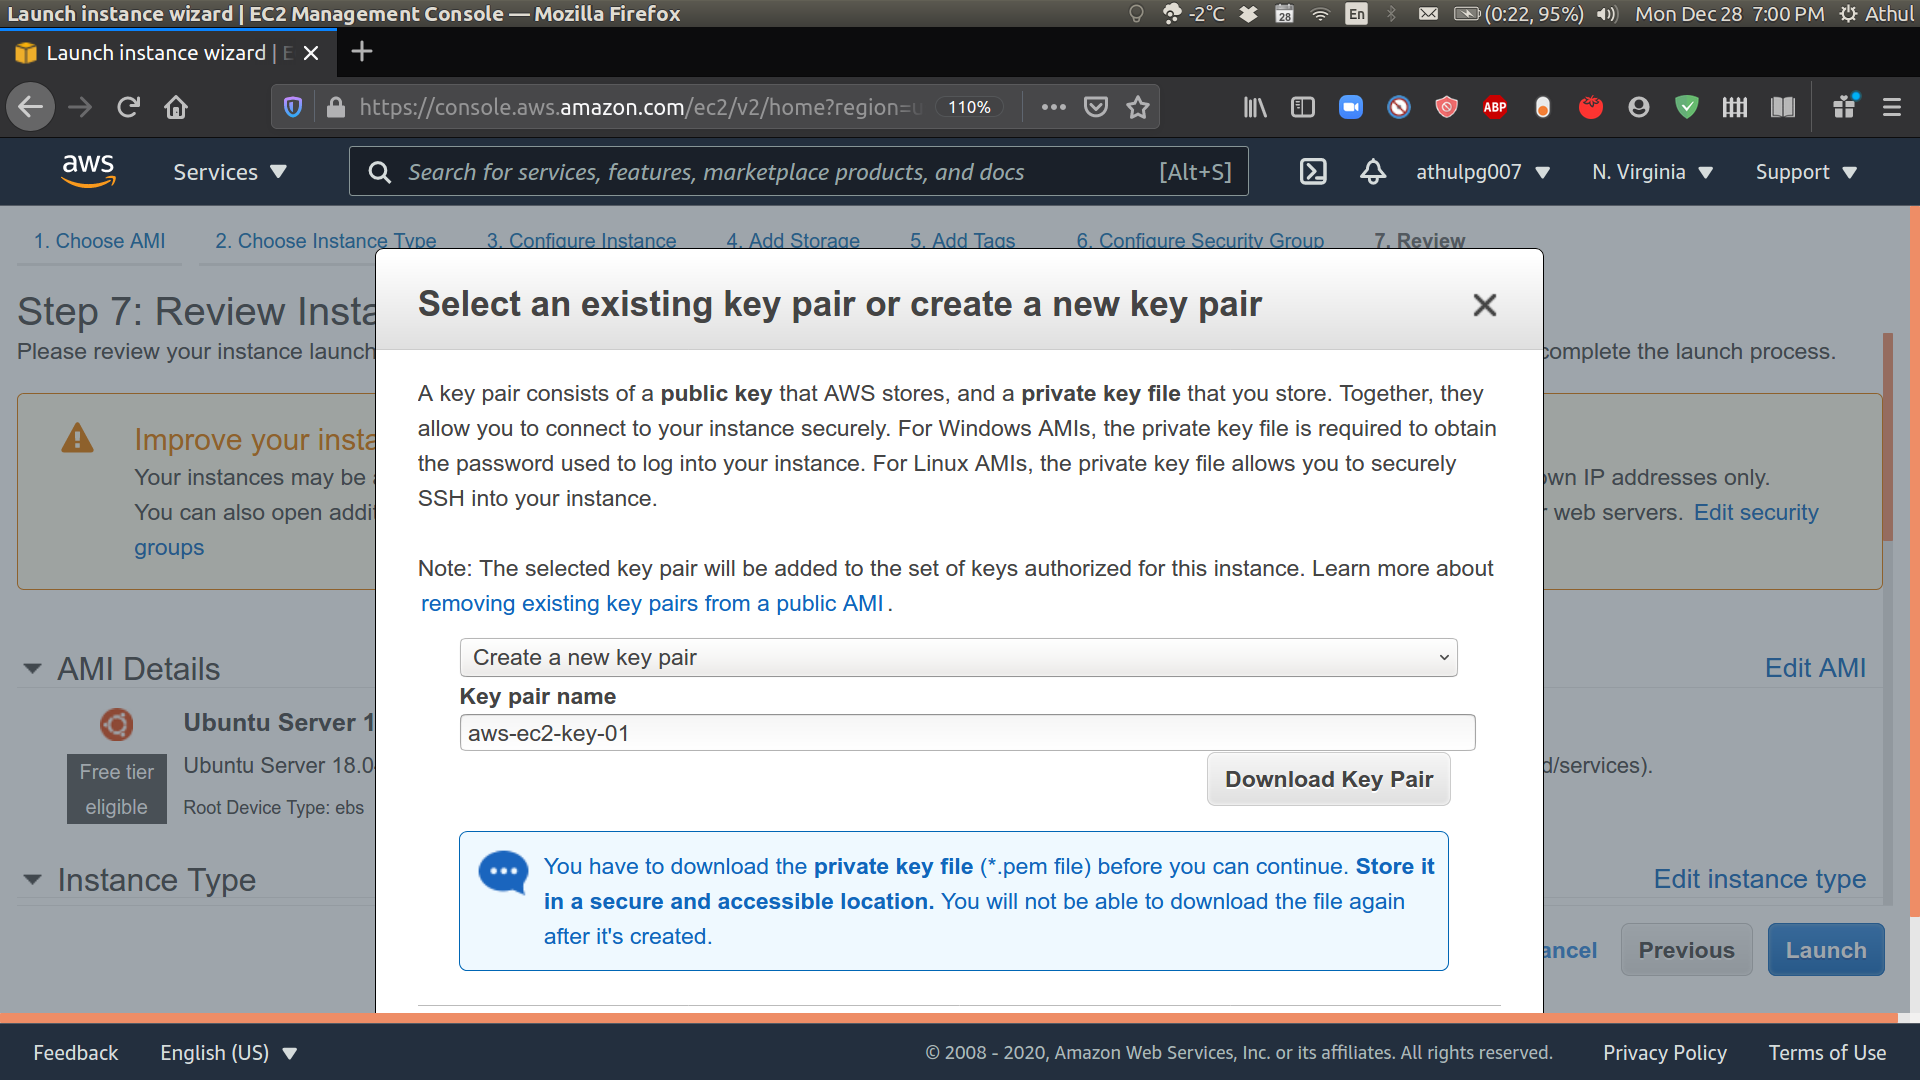
You will now be asked to select an existing key pair or create a new key pair. Select “Create a new pair” and provide a name for the key pair (eg:aws-ec2-key-01). Download the key pair and store it an accessible location. You will not be able to get the file again. Proceed to Launch Instances.
-
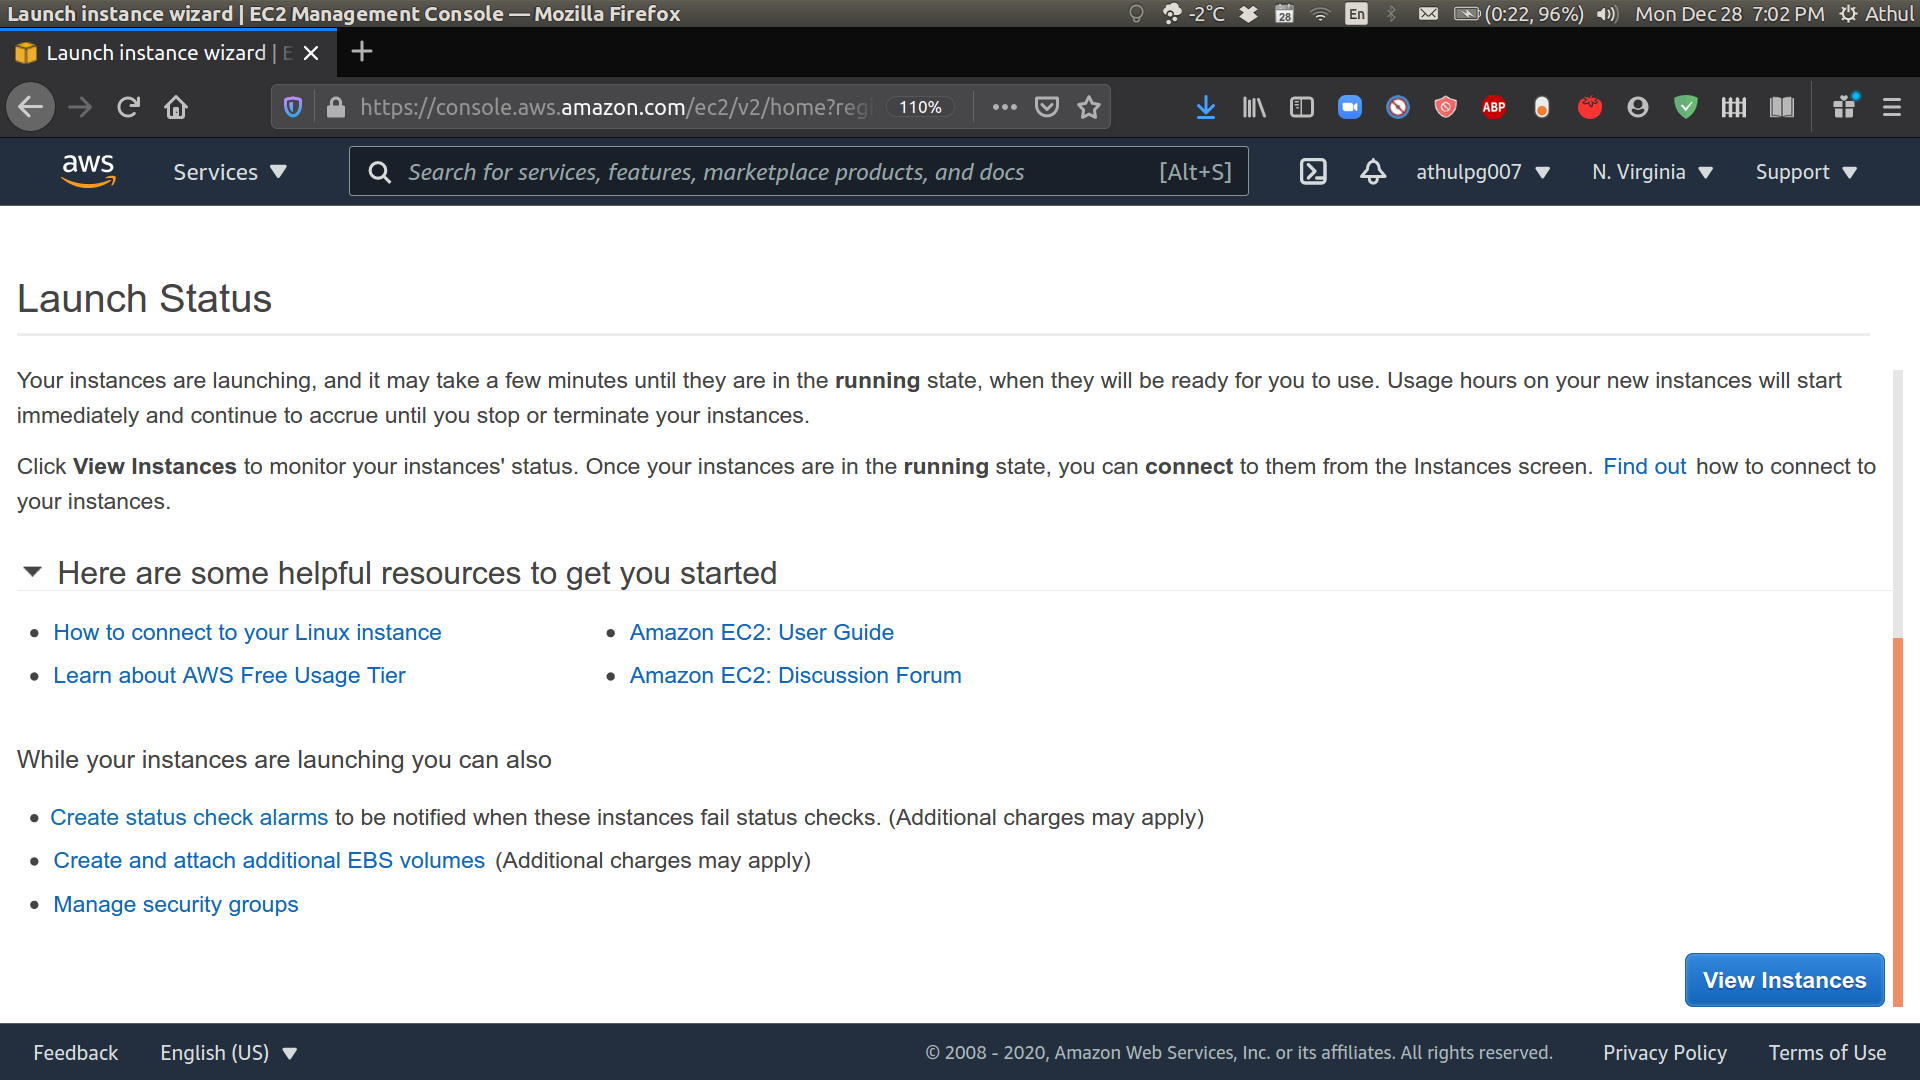
Click on view instances.
-
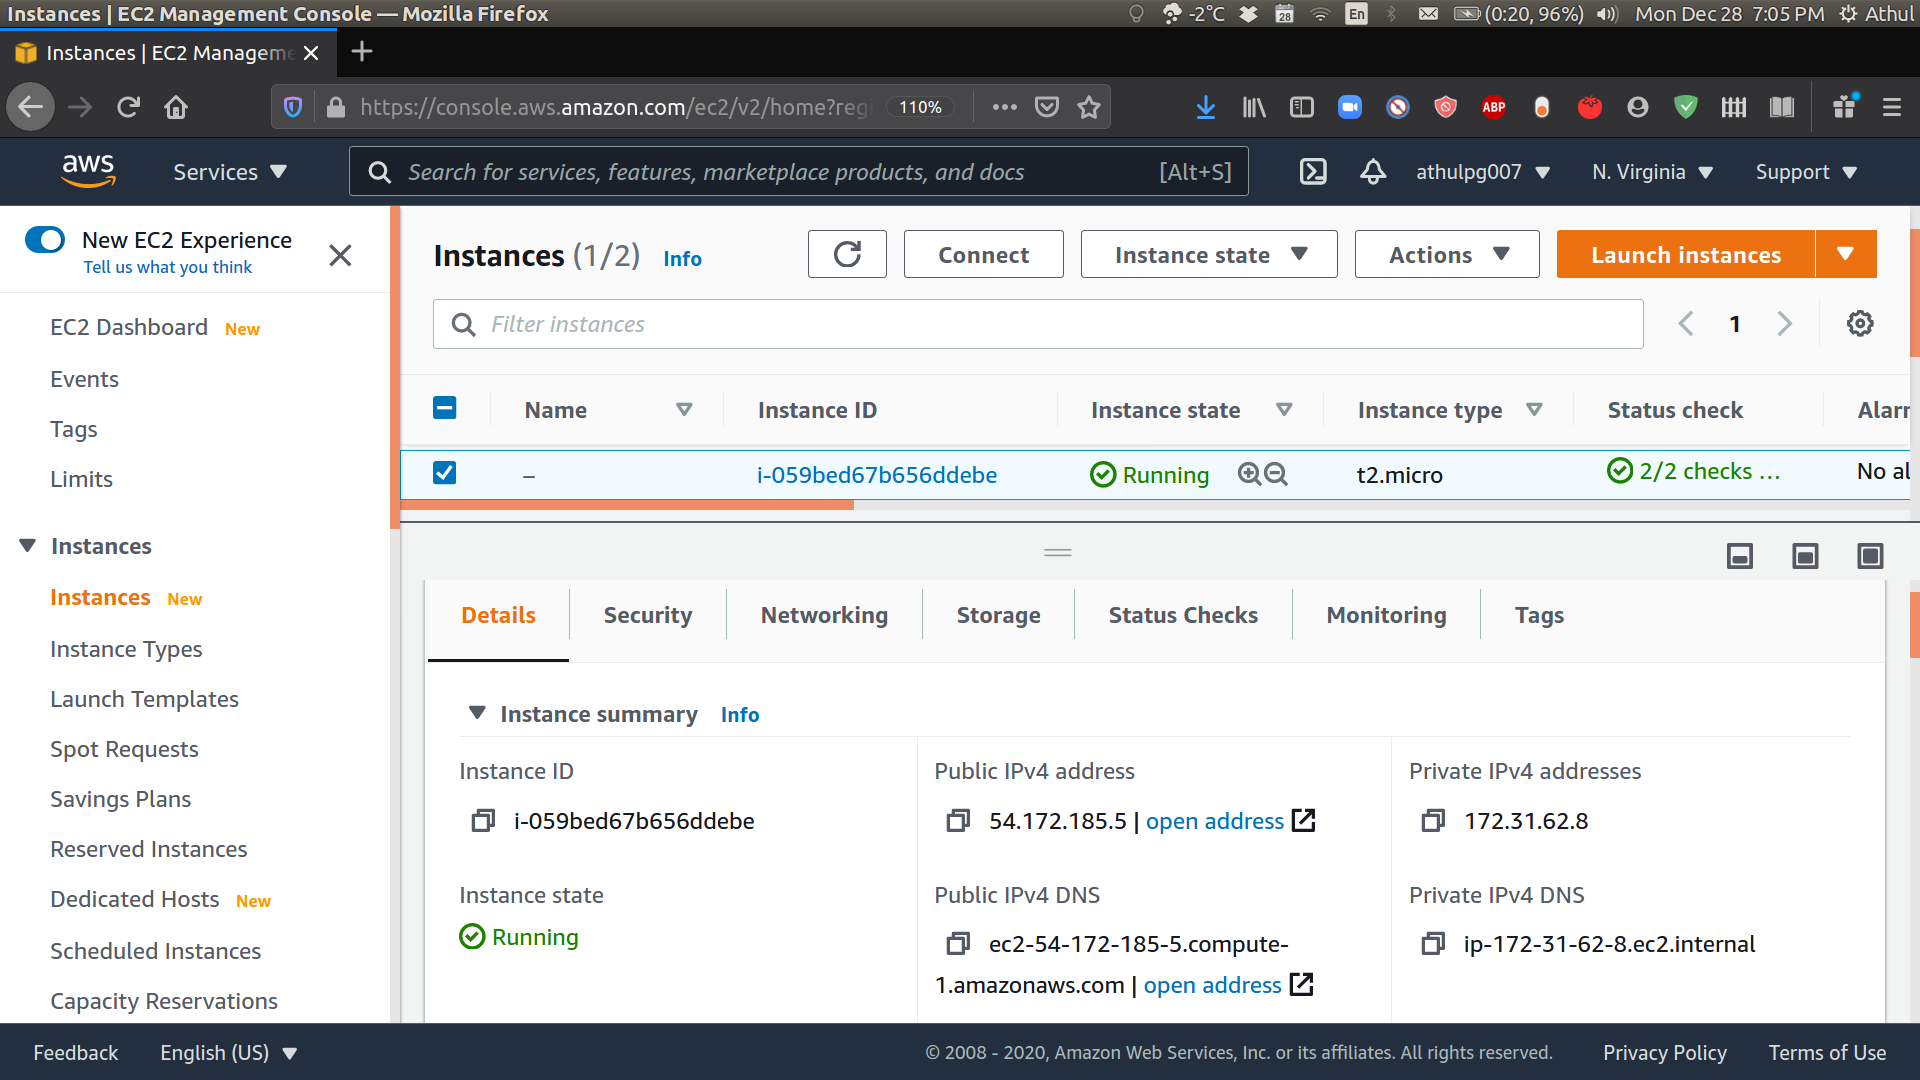
You may have to wait for a few minutes for the instance to get up and running. Once it is done, you will see the instance state as “Running” and selecting the instance will display its details below. Make sure you have a public IPv4 DNS as shown below.
-
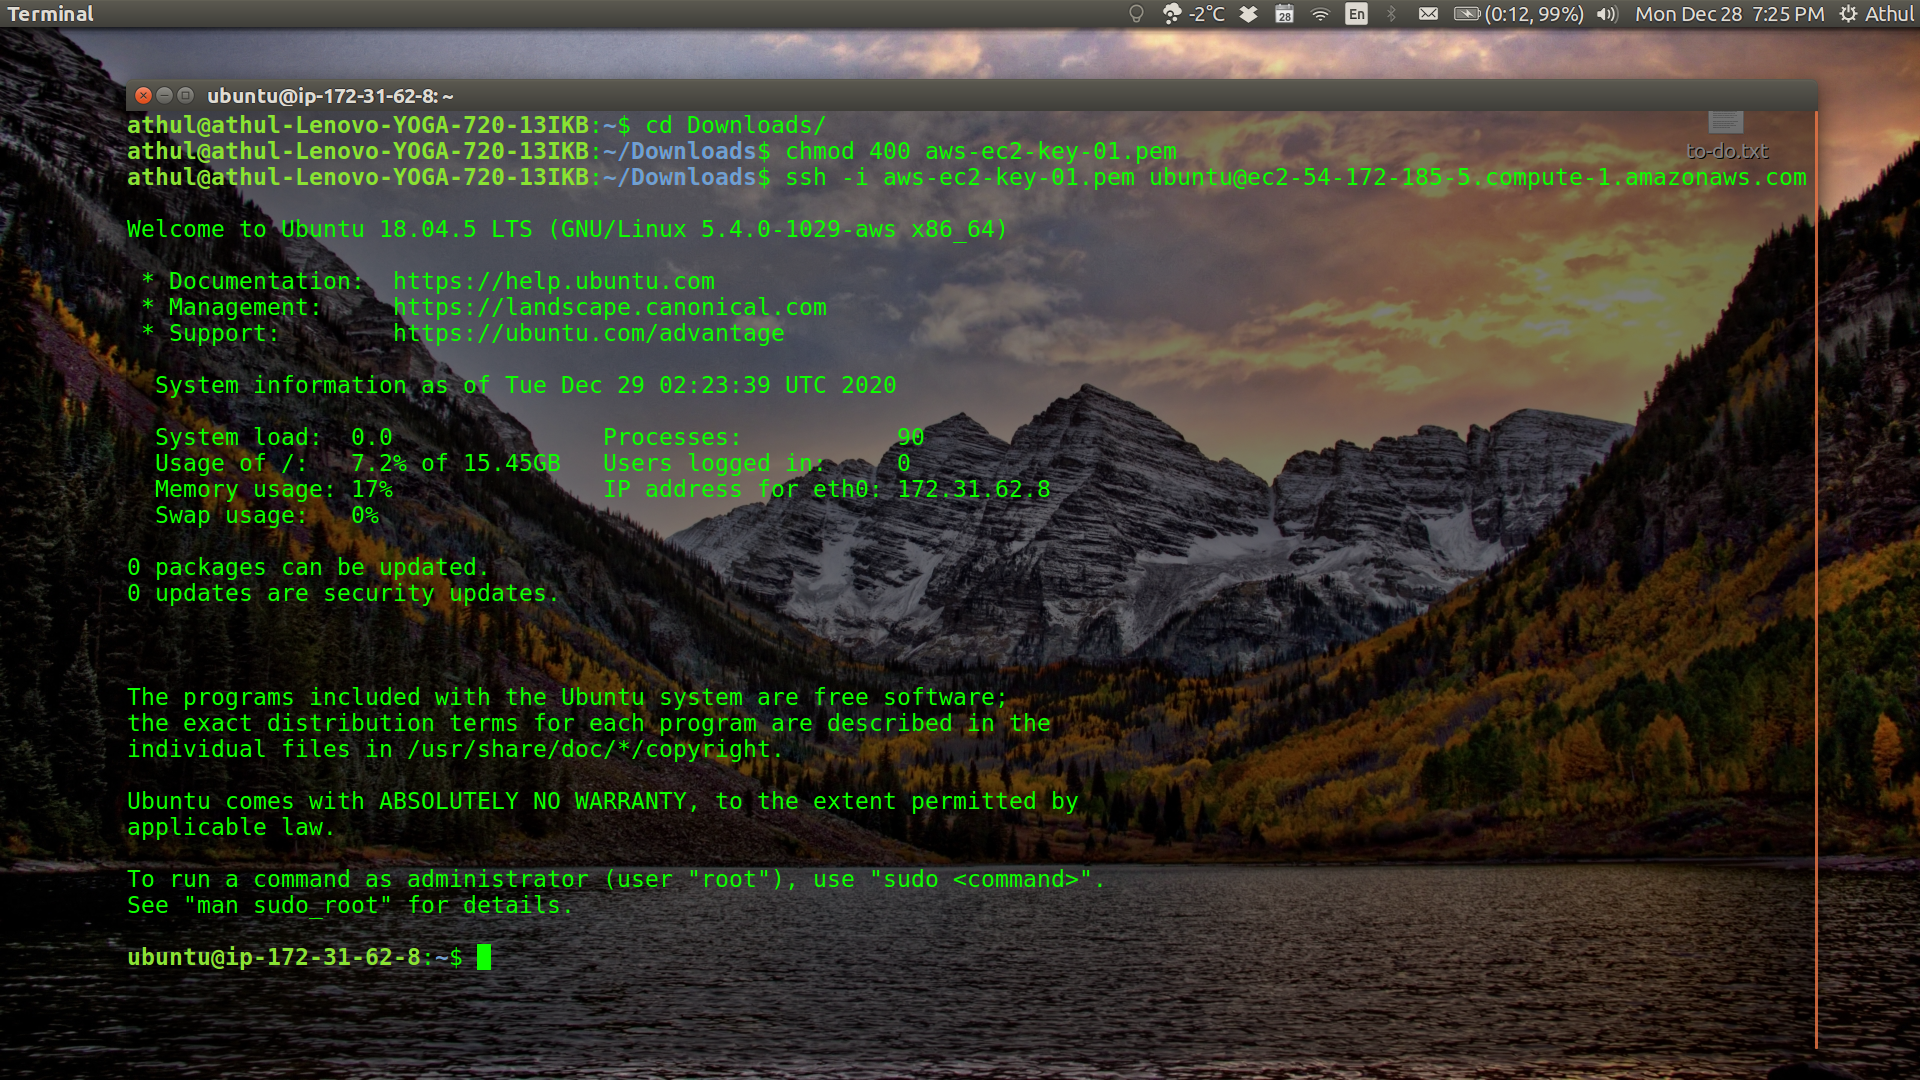
Now we will SSH into the remote computer. Open a terminal, go to the location where the key pair. In my case, the file is located in the Downloads folder. So I will open a terminal and cd into that folder. You will need to first change permissions on the key file to avoid accidental overwriting. Make sure to replace “aws-ec2-key-01.pem” with your key pair name. Make sure the key pair is actually present in the terminal location. We will then ssh into the remote computer. Make sure to change the key pair name and the public IPv4 DNS with your own.
cd Downloads
chmod 400 aws-ec2-key-01.pem
ssh -i aws-ec2-key-01.pem ubuntu@ec2-54-172-185-5.compute-1.amazonaws.com
If everything worked, you will be logged into the EC2 instance successfully.
-
We have finished setting up the EC2 instance and are now able to access it via SSH. We will noe proceed to set up Jupyter Notebooks on this instance. First we will download and install Ananconda. You may want to replace the Anaconda repository link with a more updated version from the Anaconda archive.
wget https://repo.anaconda.com/archive/Anaconda3-5.3.1-Linux-x86_64.sh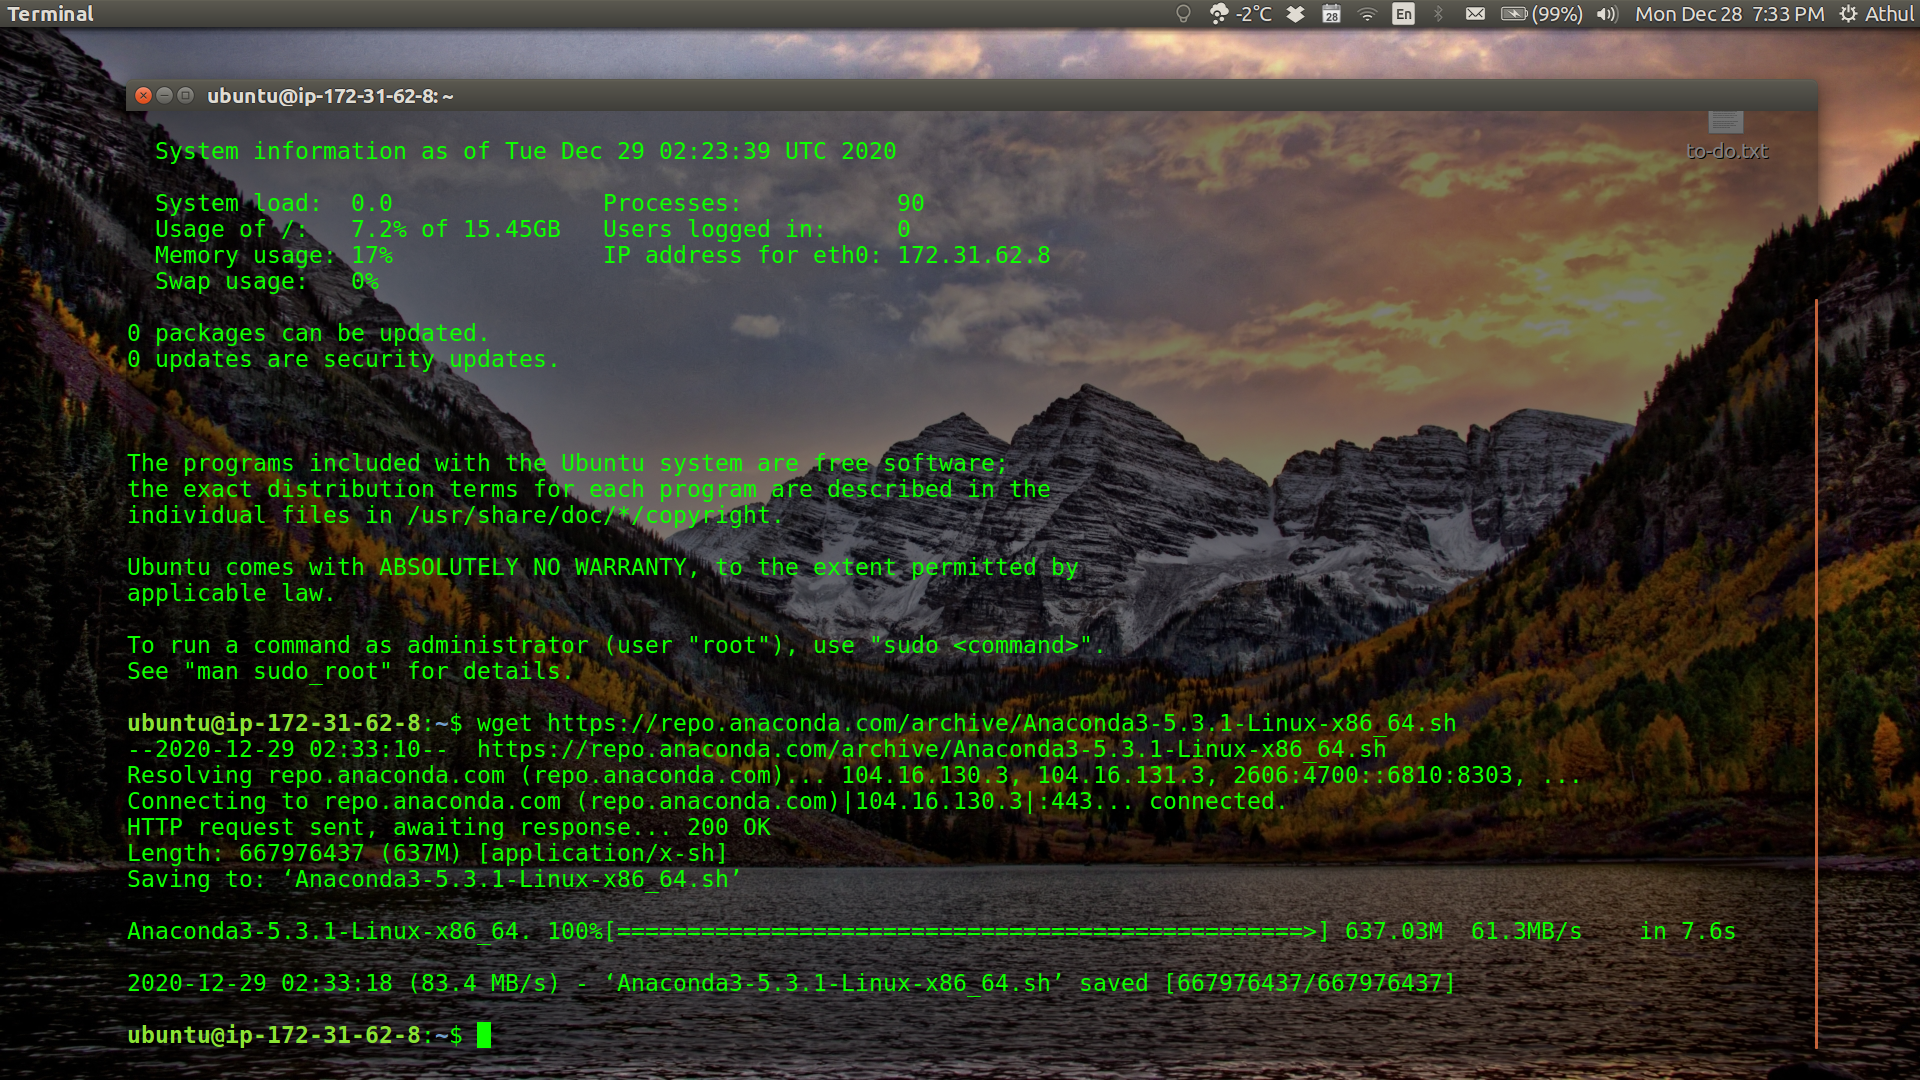
-
Install Anaconda. Review and accept the license terms and choose the default install location. It will take a few minutes to install the packages.
bash Anaconda3-5.3.1-Linux-x86_64.sh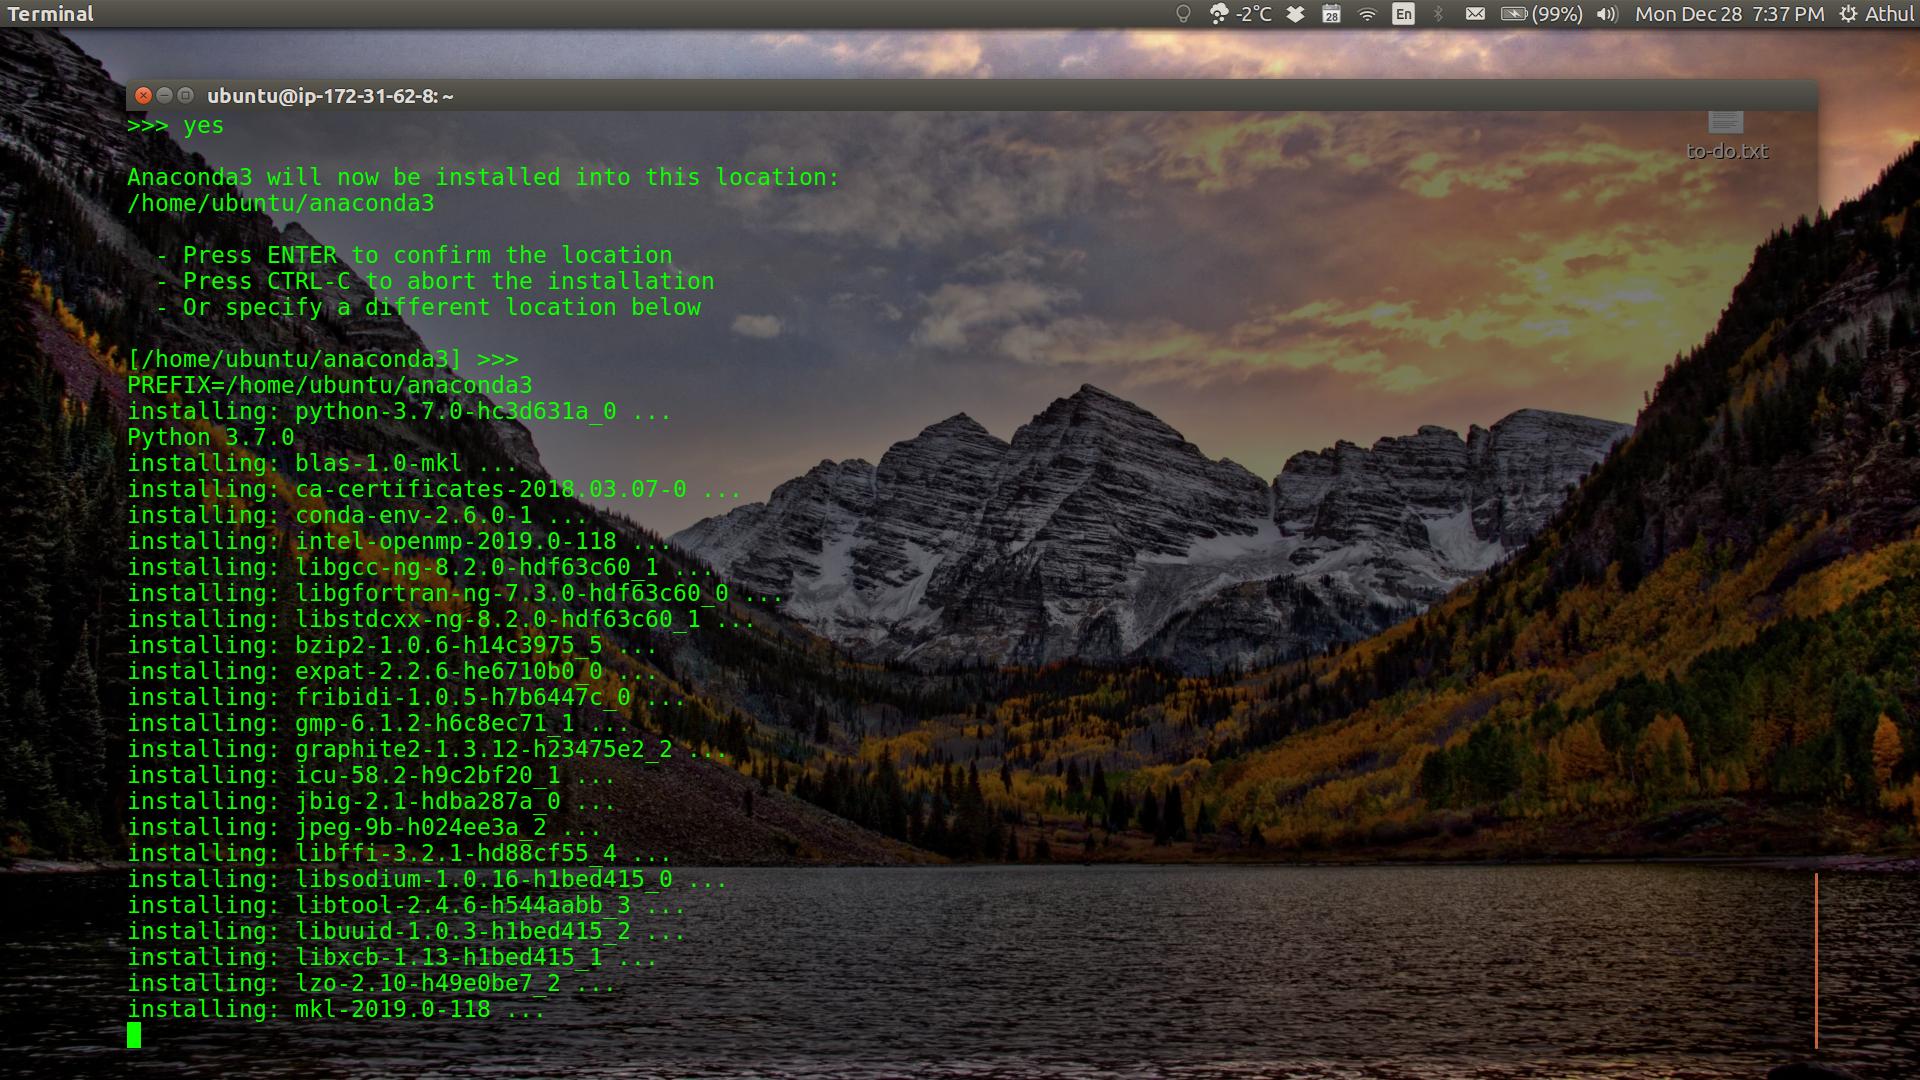
-
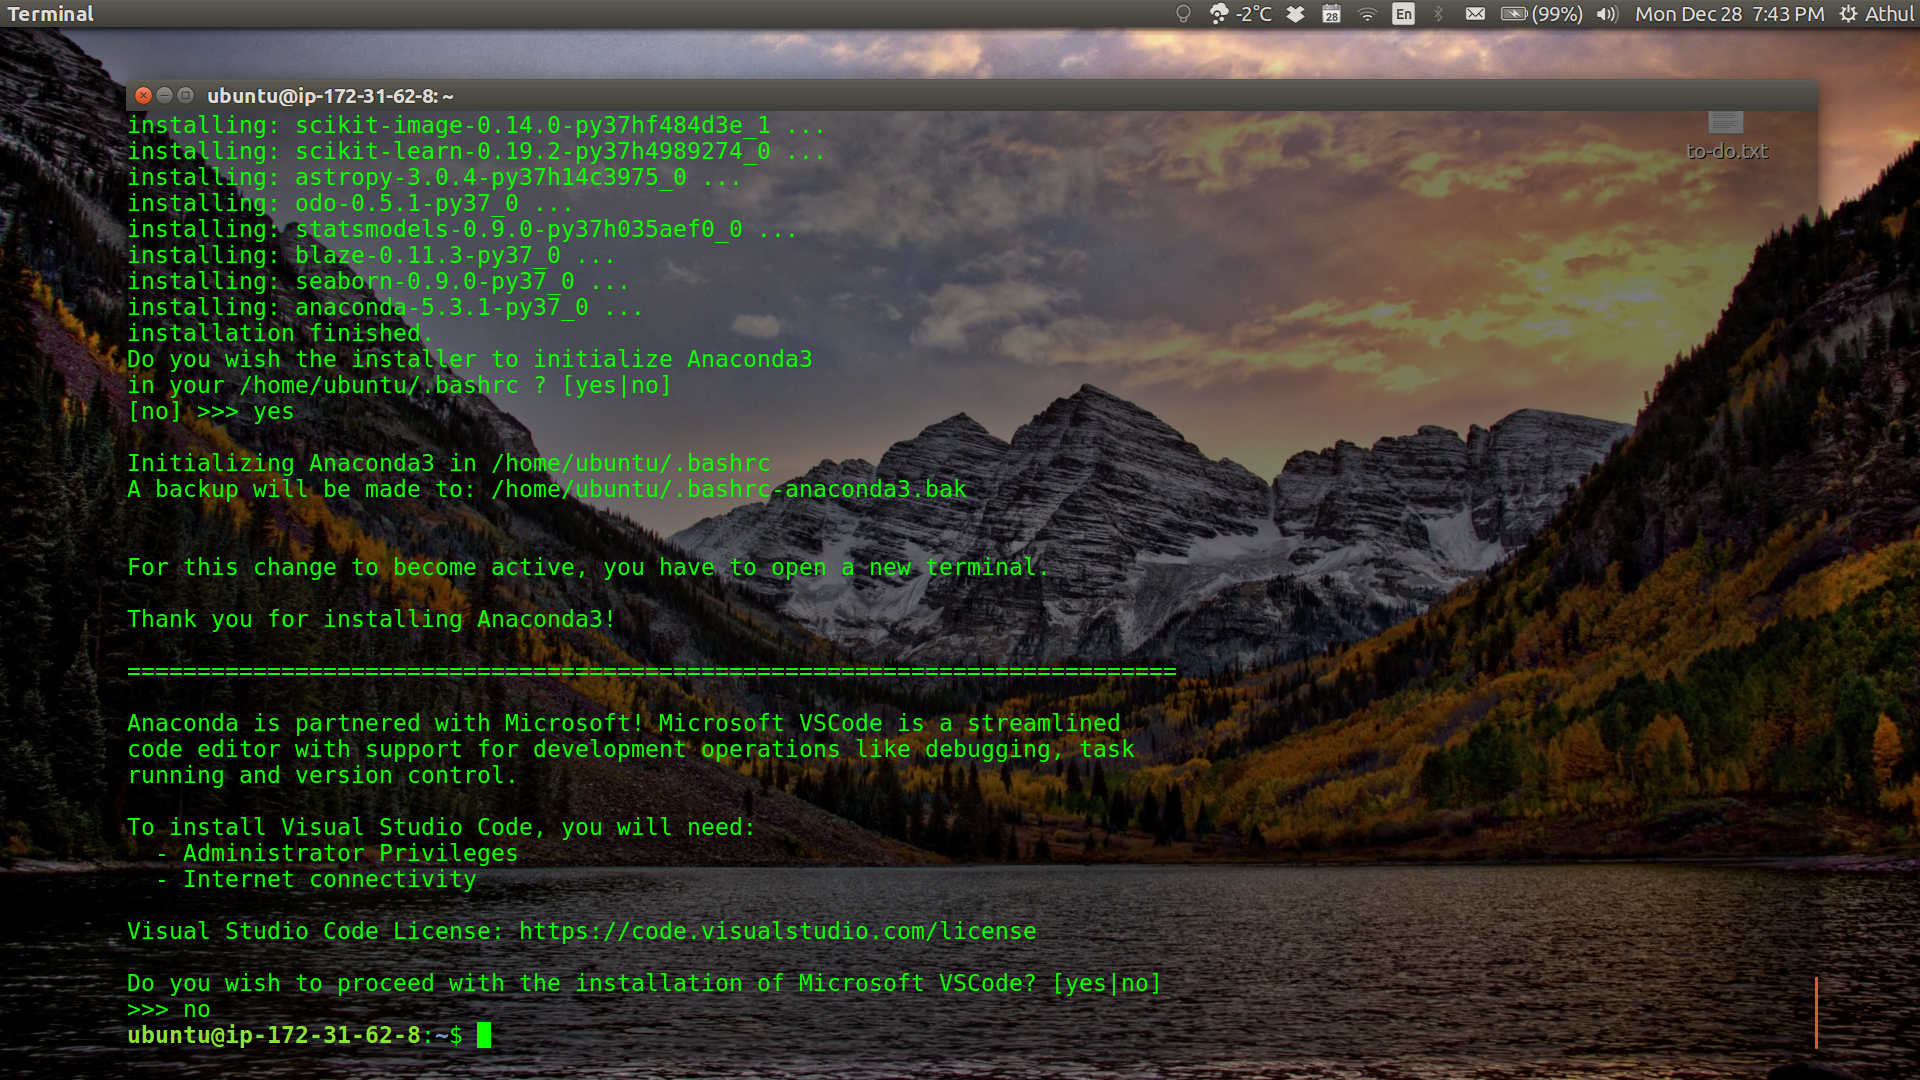
When asked if you want the installer to initialize Anaconda3 in your
/home/ubuntu/.bashrc, selectYes. You can skip the installation of Microsoft Visual Studio.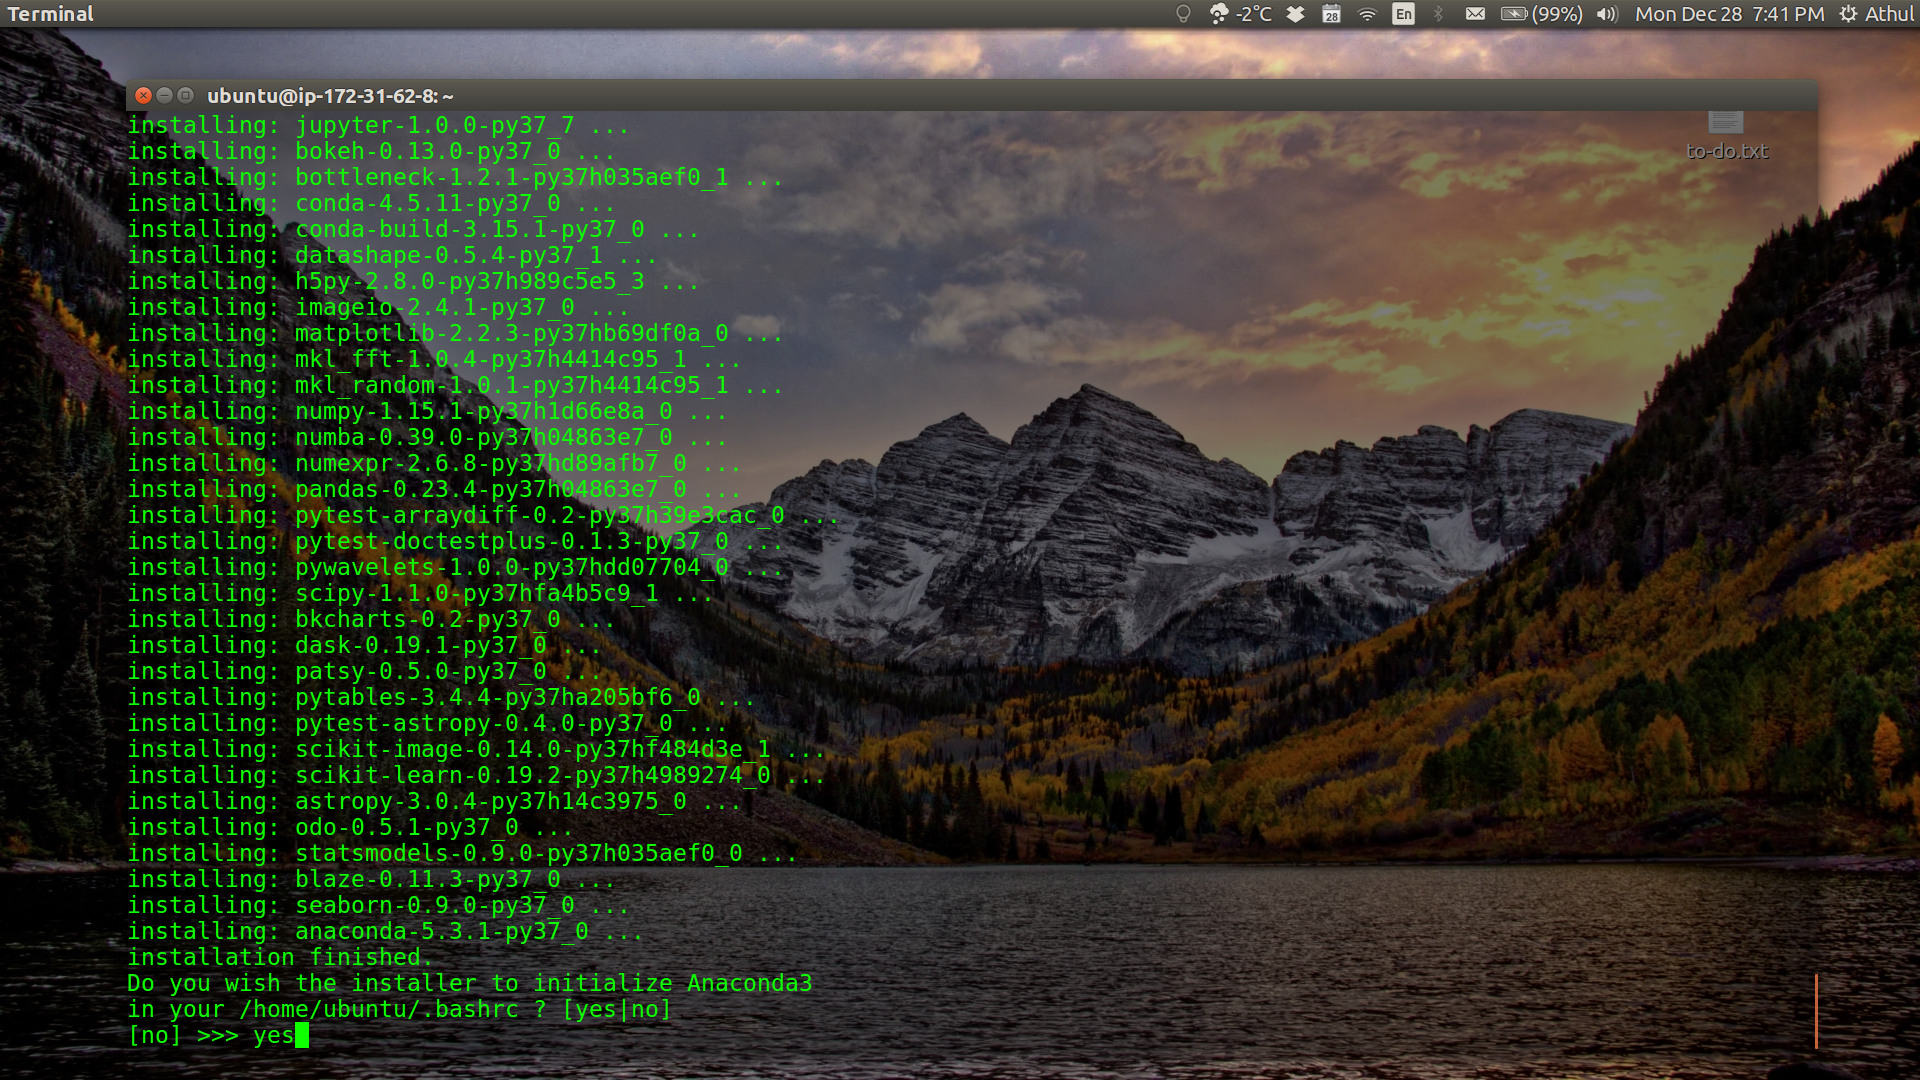
-
Anaconda is now installed on your EC2 instance.
-
Use the PATH variable to allow conda commands to be called from anywhere on the remote computer.
export PATH=~/anaconda3/bin:$PATH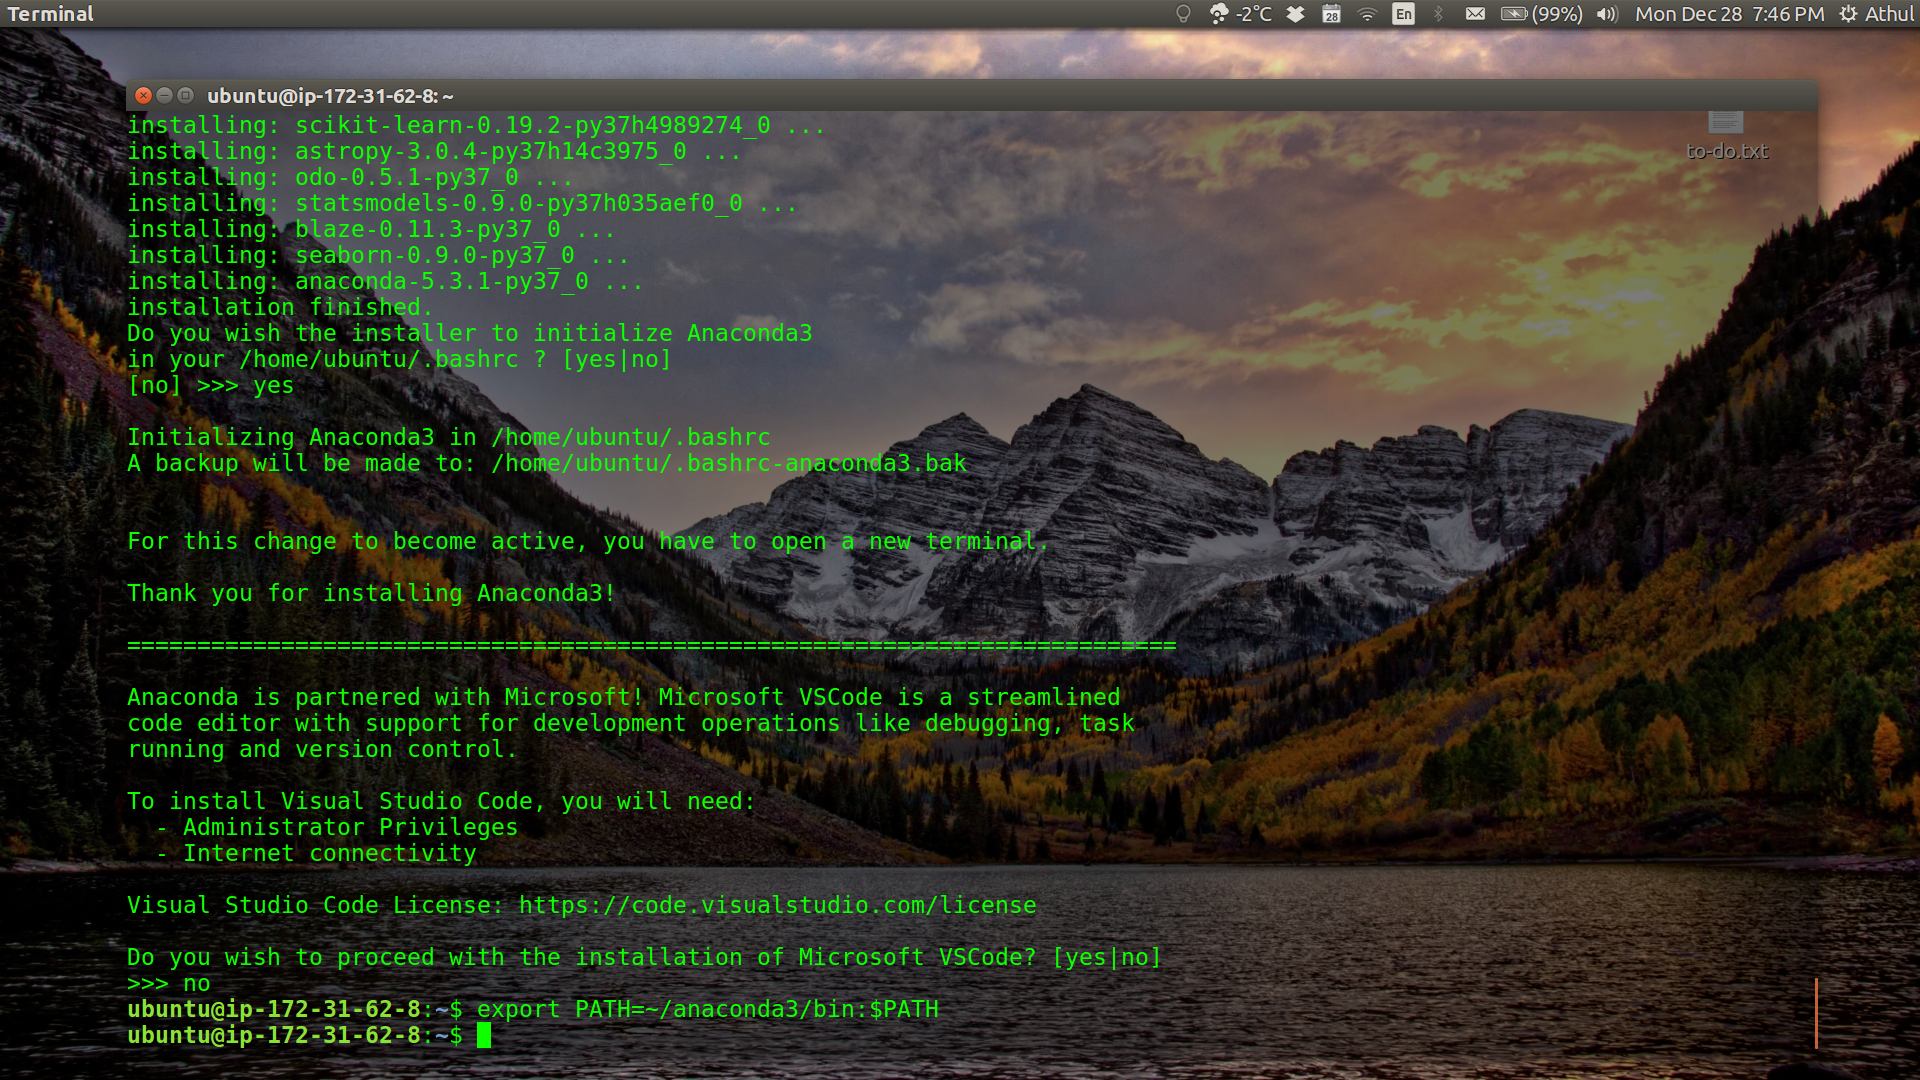
-
As a general development rule, it is good practice to create a new conda environemnt so that you get a sandboxed environment which is isolated from your system-wide python installation. Create a new python3 conda environment called
env1.conda create -n env1 python=3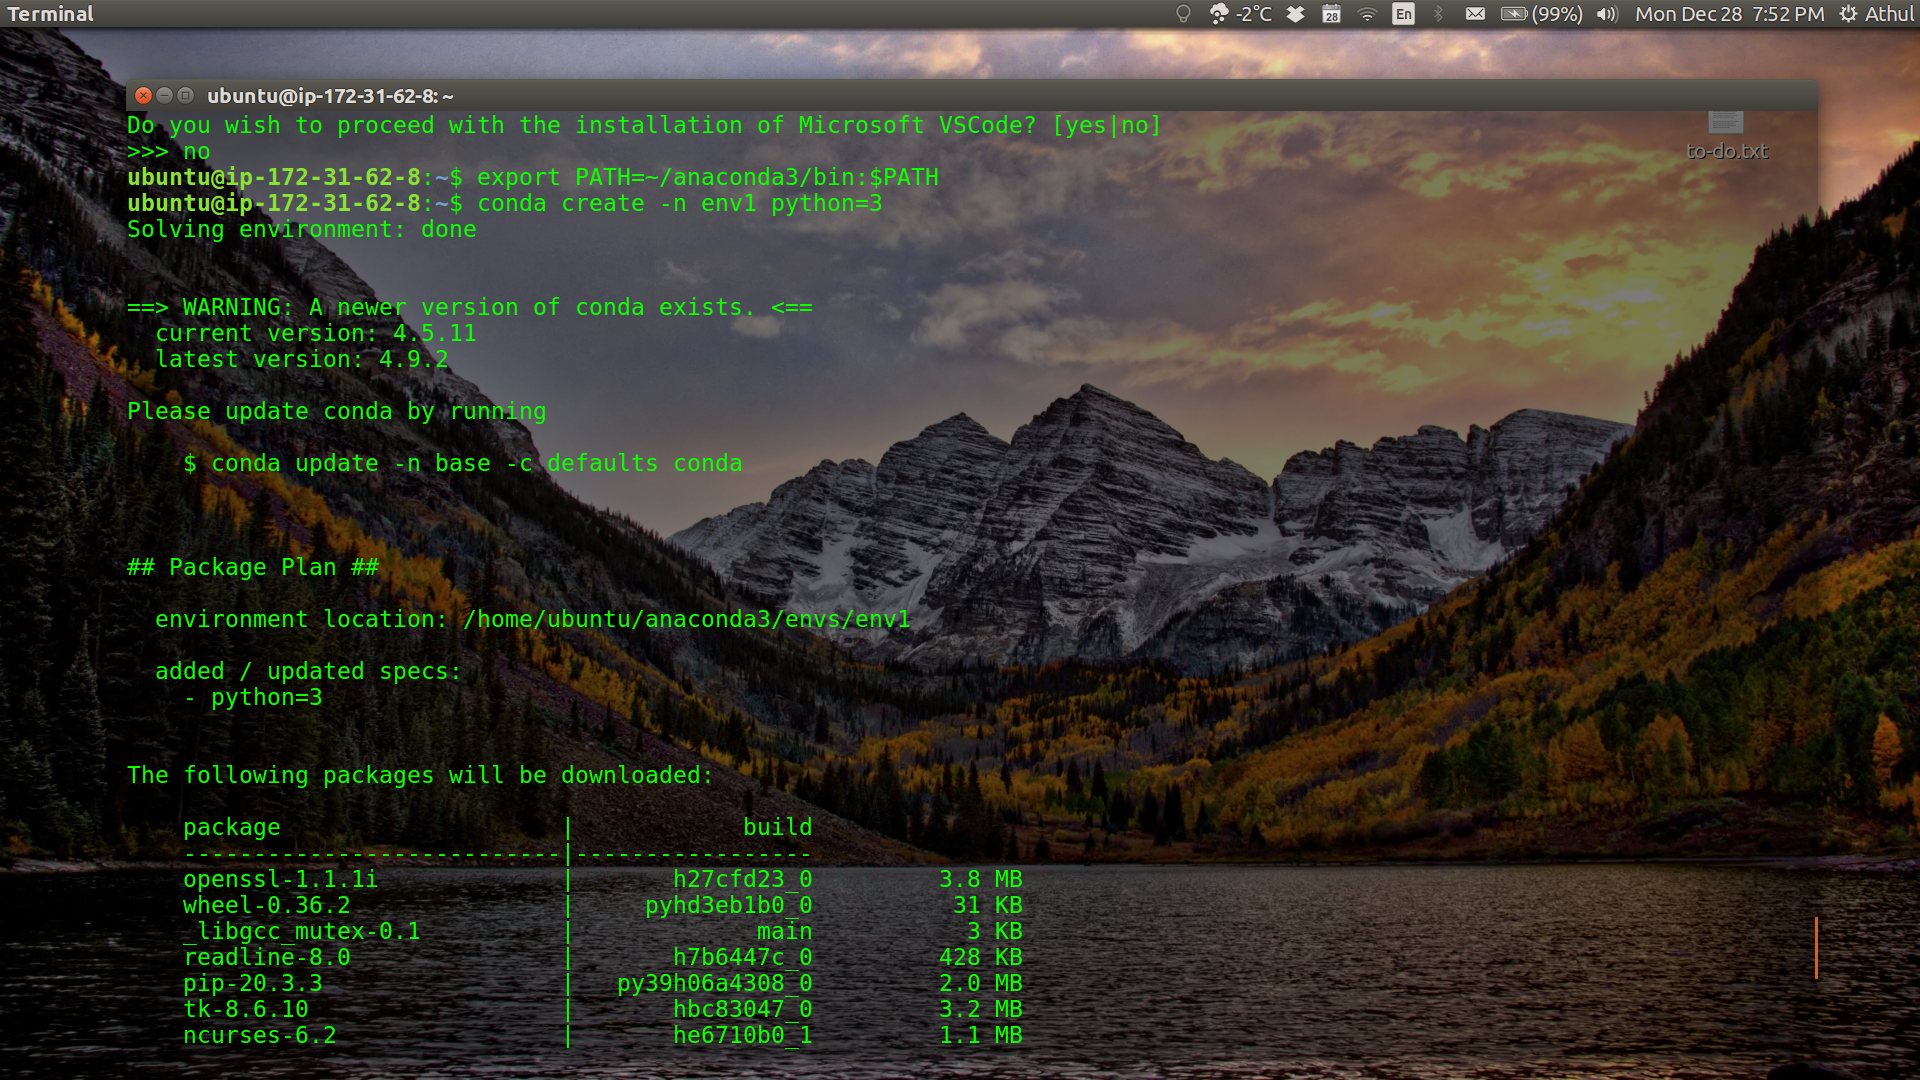
-
Activate the new environment you just created.
source activate env1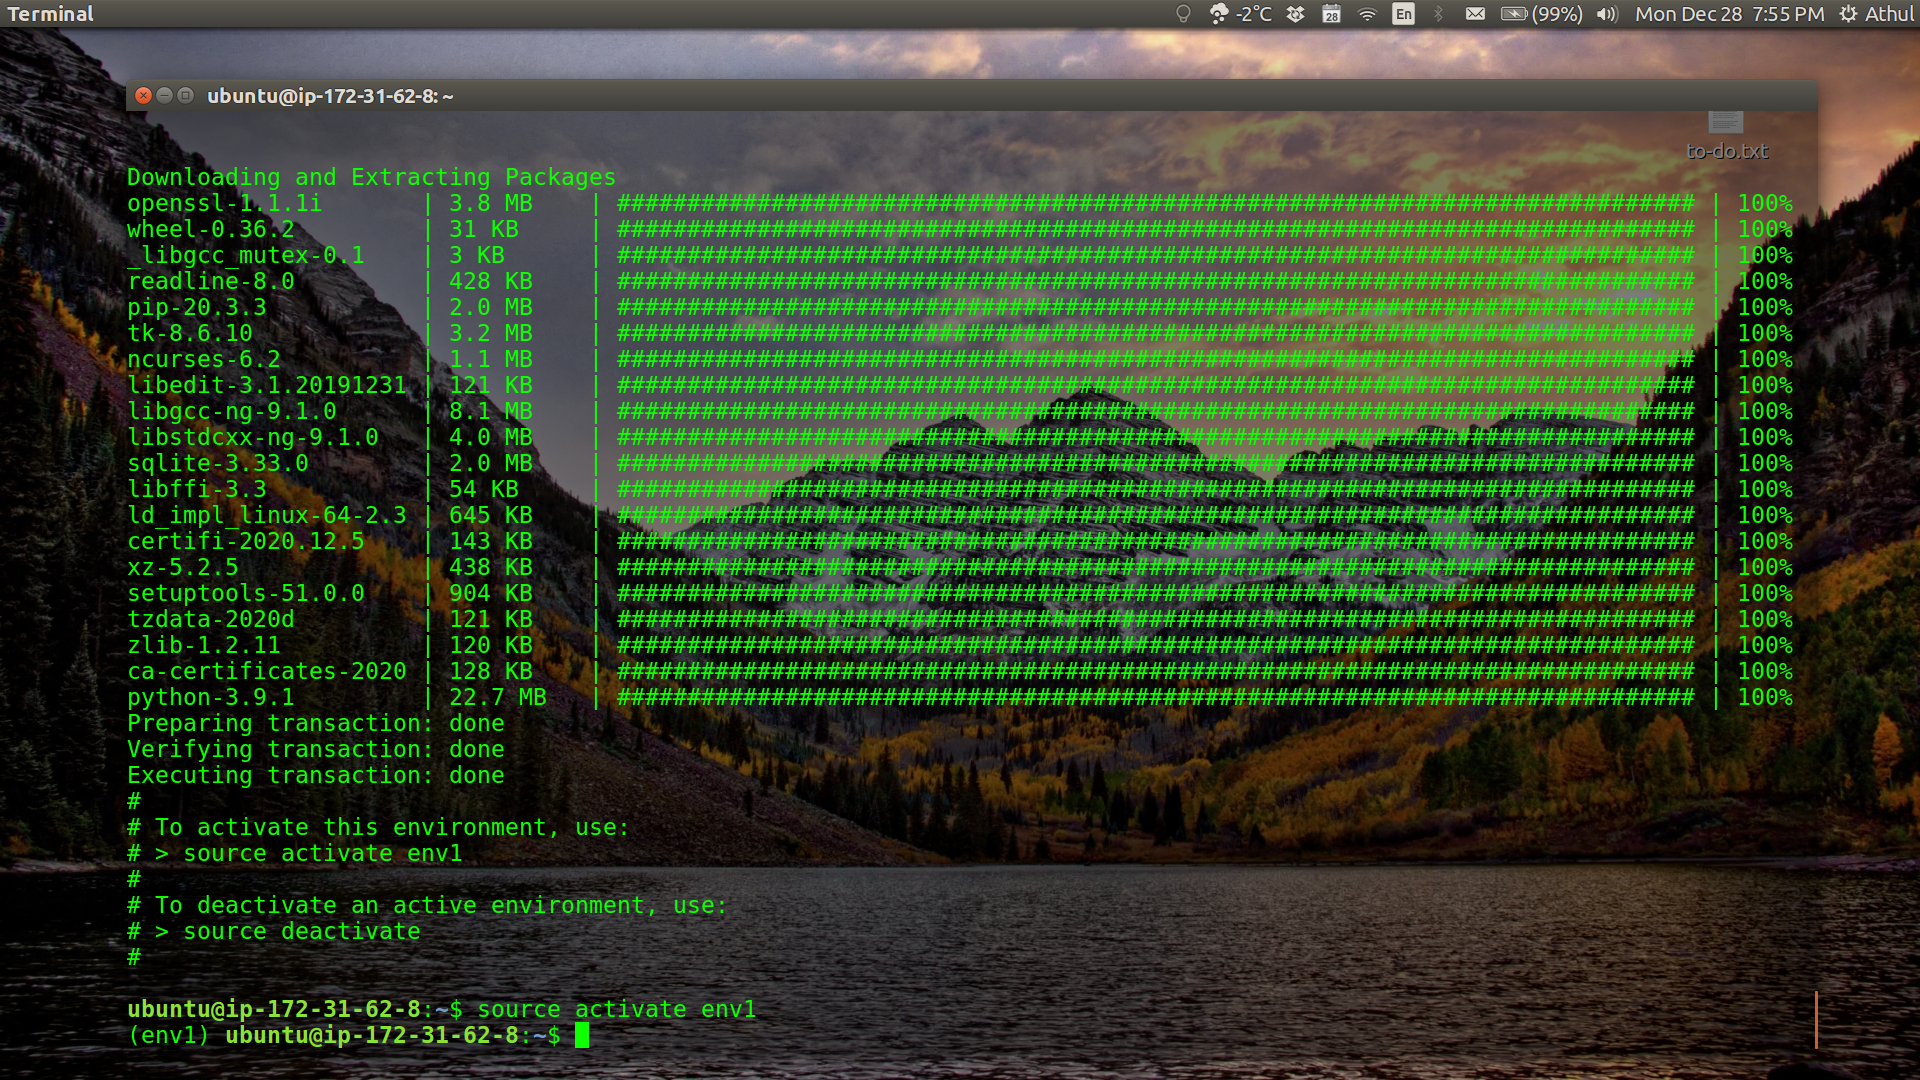
-
Install some packages, ipython and jupyterlab into env1 using conda.
conda install numpy pandas jupyterlab scipy matplotlib ipython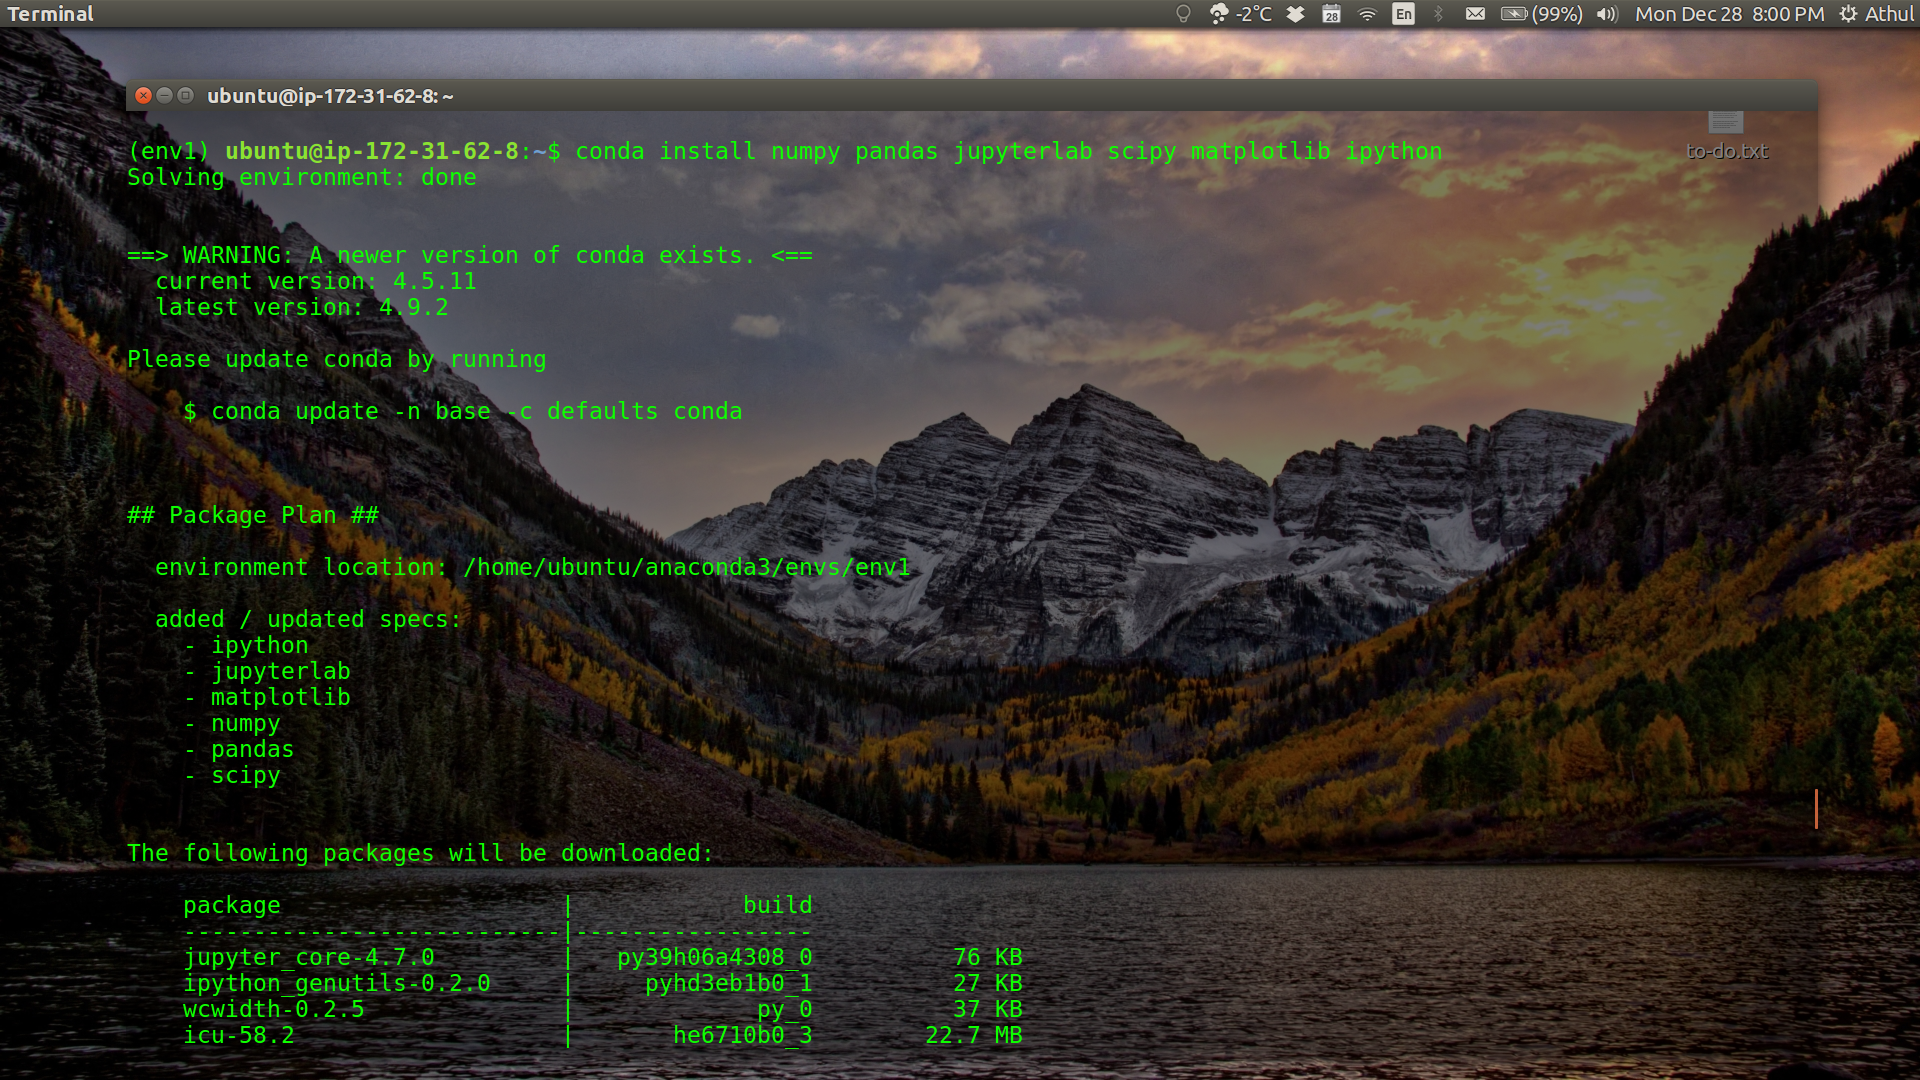
-
Type ipython to bring up the interactive IPython shell. We will use the passd utility to create a password for our Jupyter Notebooks. Enter the password you would like to use. The IPython prompt will output an SHA key which you will need to copy and paste elsewhere where you can access it later.
ipython
from IPython.lib import passwd
passwd()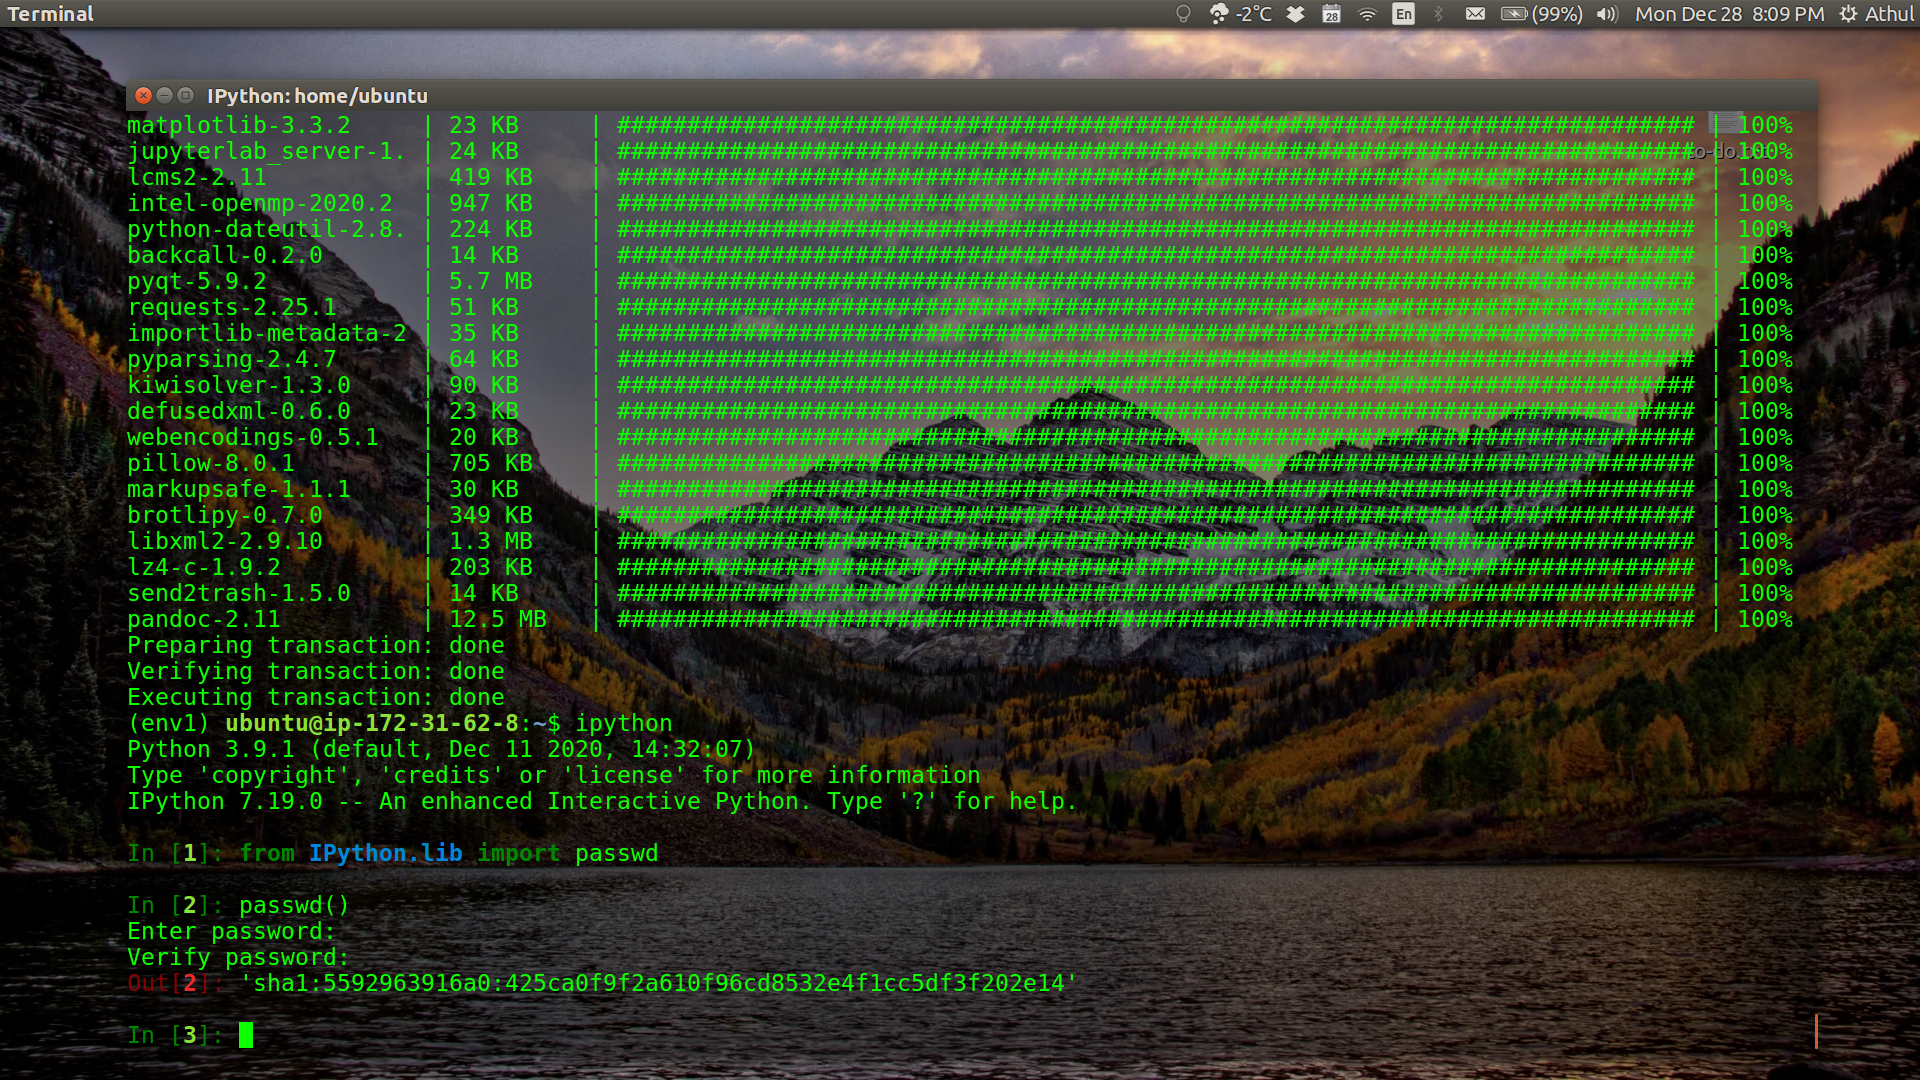
-
Exit IPython and generate a config file for the Jupyter Notebook.
exit
jupyter notebook --generate-config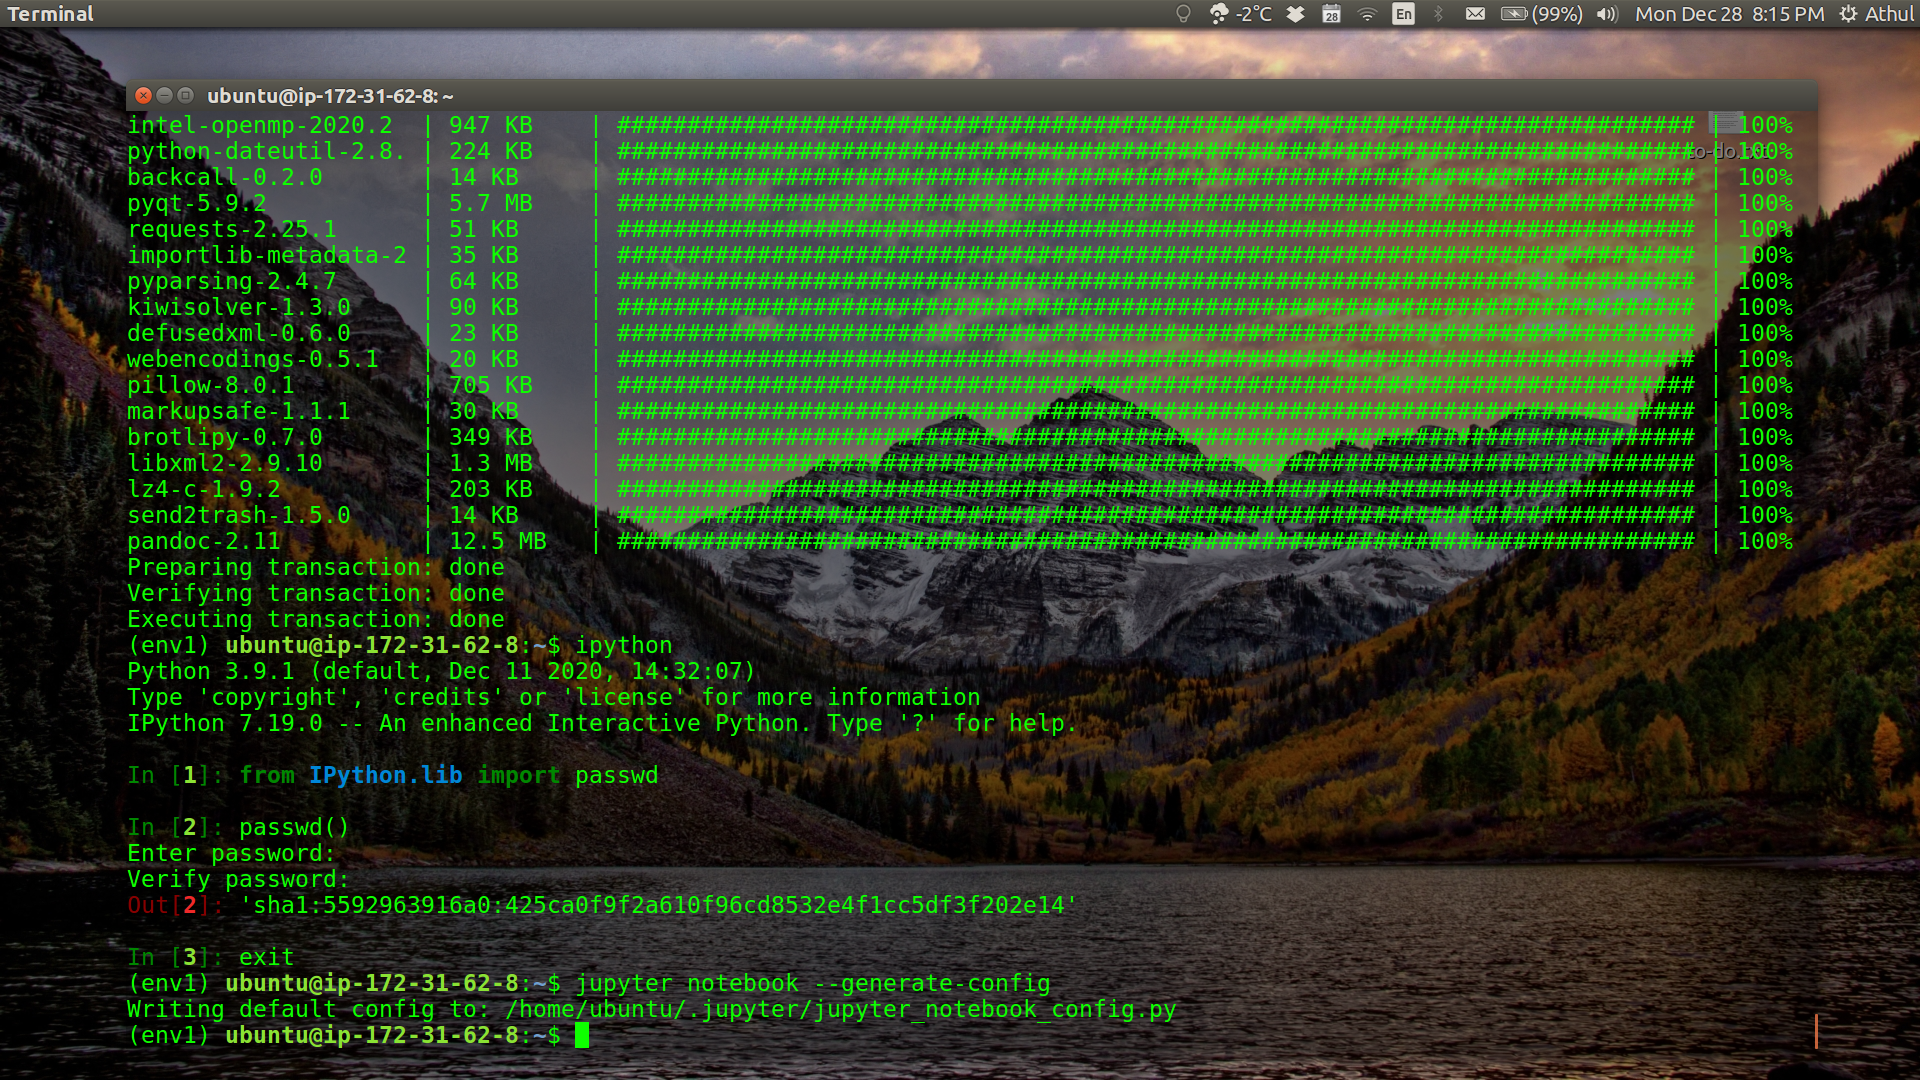
-
Create a directory to store the certificate and cd into it.
mkdir certs
cd certs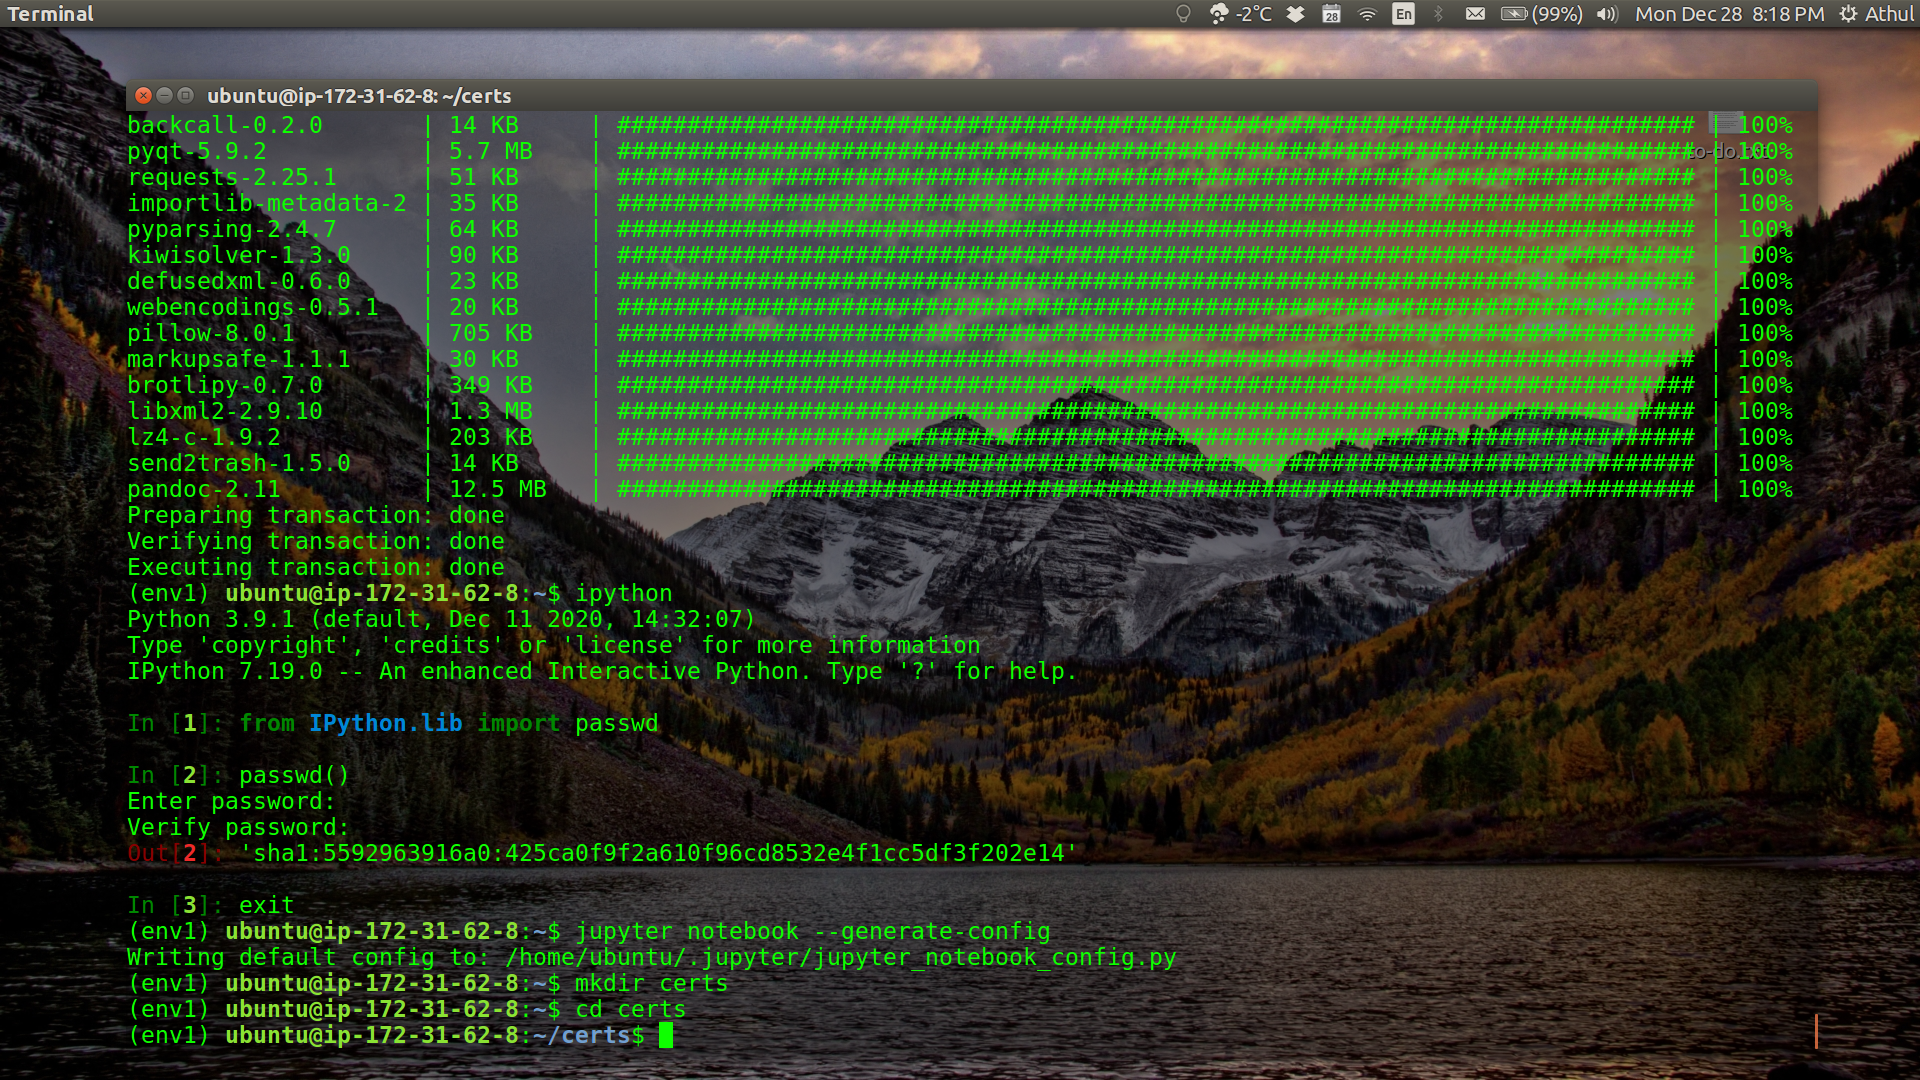
-
Create a self-signed certificate using the following command. Answer the prompted questions, you can leave most fields empty or provide your information if you wish. This will generate a certificate for us.
sudo openssl req -x509 -nodes -days 365 -newkey rsa:1024 -keyout mycert.pem -out mycert.pem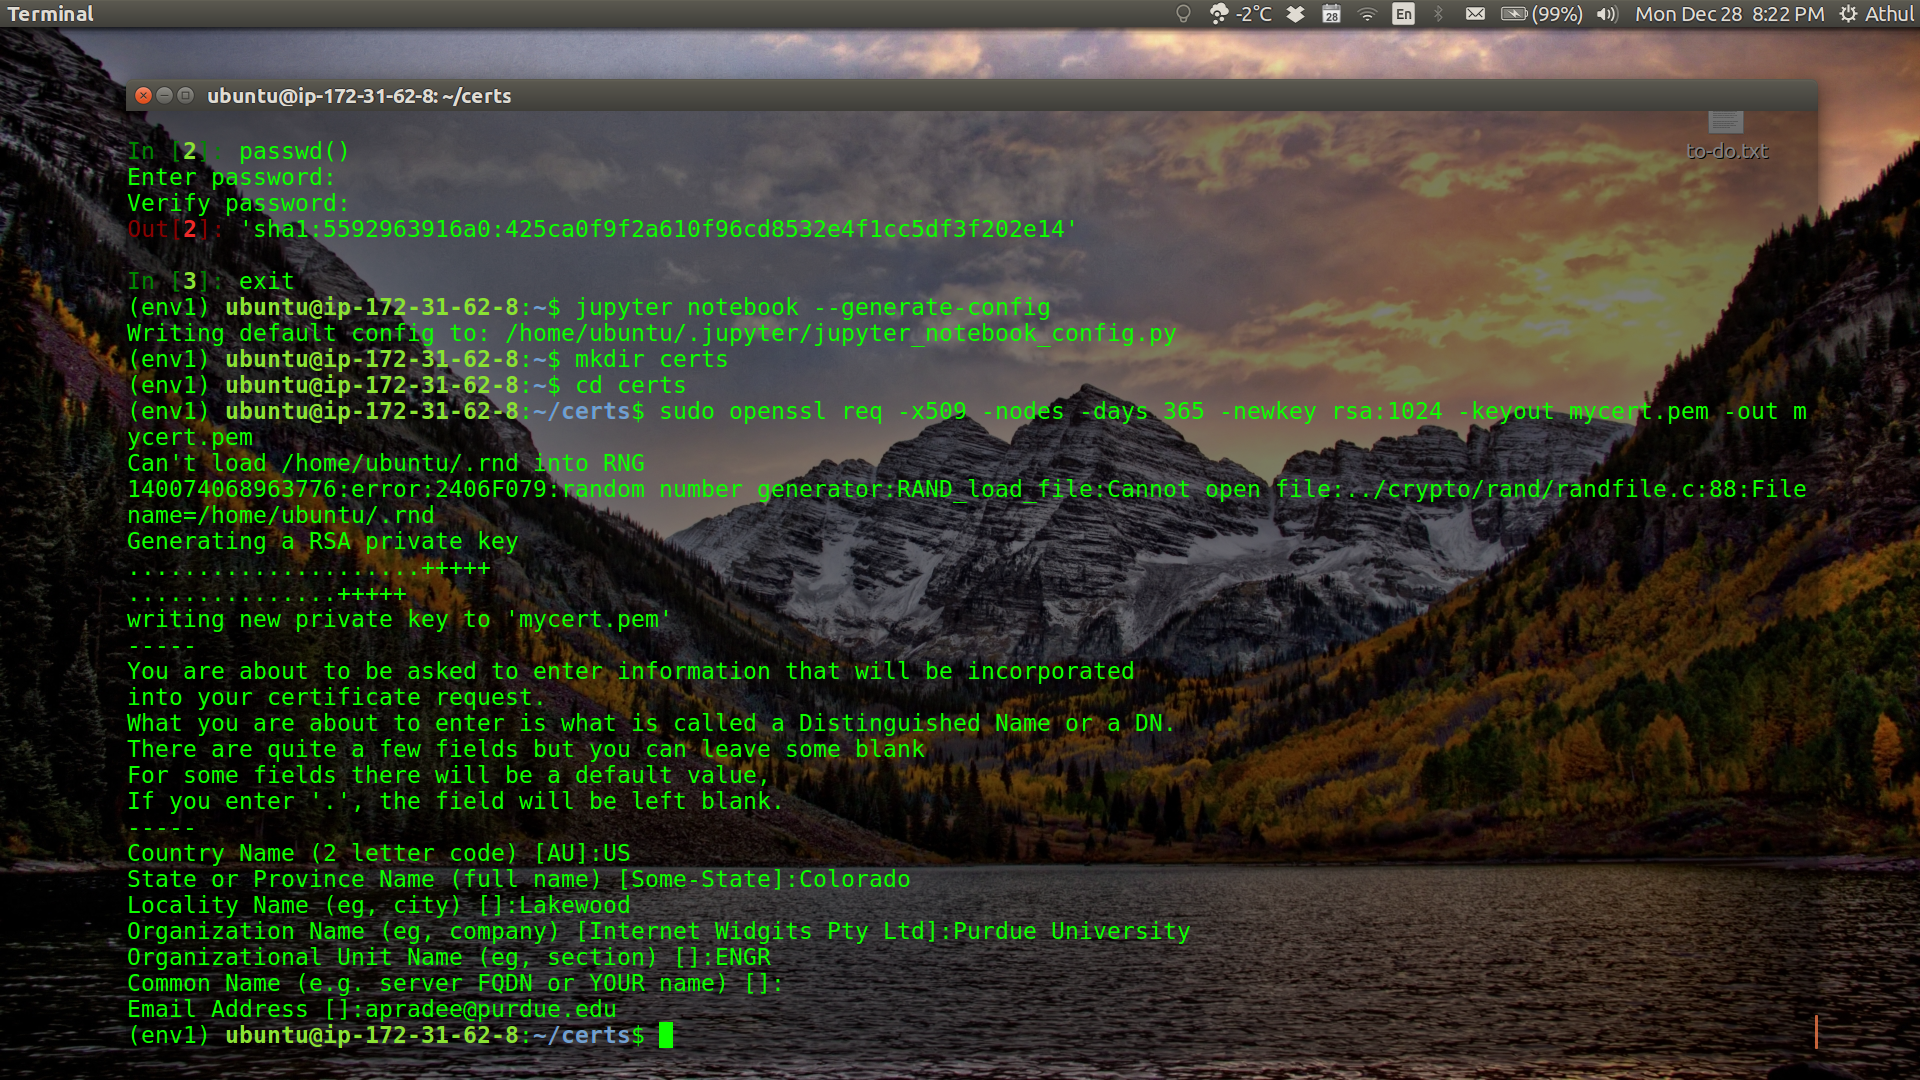
-
We will now need to edit the jupyter config file.
cd ~/.jupyter
nano jupyter_notebook_config.py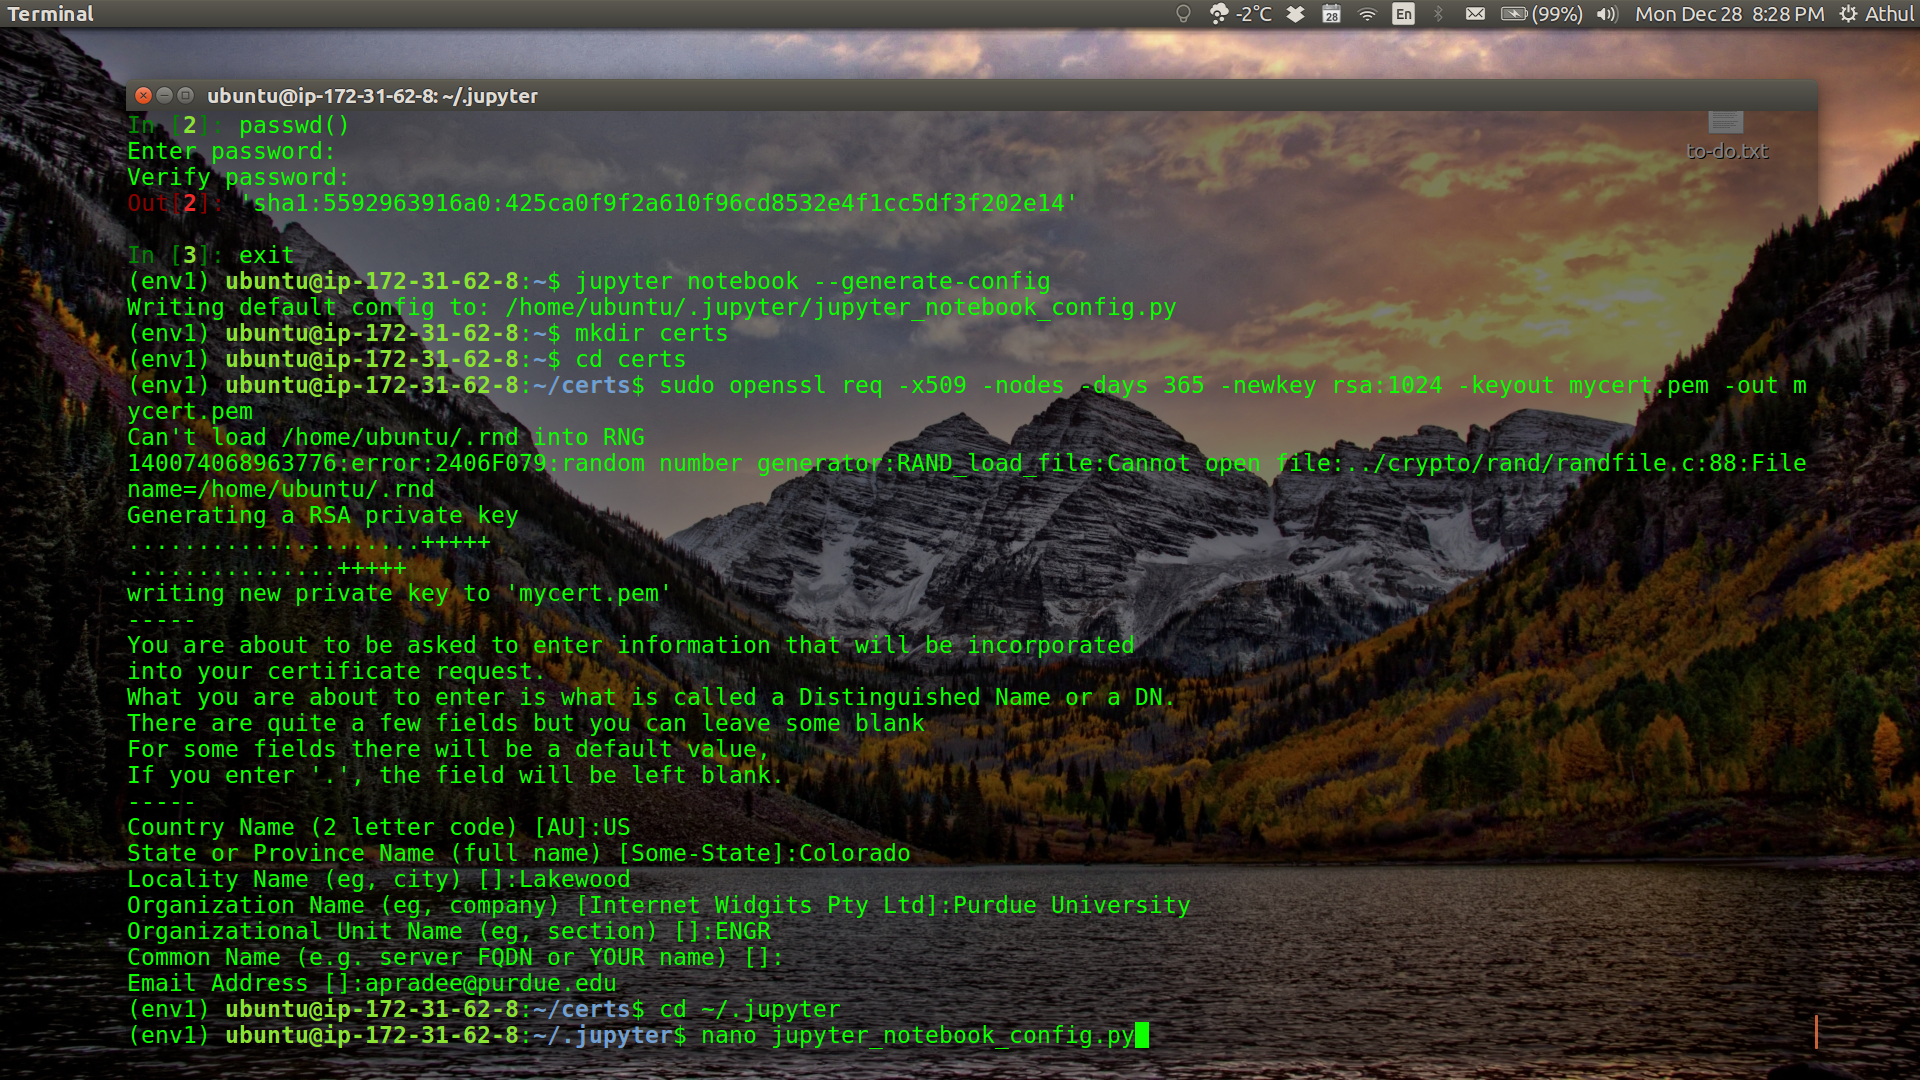
-
Add the following text to the top of the config file.
c = get_config()
c.IPKernelApp.pylab = 'inline'
c.NotebookApp.certfile = u'/home/ubuntu/certs/mycert.pem'
c.NotebookApp.ip = '*'
c.NotebookApp.open_browser = False
c.NotebookApp.password = u'sha1:5592963916a0:425ca0f9f2a610f96cd8532e4f1cc5df3f202e14'
c.NotebookApp.port = 8889
Make sure to change the SHA key with your key, and choose a port number in the range 8888-8900. For this tutorial, we will use 8889. Save the config file (
Ctrl+S) and exit the editor (Ctrl+X)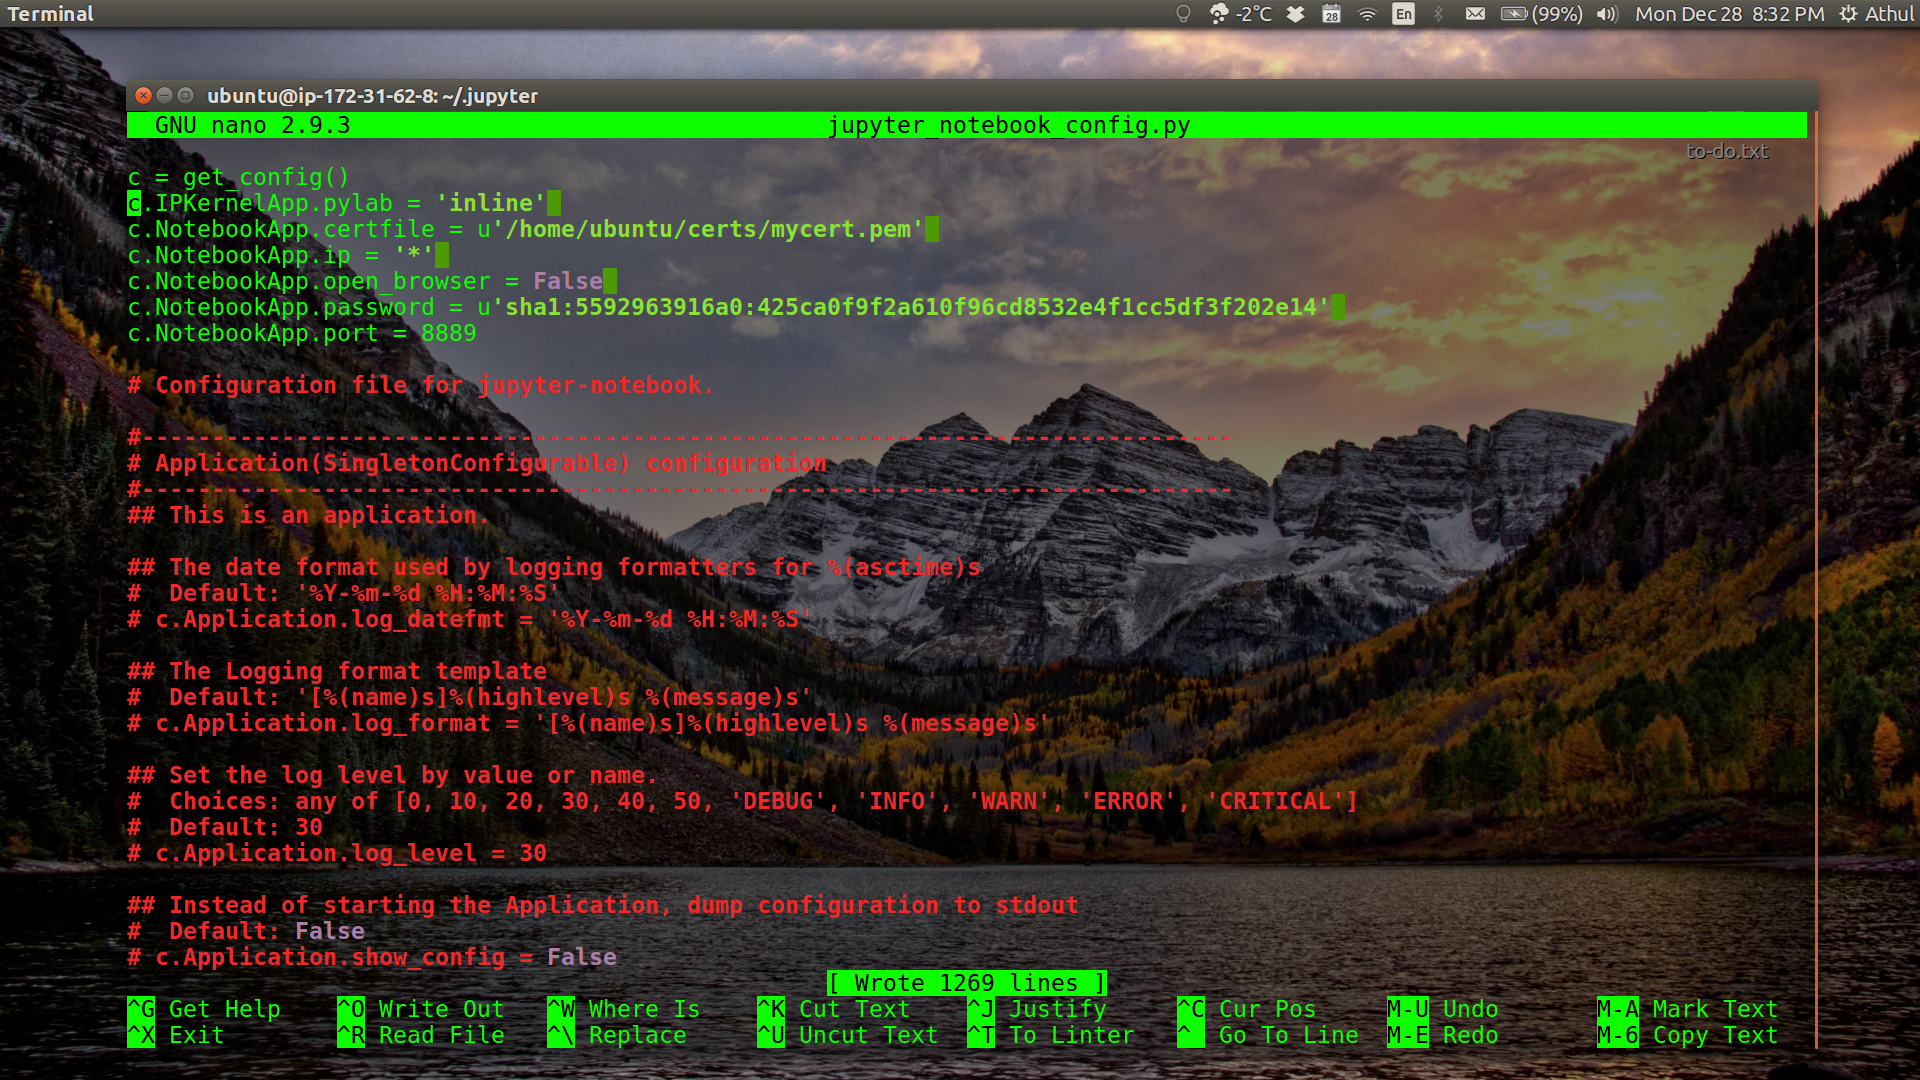
-
Change directory back to home and create a directory where you want to run Jupyter notebooks from.
cd ..
mkdir notebook-dir
cd notebook-dir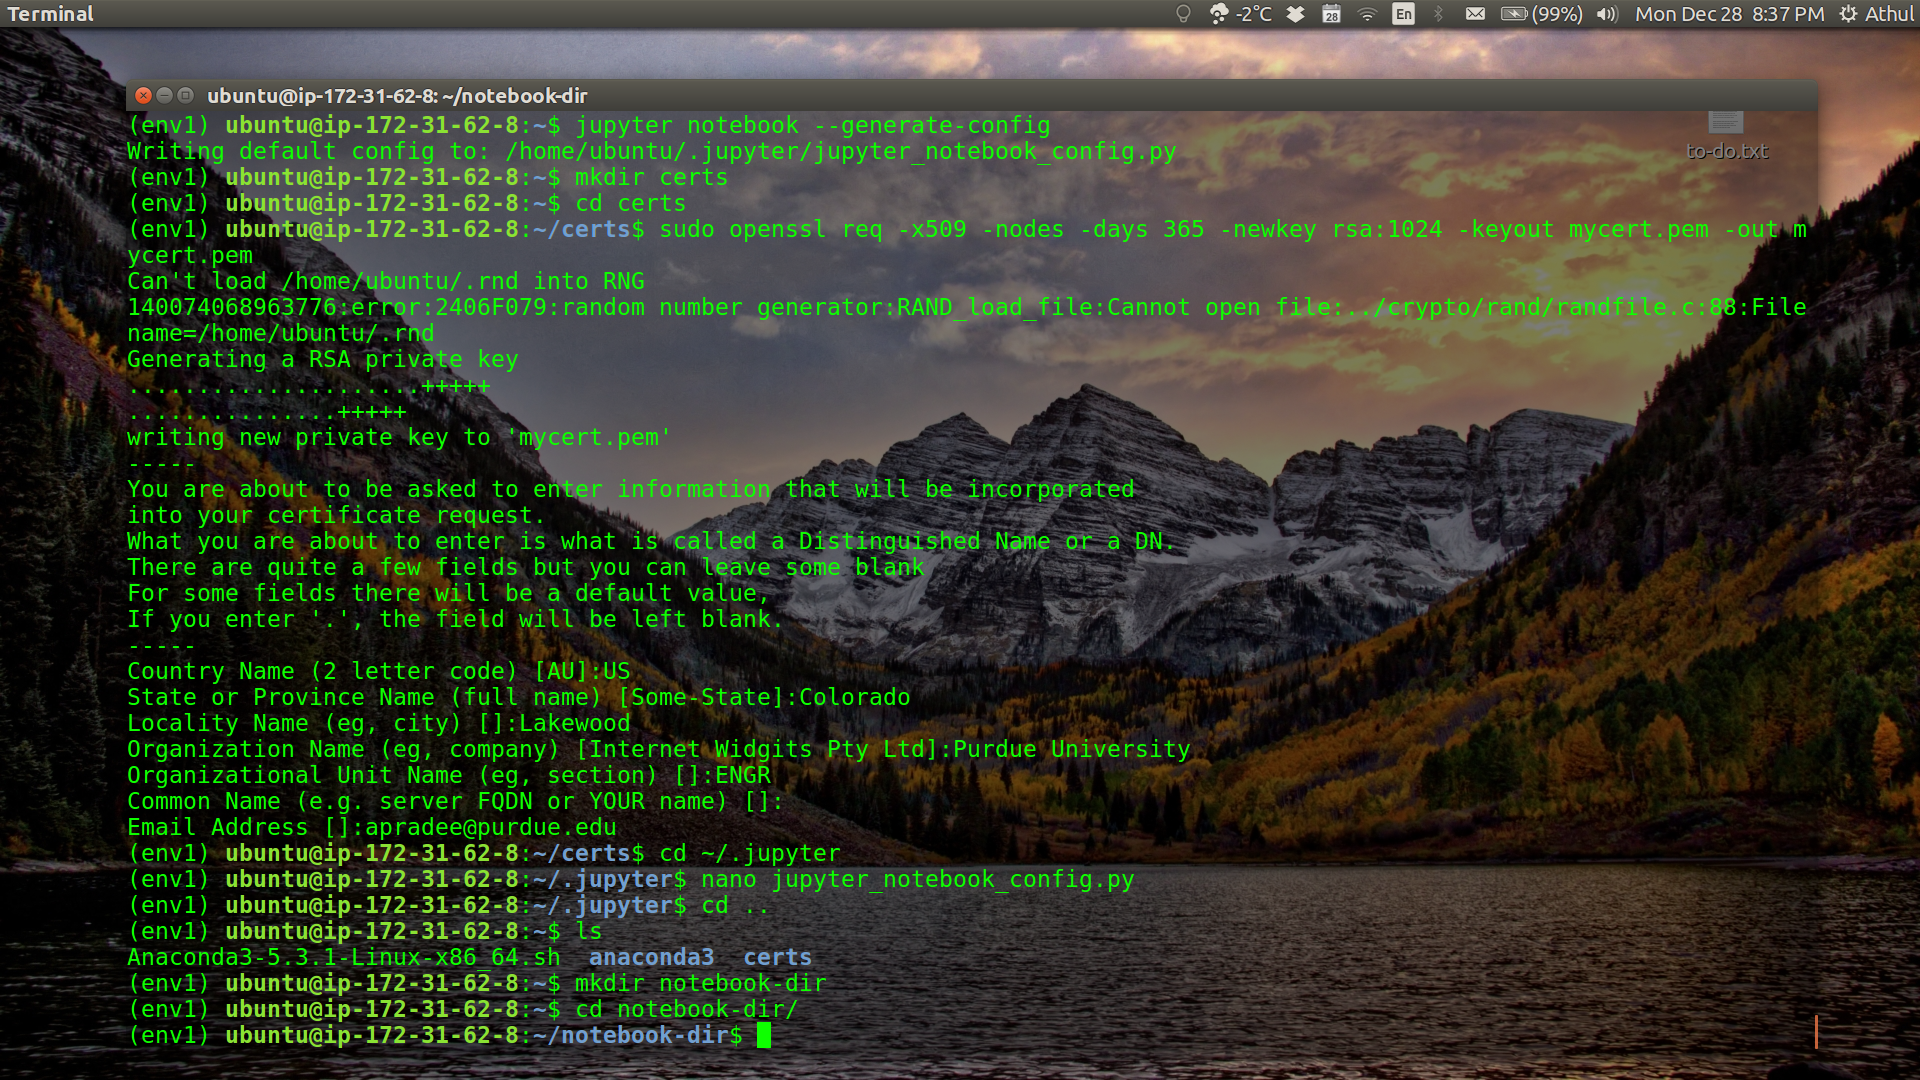
-
Change ownership of these items. If you skip or miss this step, you might get a “Permission Denied” error message when you try to lauch your Jupyter notebook.
sudo chown -R $USER /home/
sudo chown -R $USER ~/.local/share/jupyter/
cd ..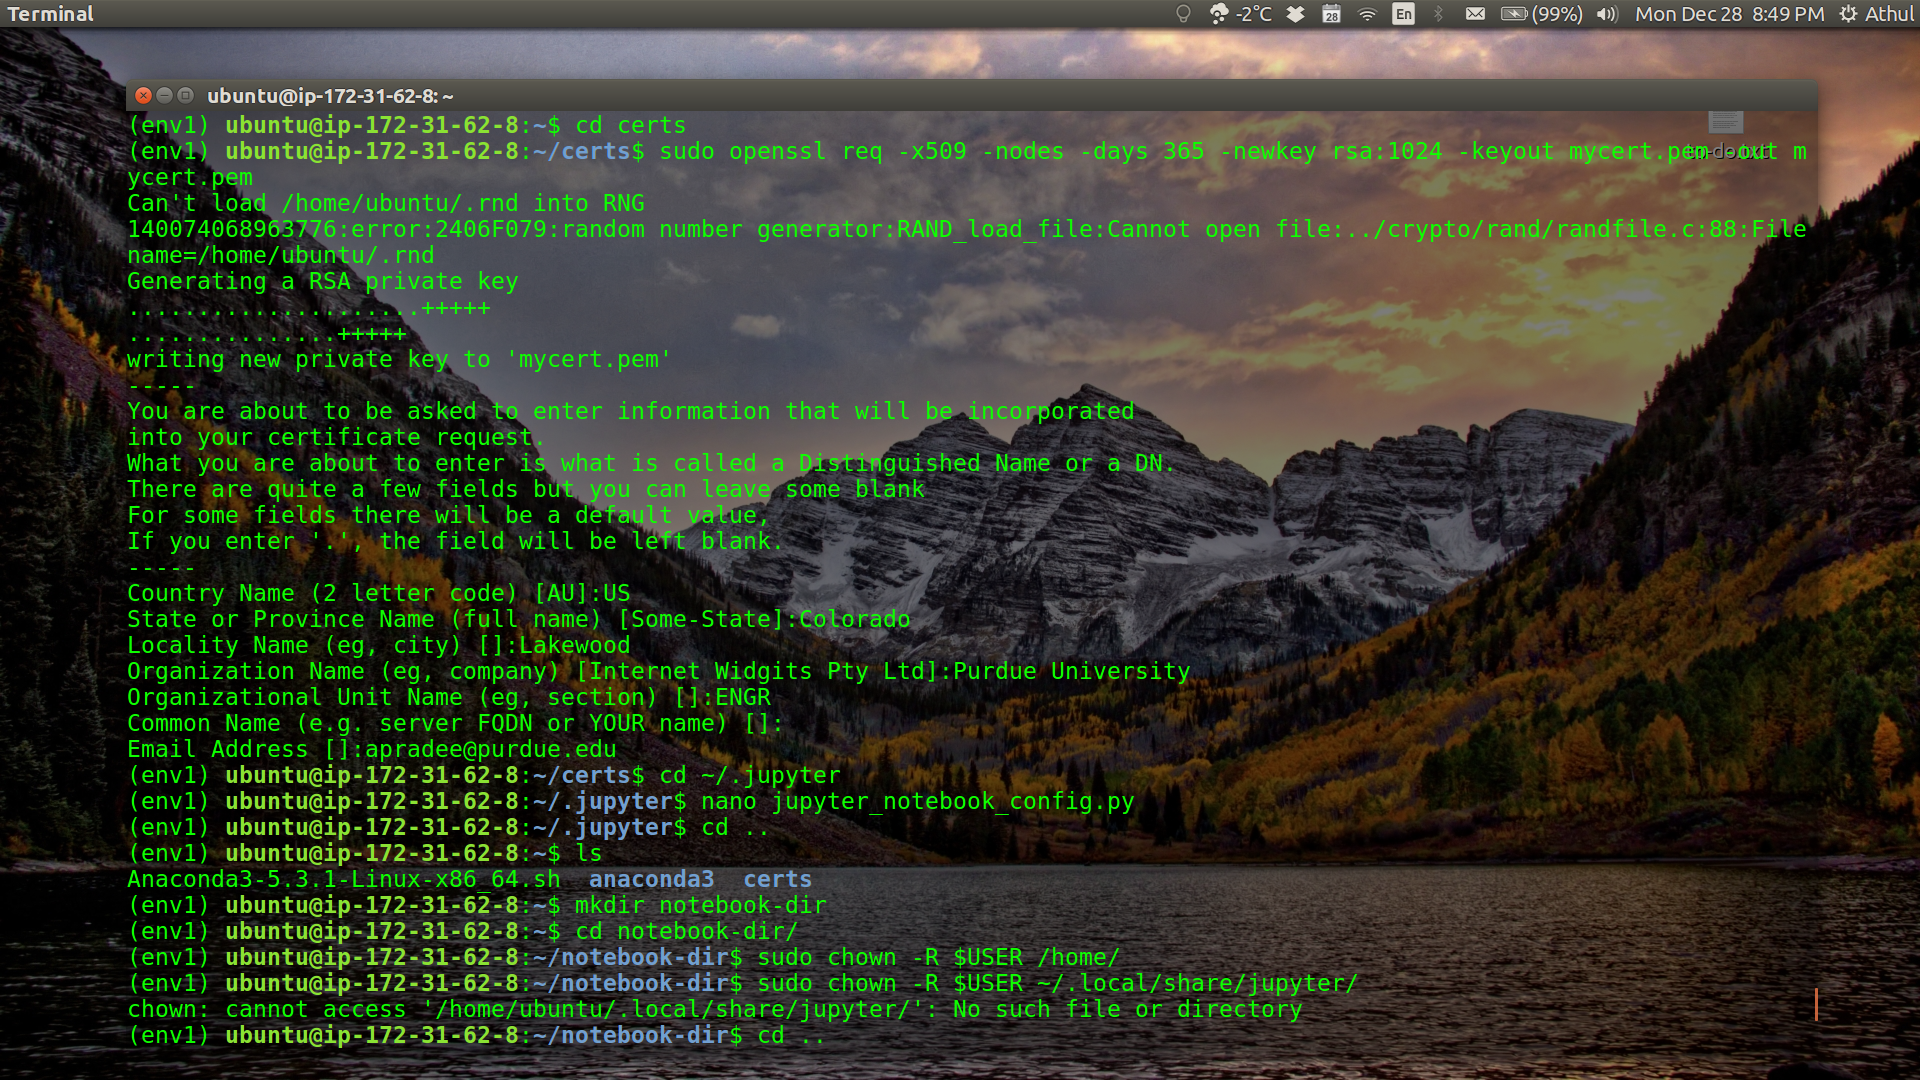
Note: I actually got an error for the second line, but some people needed that line to get it working. So I suggest you try it.
- We are now ready to launch our Jupyter notebook. Make sure to change the IPv4 address to that of your instance.
jupyter notebook --ip=ec2-54-172-185-5.compute-1.amazonaws.com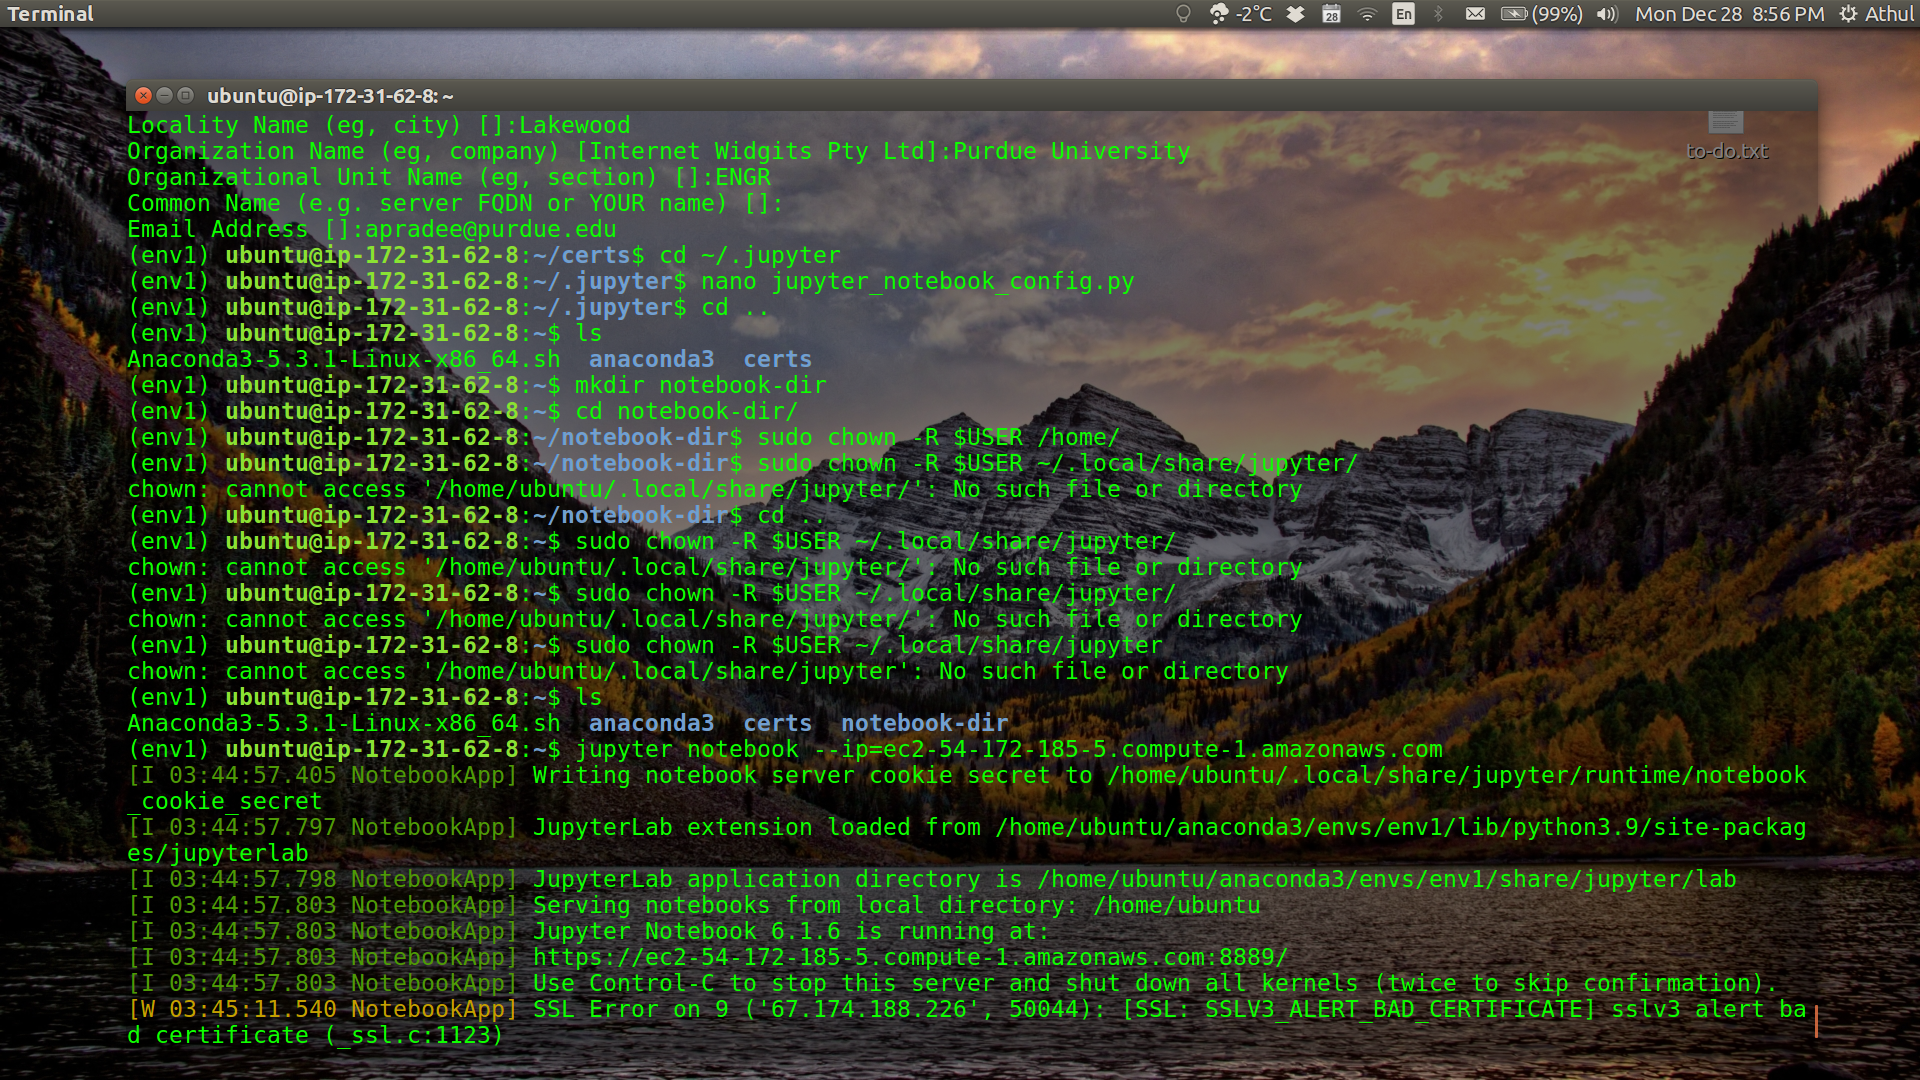
The terminal will print out the location of the Jupyter notebook. In my case, the notebook is running at
https://ec2-54-172-185-5.compute-1.amazonaws.com:8889/. Copy this (your web address) and paste into your browser. -
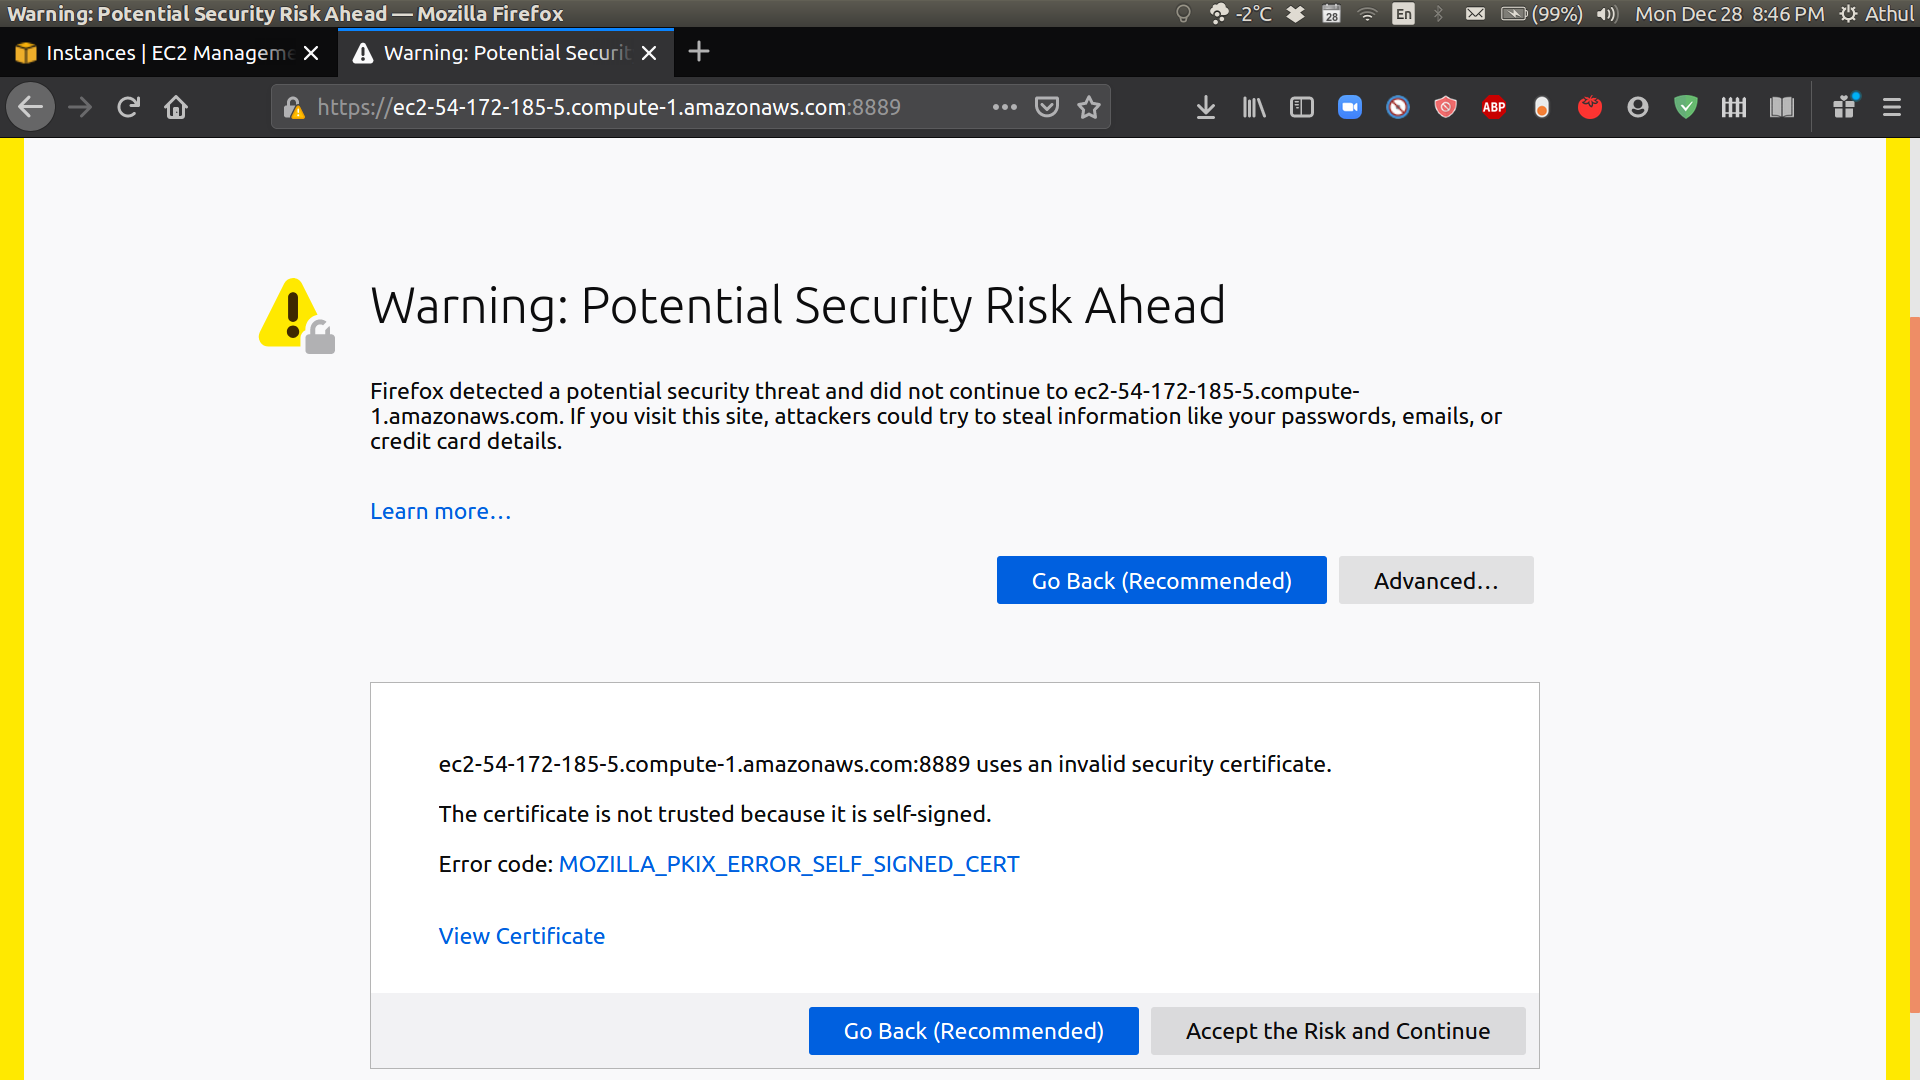
If everything worked correctly, you will get a warning that the connection is not secure. Since you know you have set it up, it is safe to proceed. Click Advanced, and Accept the Risk and Continue to proceed.
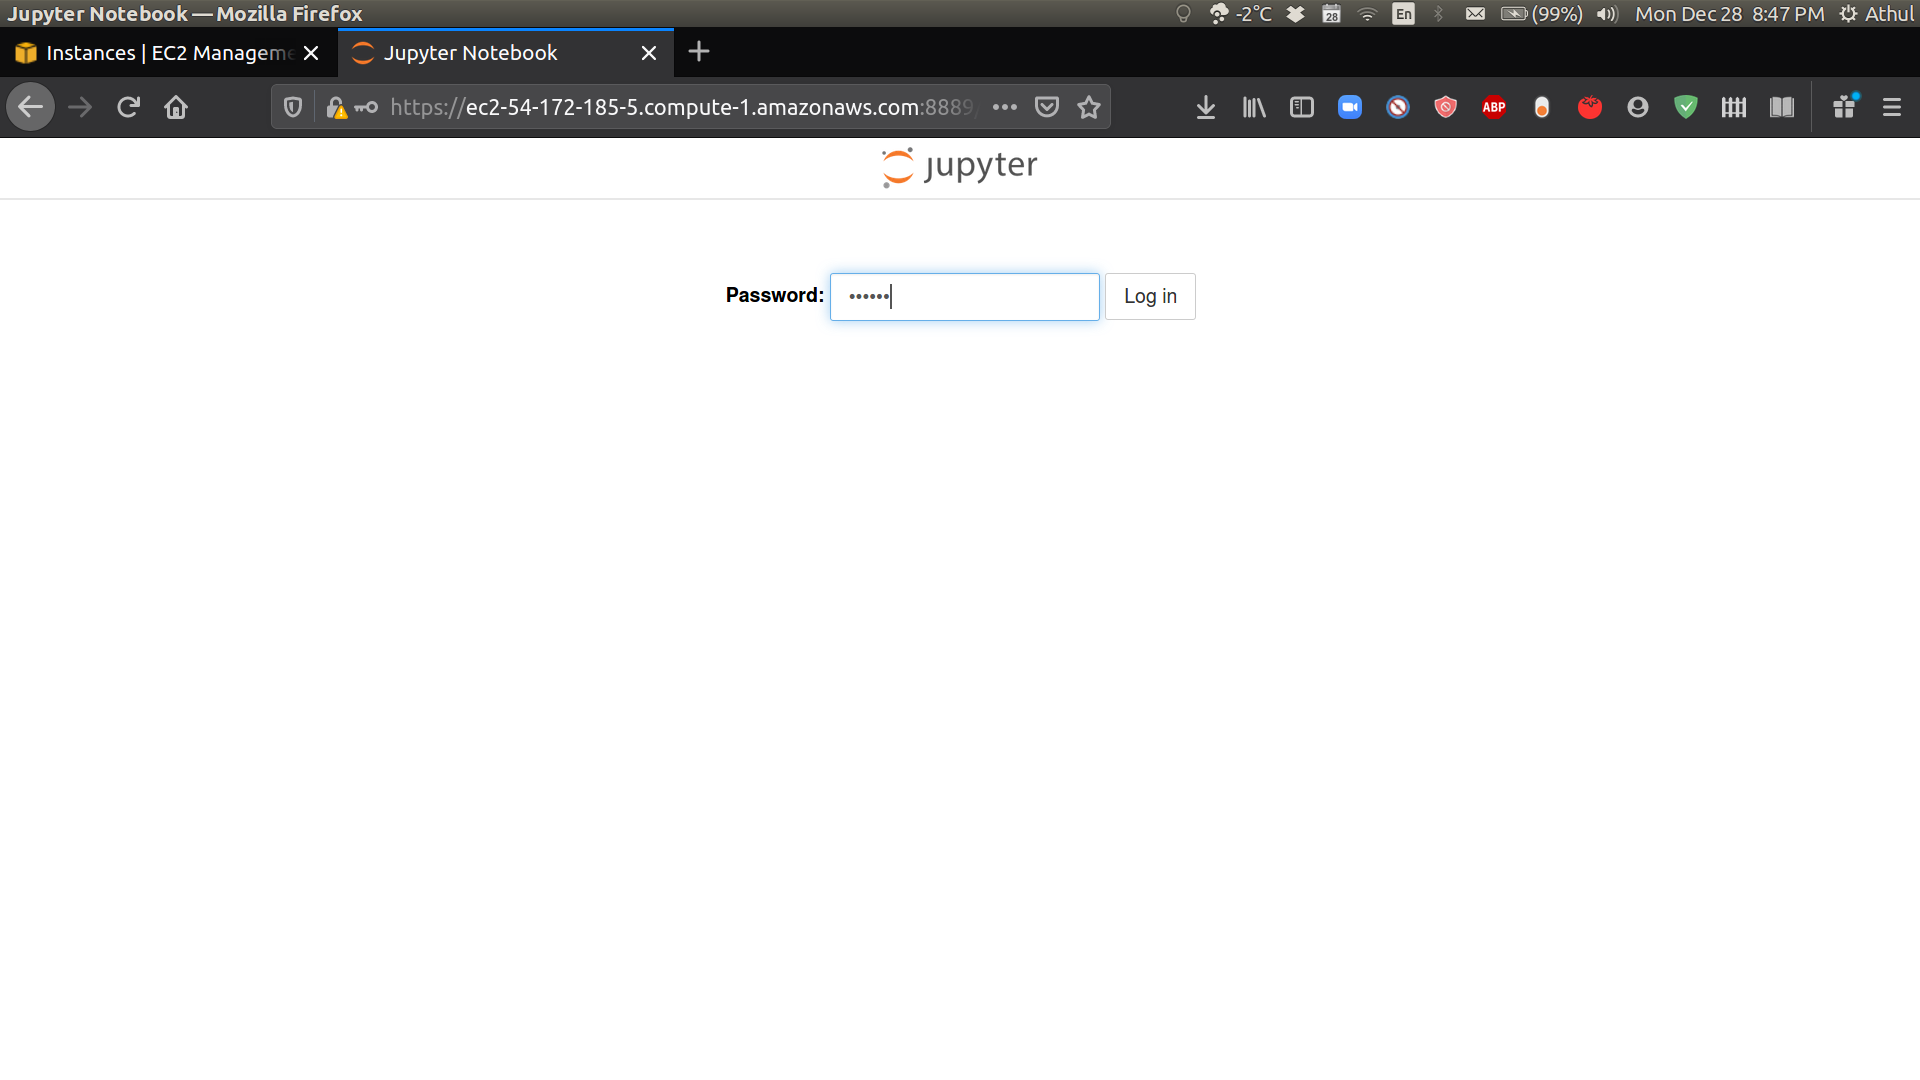
- Enter the password you chose earlier for your Jupyter Notebook.
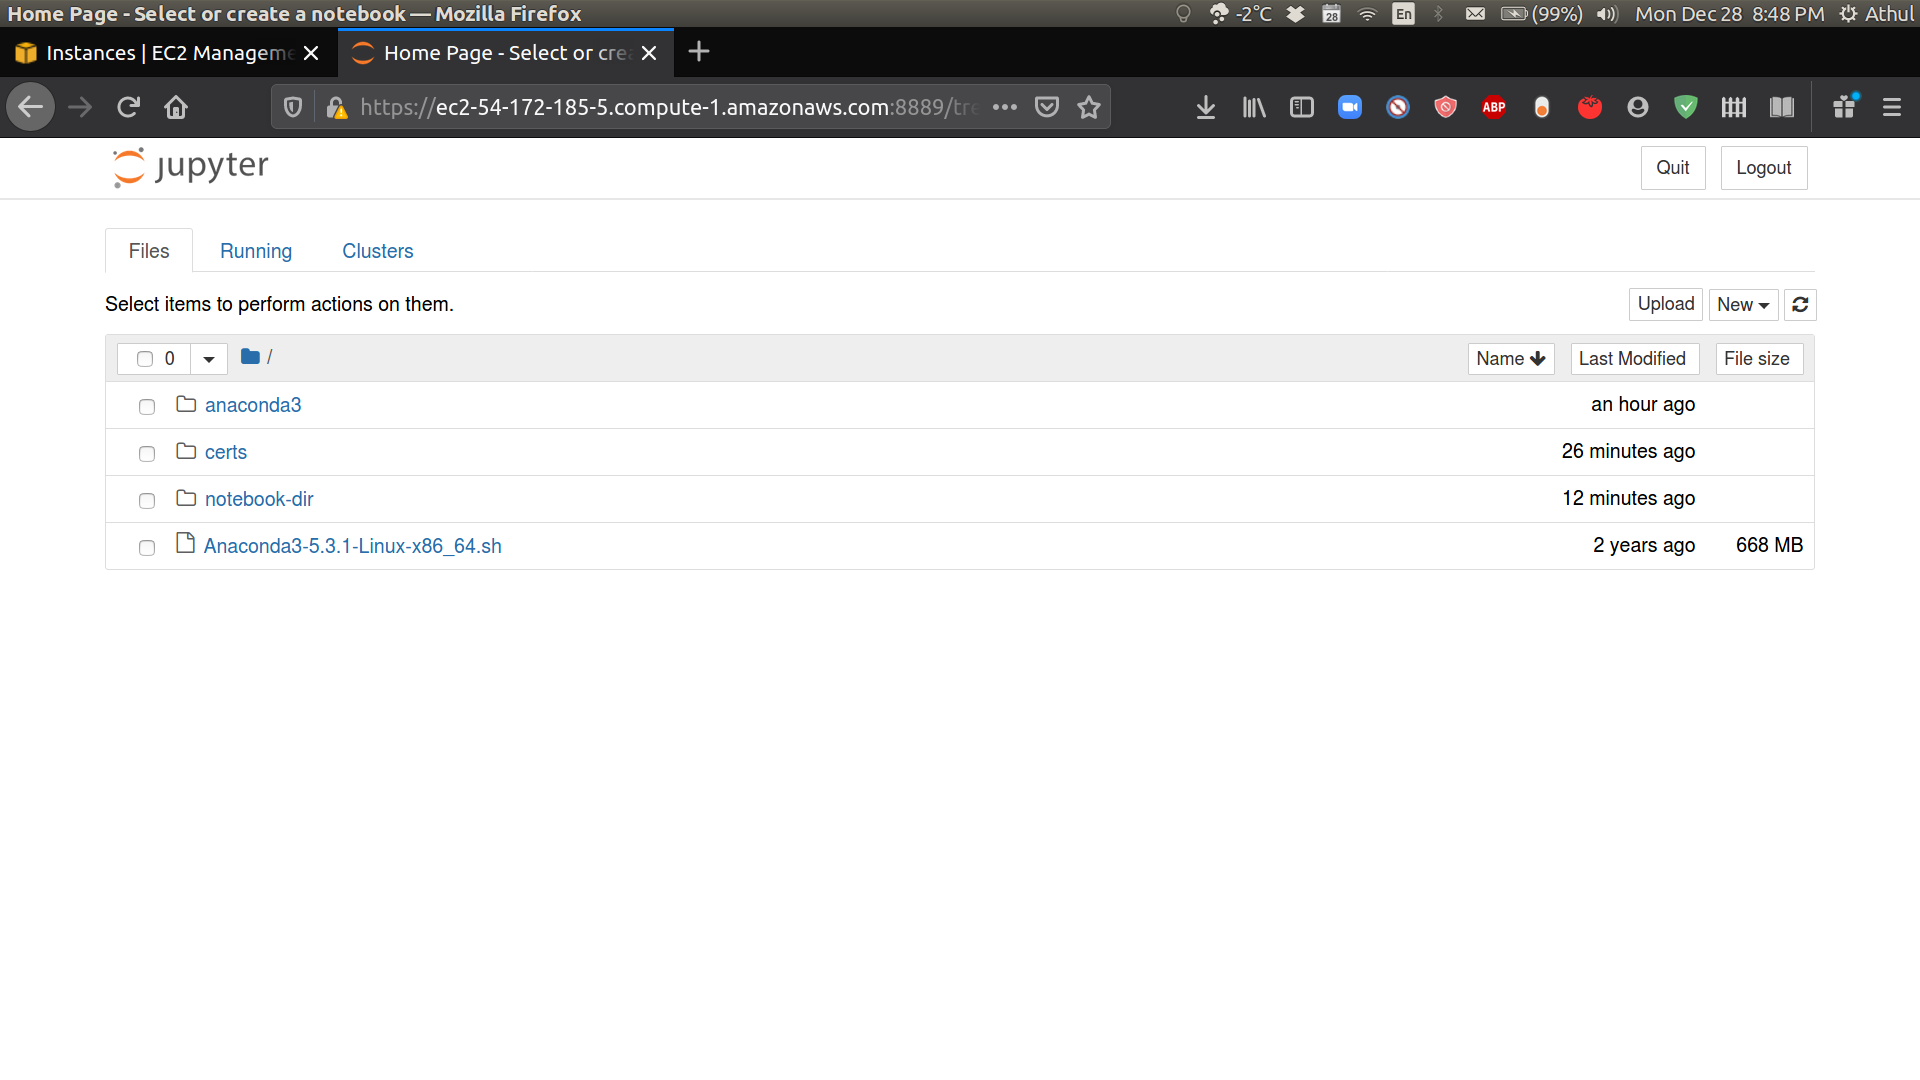
- Finally, we have arrived at our Jupyter notebook on the cloud.
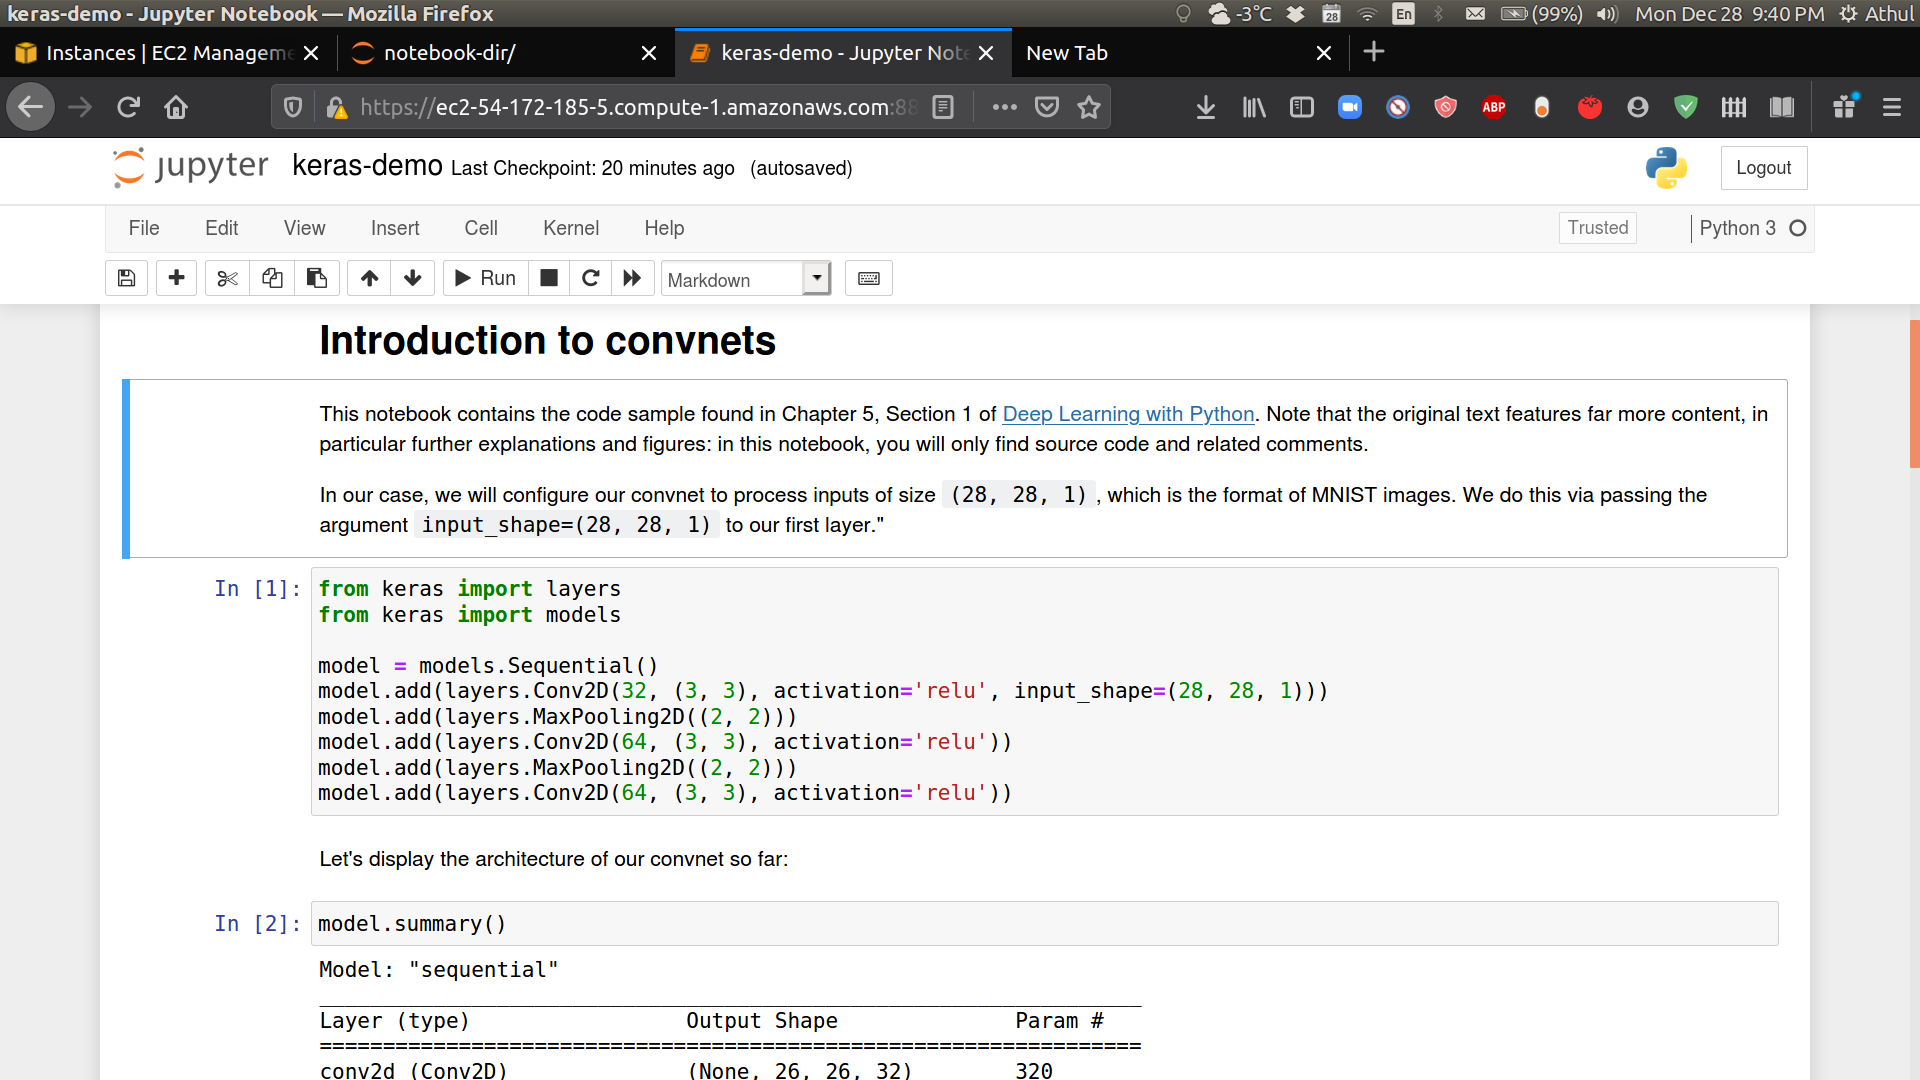
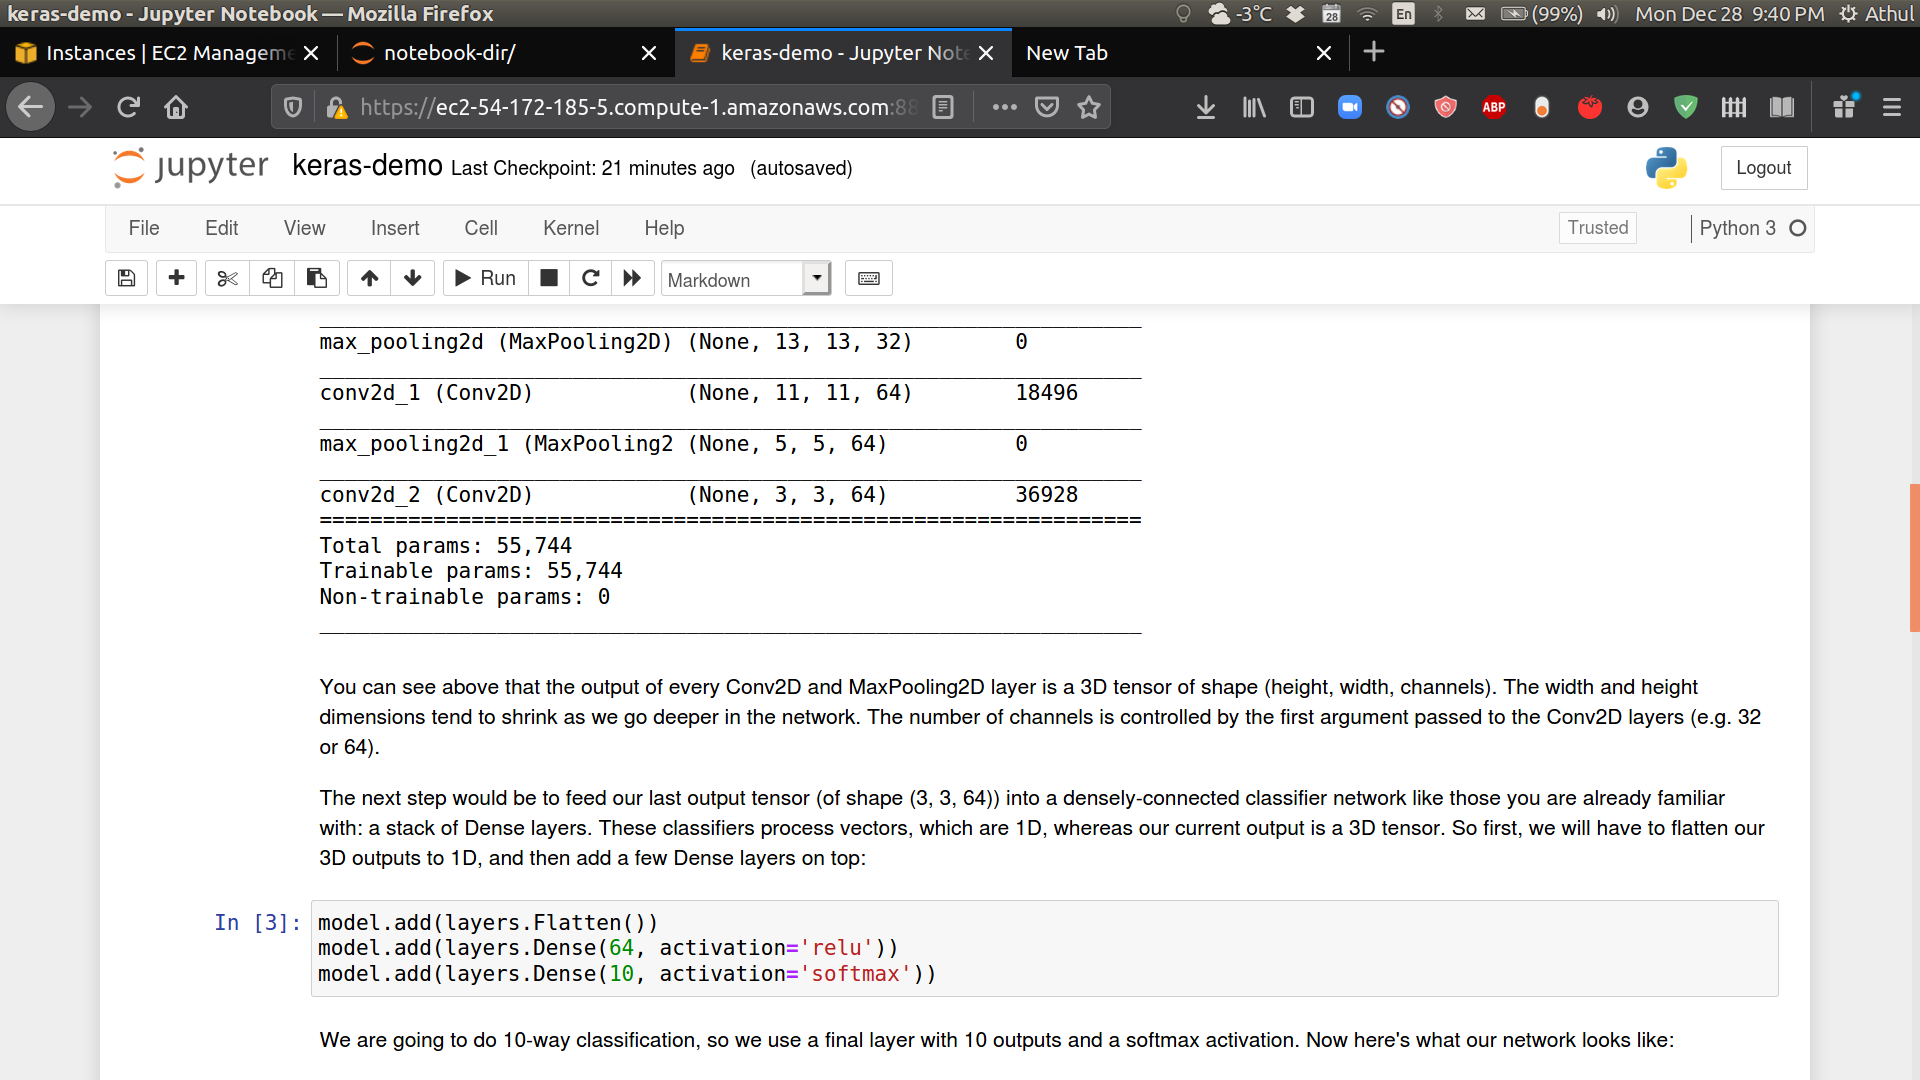
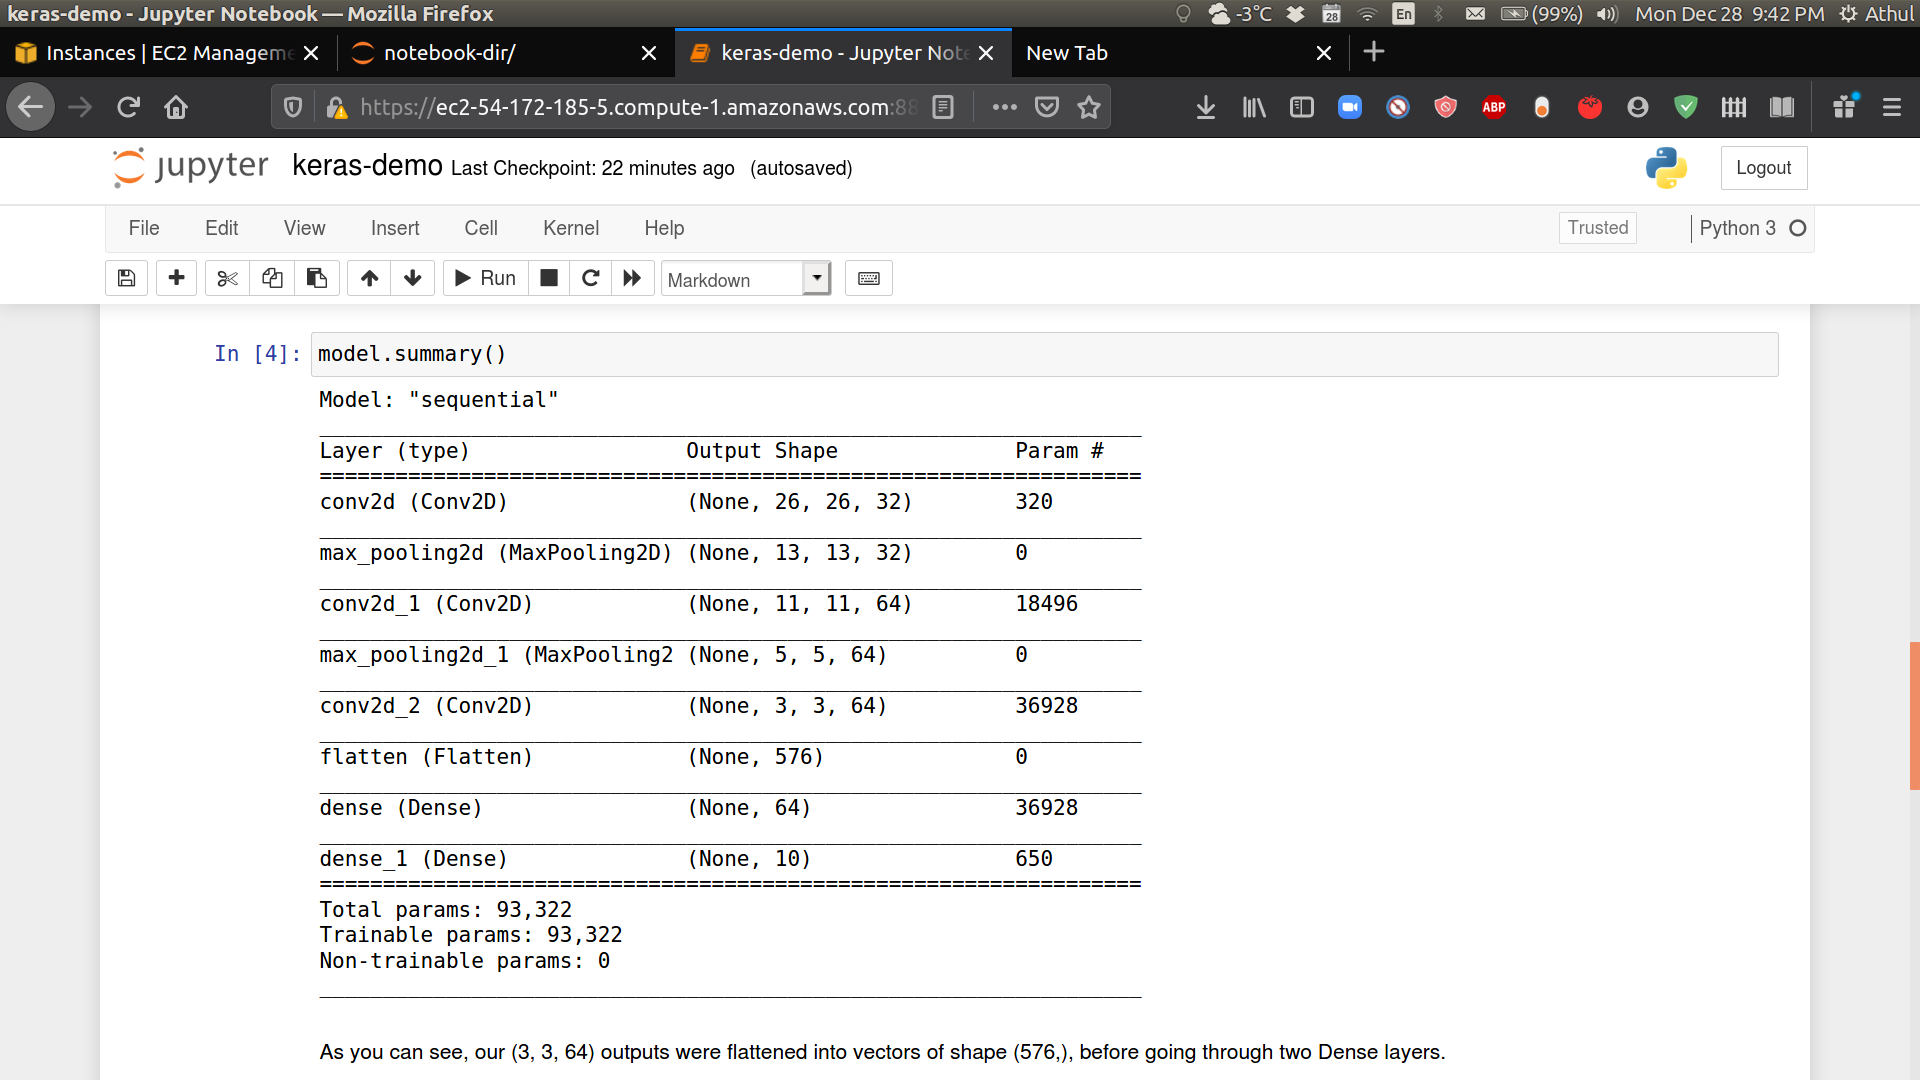
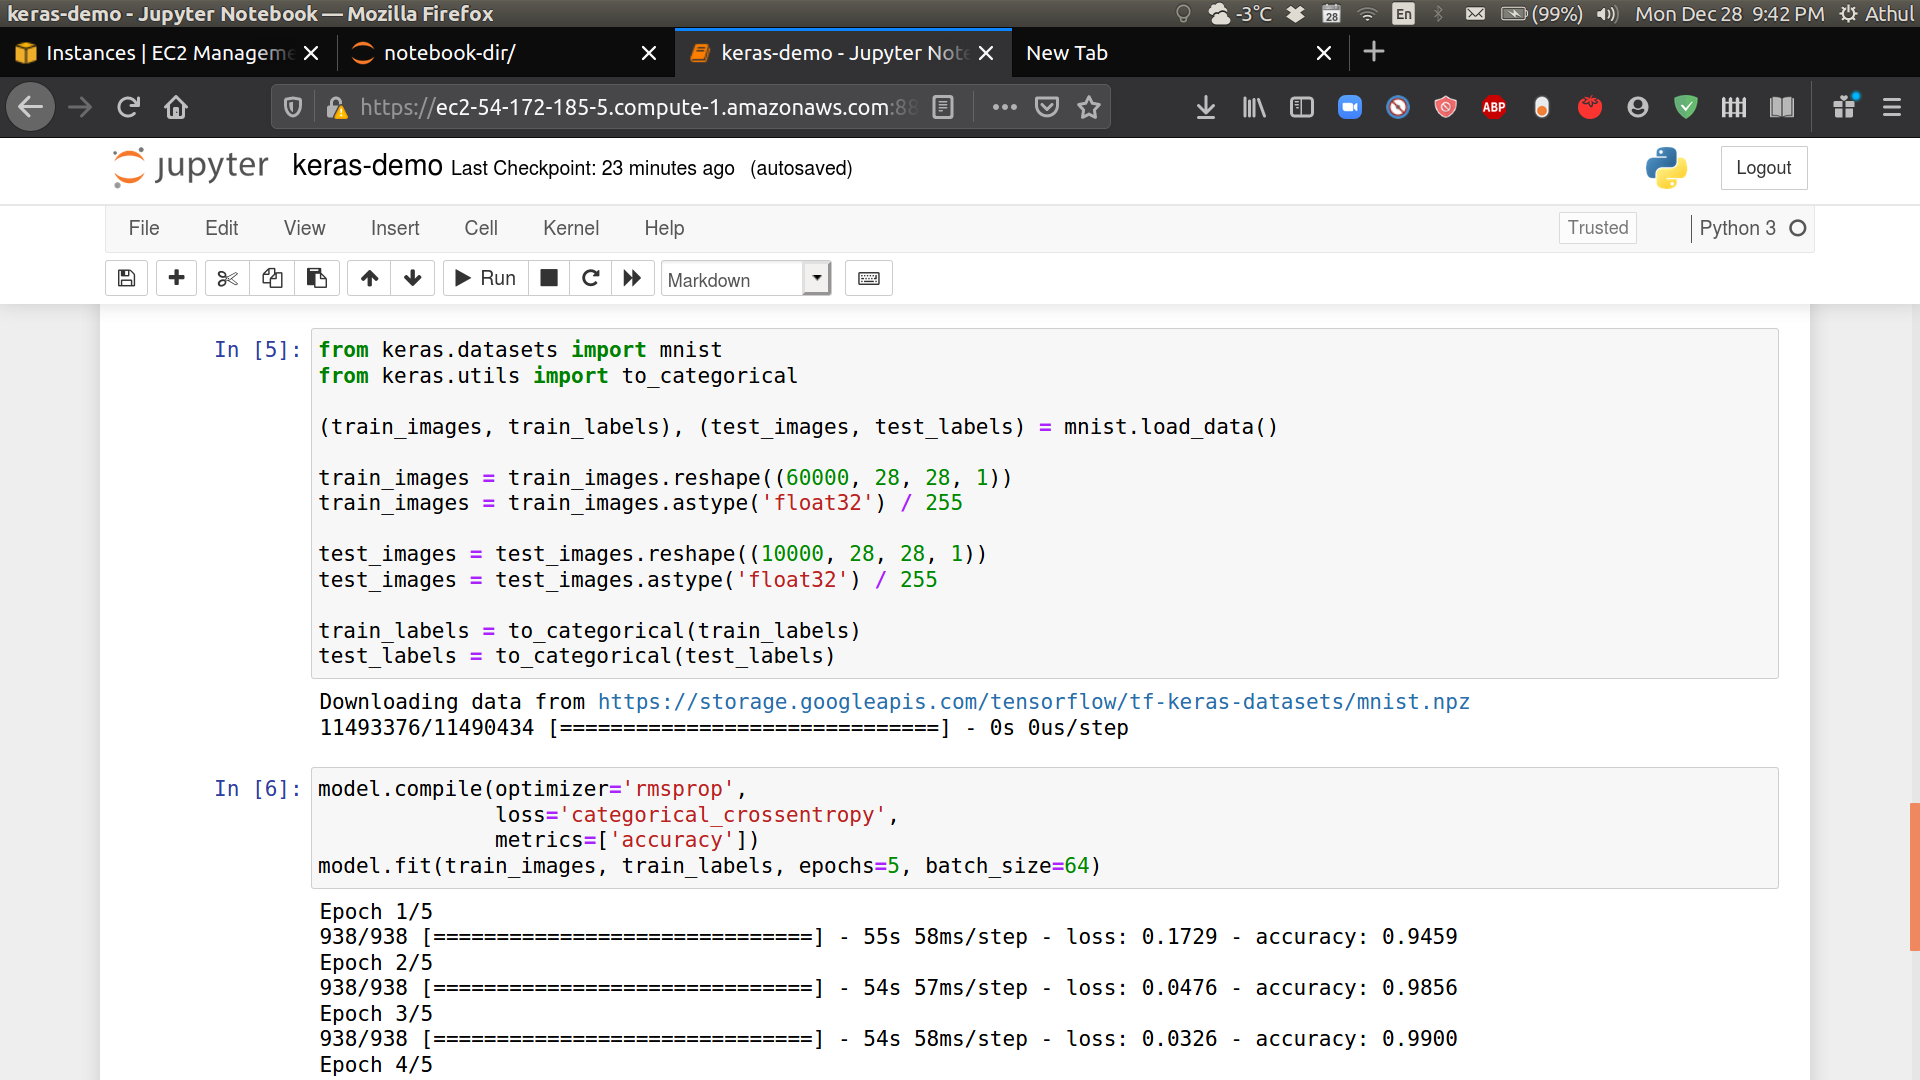
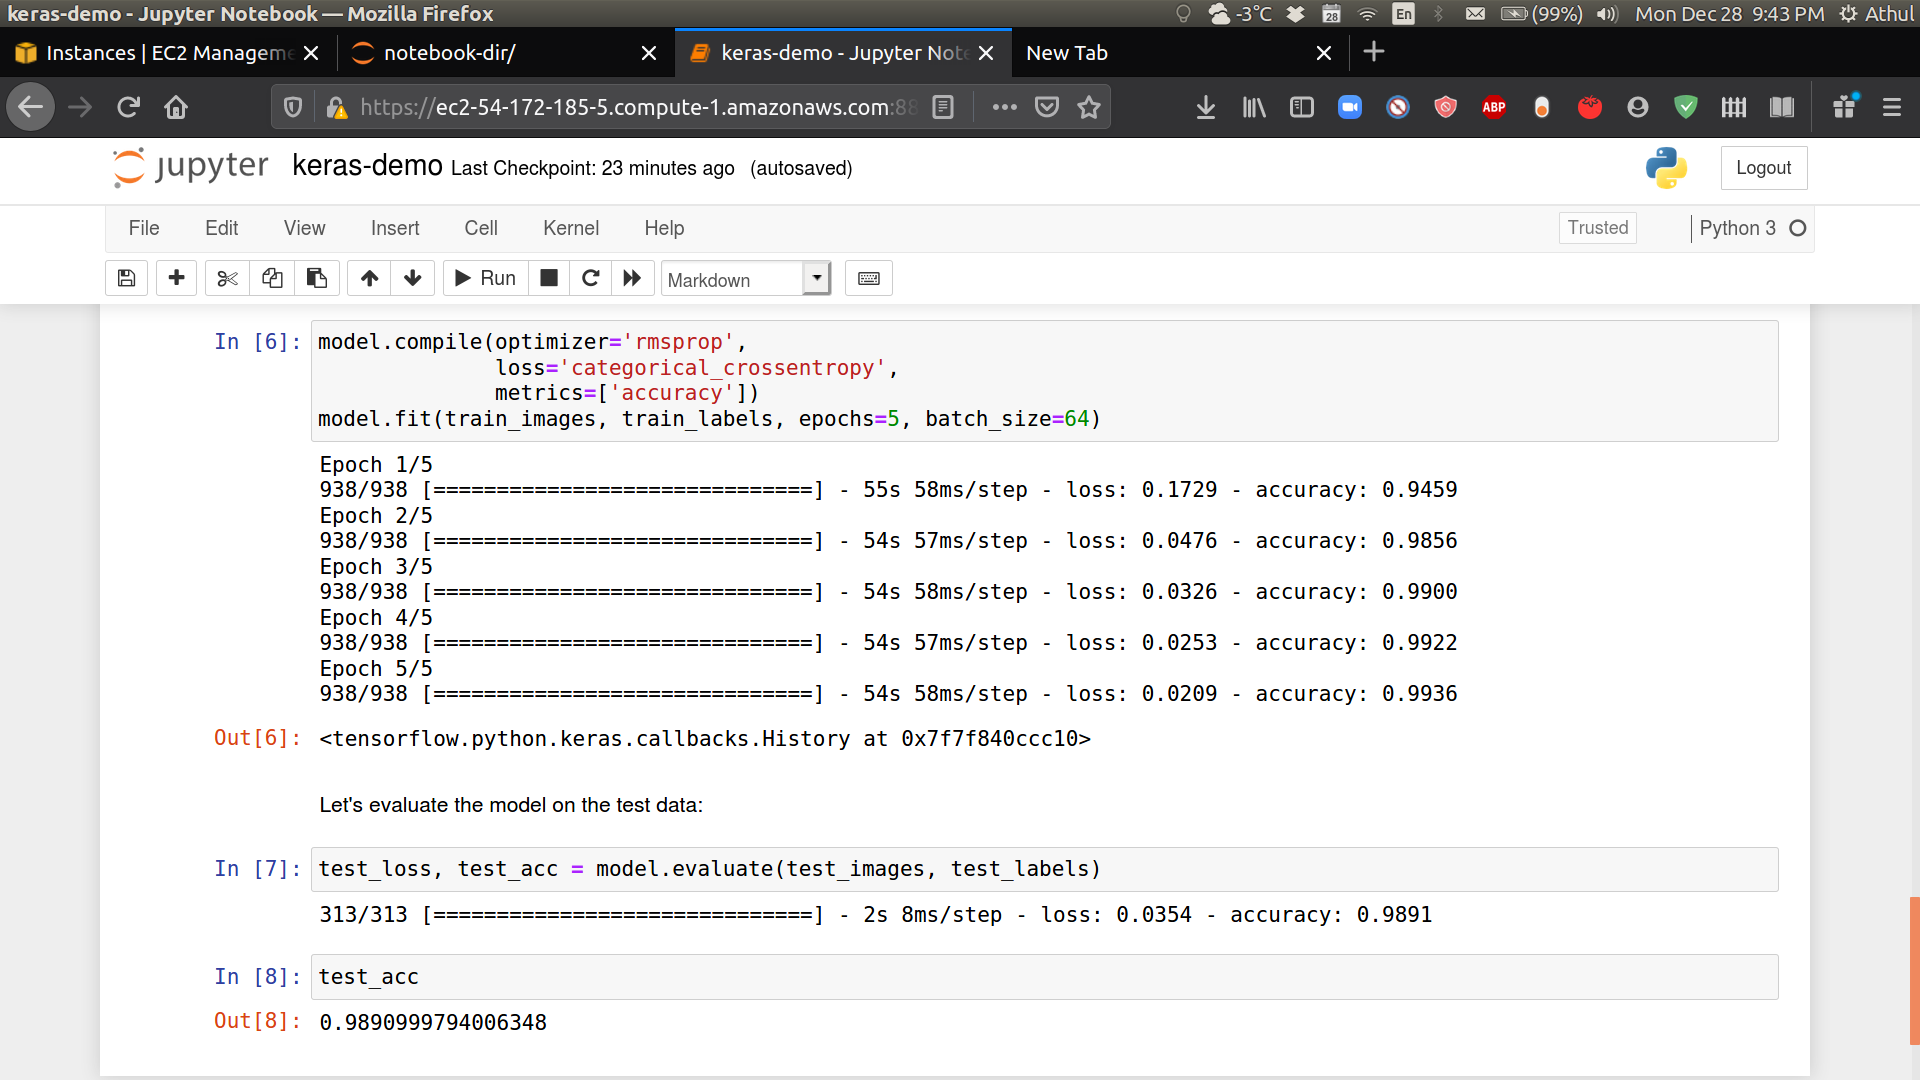
- To demonstrate the flexibility offered by having an SSH connection and a Jupyter notebook on the cloud, we will run a deep learning example problem using Keras. Close the notebook browser window and use
Ctrl+Ctwice in the terminal to shutdown the notebook server. Install keras on the remote computer and restart the notebook server. Open the address as in step 32 to open the Jupyter Notebook.conda install keras jupyter notebook --ip=ec2-54-172-185-5.compute-1.amazonaws.com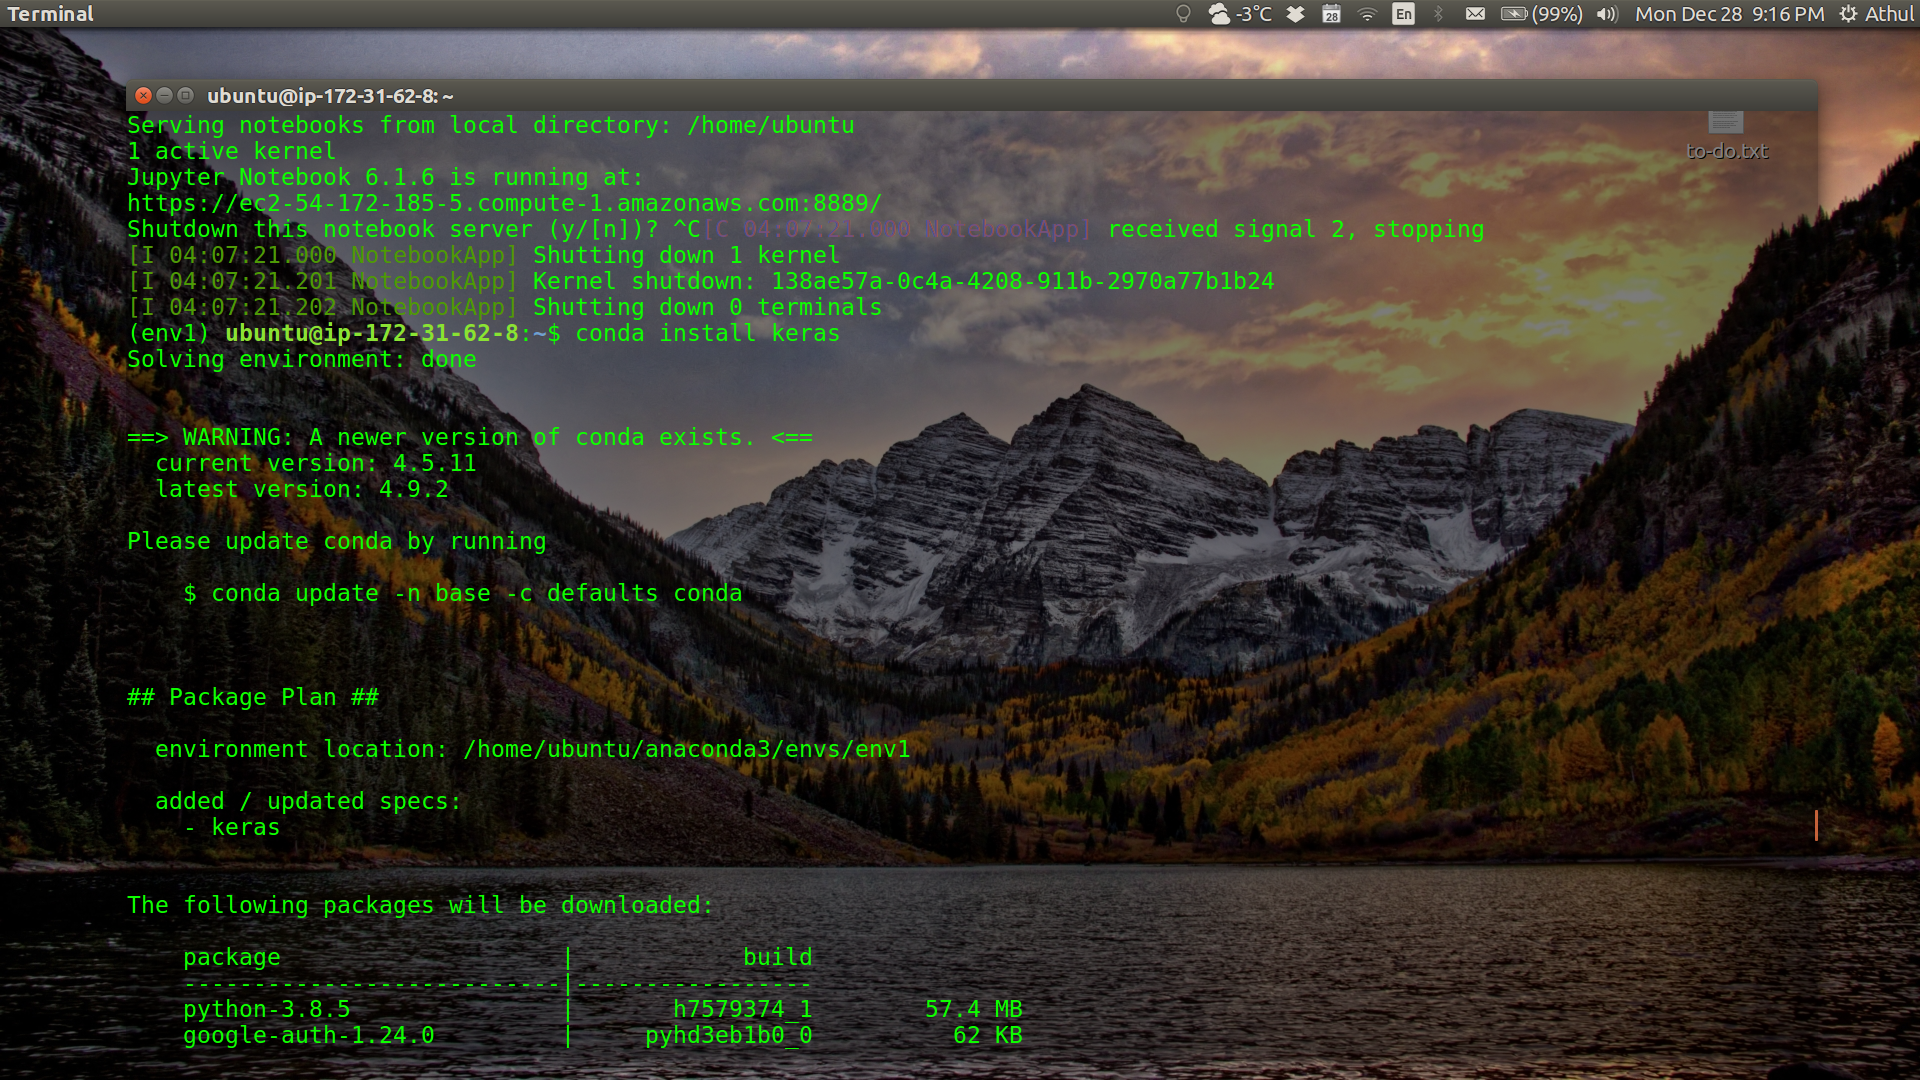
-
Create a new Python 3 notebook in the notebook-dir folder called keras-demo. This demo will use convolutional neural networks to classify MNIST digits and the code can be accessed on GitHub. Alternatively, you can download the .ipynb notebook file here and upload it to your Jupyter Notebook in the browser.
-
There you go! You have succesfully deployed a Jupyter notebook on the AWS EC2. Before you forget, make sure to close the notebook window, shut down the notebook server (
Ctrl+C) and stop the EC2 instance before leaving. If you leave the instance running and it exceeds the 750 hour free-tier, you will incur charges. To stop the instance, go to the EC2 dashboard, select the instance and Instance State -> Stop instance.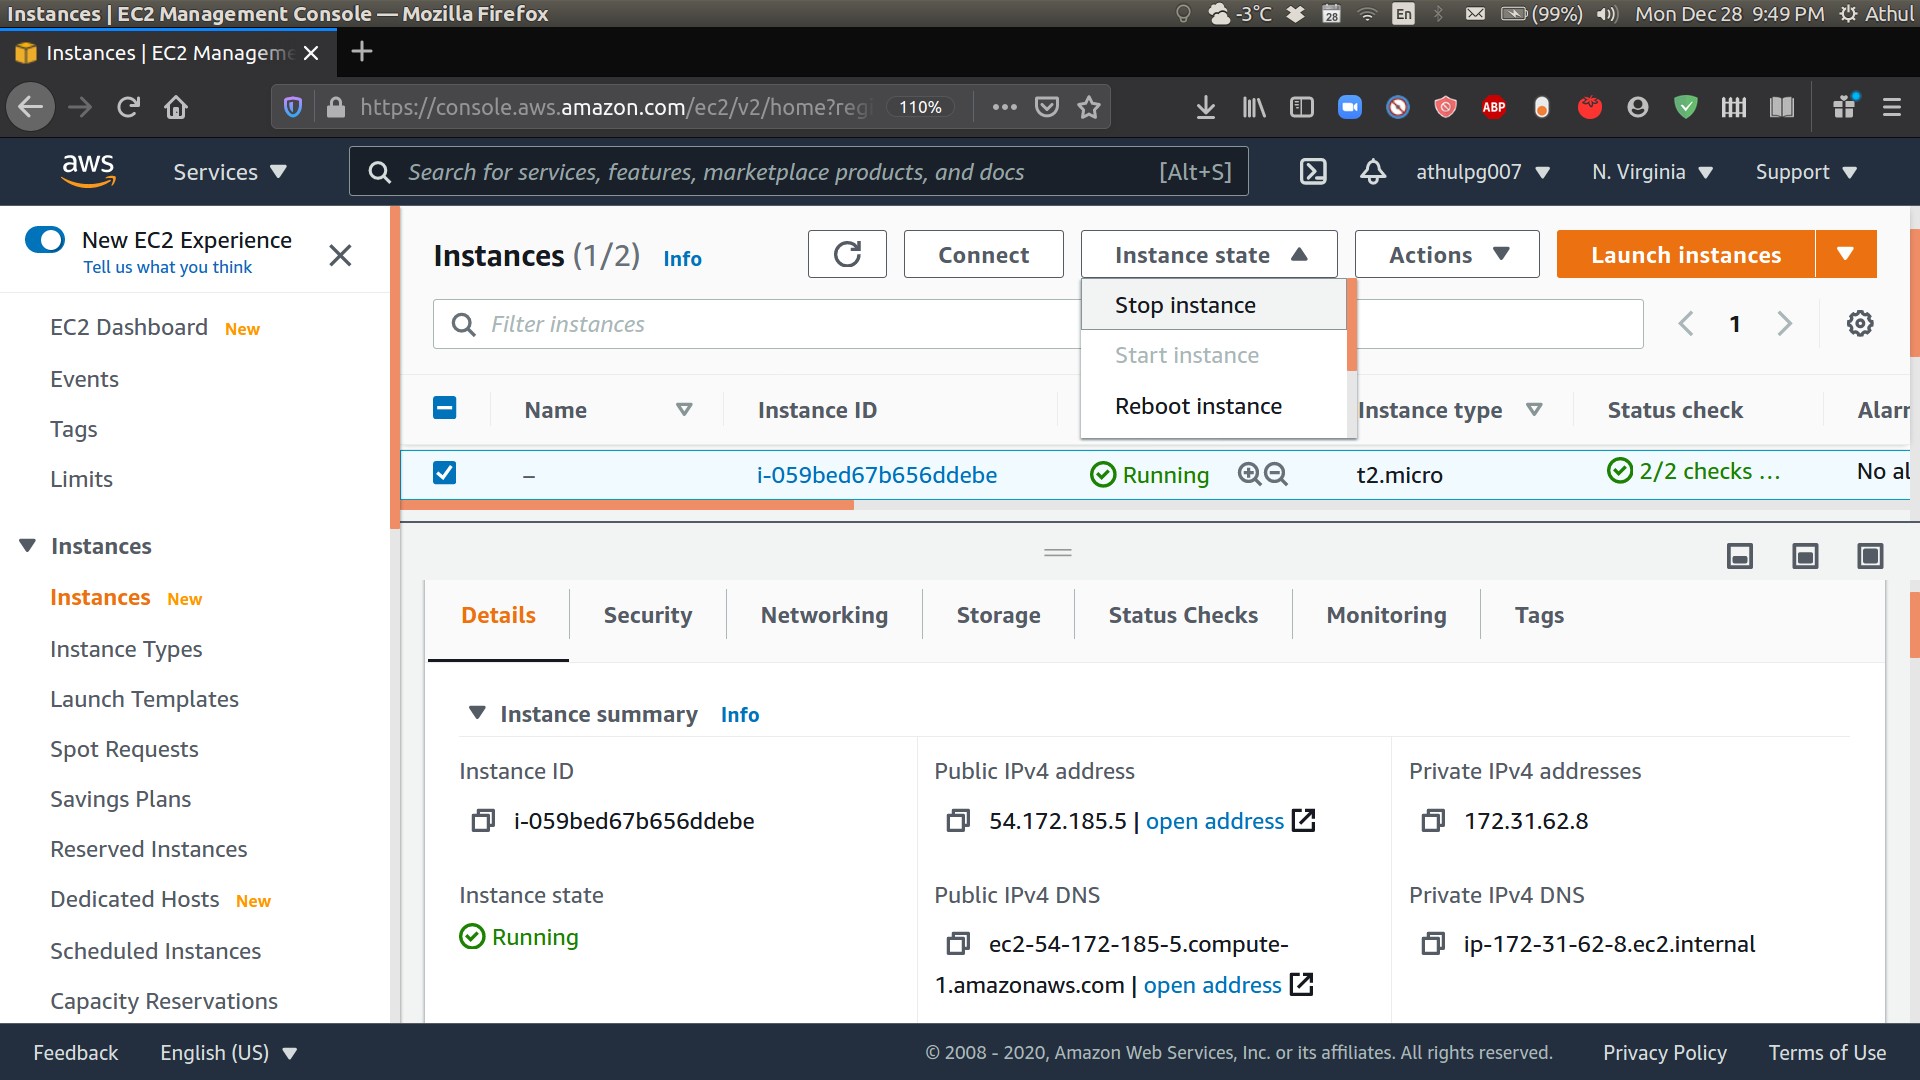
Obviously, you might be thinking I could have probably run this problem faster on my laptop than on t2.micro instance. That is true. But remenber we used the t2.micro because it was free and the demo problem is not a demanding one. For problems which require much more computing power, you can simply select a more powerful instance type possibly with GPU support (such as the p2.xlarge) which will allow you to run your codes much faster than any local workstation. Of course, the more capable the instance the more expensive it becomes; but I assume someone will be willing to pay for it if they need to use such large computing resources.
In any case, the EC2 charges are a fraction of what it would cost you to buy a brand new high performance CPU + GPU, and for most purposes AWS EC2 offers a very competitive price.
If you have made it this far, please take a moment to celebrate your achievement with some inspirational music.
Credits
Obviously I did not figure all this out by myself! Here are some links which have been very helpful in putting this together. Some of them had issues getting everything to work correctly, hopefully this tutorial will not have those issues. If you found this article helpful, or if you faced any issues or have a better way of doing this, please connect with me on LinkedIN and let me know.
-
François Chollet’s GitHub and Deep Learning Textbook.
